A timecard in Wrapbook is your central tool for tracking work hours, wages, allowances, and expenses for each production workweek. It ensures you get paid accurately for your time and any additional compensation you're entitled to receive.
Timecards & Allowances dashboard
Your timecards are tracked on the Timecard & Allowances dashboard for each project that you’ve joined.
To access a project’s Timecards & Allowances dashboard:
In the left-side navigation, click All projects
On your All projects dashboard, click the View Project button next to the project that you want to see the Timecards & Allowances dashboard for
In the left-side navigation, click Timecard
On a project’s Timecards & Allowances dashboard is:
Your Deal summary - click the toggle to see your worker classification, union affiliation, and wages for the project
A workweek dropdown menu - click the workweek dropdown to set the dates for the timecard workweek
The submission status of the timecard for the selected workweek
The option to View/add notes to the timecard
The Week Breakdown where you can click on each day you worked to enter the time you worked
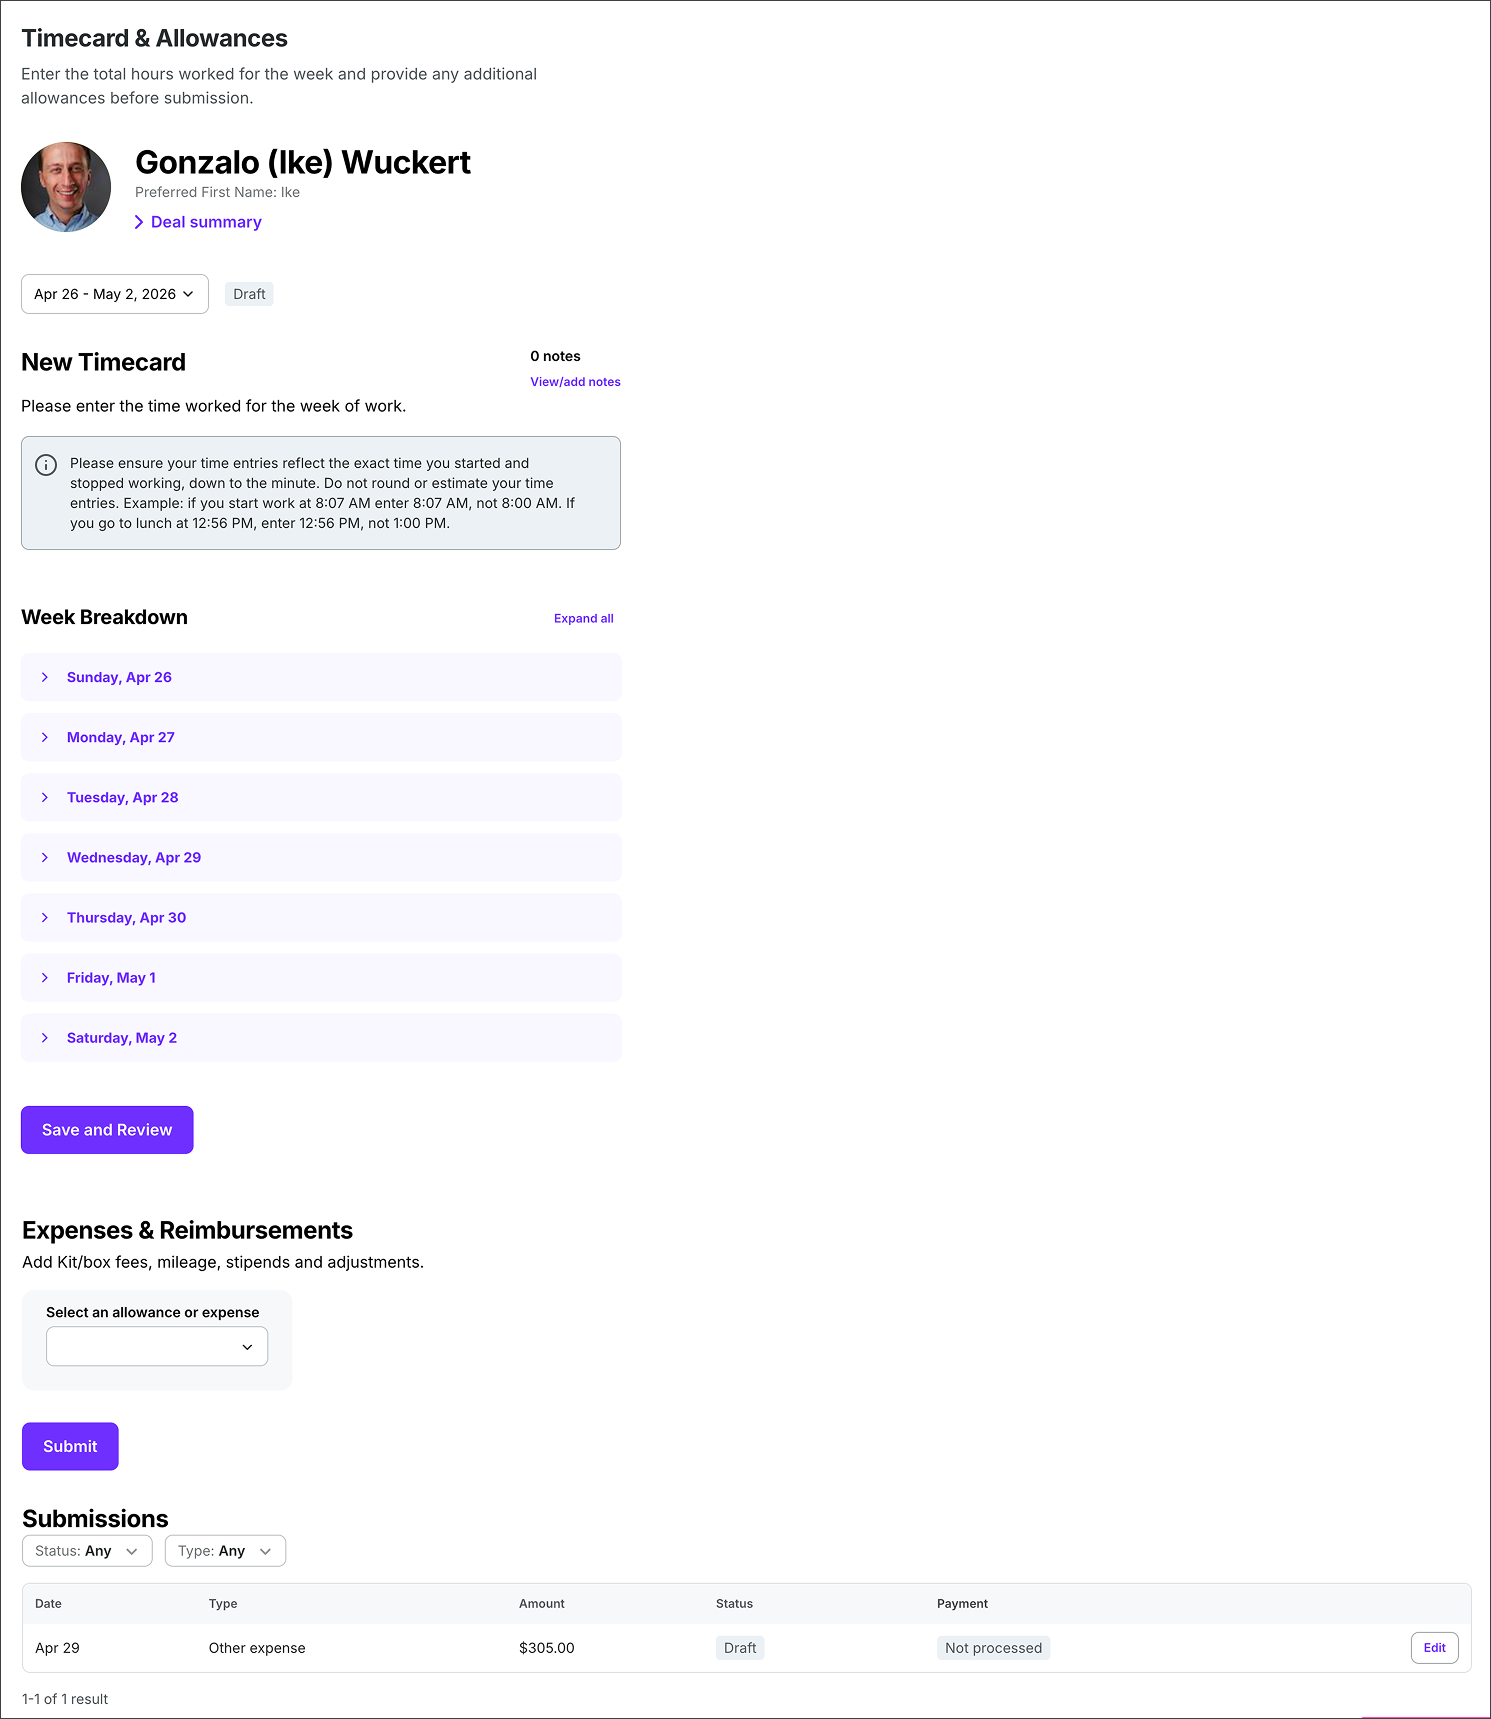
Example of a worker’s timecard in Wrapbook
Dynamic workweeks
By default, Wrapbook establishes a worker's workweek as starting on their first day of employment on the project. This is called a dynamic workweek because not all project workers will necessarily have the same workweek configuration.
For example:
A worker starting a project on a Monday would have a Monday-Sunday workweek in Wrapbook
A worker starting a project on a Wednesday would have a Wednesday - Tuesday workweek in Wrapbook
Timecard tips
Use these tips to make sure your timecards are accurate and paid on time:
Submit your timecard promptly at the end of each week
Include clear notes for any special circumstances
Attach any required documentation or receipts for expenses
Double-check all entries before submitting
Timecards help articles
This section contains the following help articles:
Timecards FAQ
To help you understand timecards in Wrapbook, we’ve put together this list of frequently-asked questions.
Click the arrow next to a question to see the answer.
How do I fill out my timecard?
To fill out your timecard, follow these steps:
In the left-side navigation, click All projects
On your All projects dashboard, click the View Project button next to the project that you want to submit a timecard for
In the left-side navigation, click Timecard. By default, the timecard for the most recent workweek will be displayed on the page.
Click on the specific days you worked
Enter your Start Time and End Time for each day
Enter your Meal Start and Meal End times (meals must occur during your work hours)
If you worked at multiple rates, click the Rate dropdown menu to select the appropriate rate for each type of work performed during the workweek
To add notes to a timecard, under Modifications click Add Notes to provide additional details about your timecard that will be visible to the timecard reviewer. Notes are useful for explaining any special circumstances, providing context for multiple meal breaks or different work rates, and adding clarity to any entries that might need explanation for the reviewer.
To see screenshots along with these step-by-step instructions go to How to fill out your timecard.
Can I update my timecard after it’s been submitted?
You can update your timecard after it has been submitted, but only if it hasn't been approved yet.
If the timecard is in Draft status or has been Submitted but not Approved, you can make updates, which will restart the approval process.
To learn more, see How to update a submitted timecard.
How do I see if my timecard has been approved?
To see if your timecard has been approved, you can check the Submissions section of your Timecards & Allowances dashboard.
Here’s how:
In the left-side navigation, click All projects
On your All projects dashboard, click the View Project button next to the project that you want to review your submissions for
In the left-side navigation, click Timecard
On the Timecards & Allowances dashboard, scroll down to the Submissions list
All of the timecards, allowances, and expenses that you’ve created will be listed in Submissions, along with their status
The status of your submission will indicate whether it has been Approved or is still in Review
To learn more, see How to see your timecard submissions and status.
Why can’t I enter the dates in my timecard?
There are a few key reasons why you might not be able to enter certain dates on your timecard:
Project Start and End dates
Your timecard dates must fall within your project's official start and end dates
If you need to enter time for dates outside of these ranges, please contact your project administrator to verify your official start/end dates
Pay week structure
Your project may have specific work week definitions that determine which dates are available for time entry. These workweeks are configured by your project administrator and may not always align with calendar weeks (Sunday-Saturday).
Timecard submission status
Once a timecard has been submitted and approved, those dates will be locked for editing
If you need to make changes to an approved timecard, contact your production administrator
Still Having Issues?
If you're unable to enter dates that you believe should be available, please:
Verify your project start and end dates with your production administrator
Ensure you're selecting the correct workweek from the dropdown menu
To adjust timecard dates or request unlocking, click the point of contact link at the bottom of your timecard to send an email to your production administrator

Look for the Need help? alert at the bottom of your timecard. Click point of contact to send an email to your production administrator.
Who is my point of contact?
In Wrapbook, your point of contact is the designated production administrator that you should reach out to with questions about a specific project.
During onboarding:
The production’s point of contact will appear under the Project details
Once you’ve successfully onboarded, you can find your point of contact for a project:
On the project’s dashboard
At the top of project timecards
How do I create my timecard?
In Wrapbook, your timecards are automatically generated for each workweek that falls between your project start and end dates, so as a production worker, you don’t need to create a timecard. Simply go to your Wrapbook account to access your timecard, fill it out, and then submit it to your production administrator. To learn how, see About timecards.
As a worker, what do I need to know about how my overtime is calculated in Wrapbook?
In Wrapbook, workers who are non-exempt from overtime will have their wages for overtime work automatically calculated on their timecards based on their workweek and US Department of Labor FLSA requirements.
By default, Wrapbook establishes a worker's workweek as starting on their first day of employment on the project. To learn more, see Dynamic workweeks.
Under the FLSA, a workweek is a fixed and recurring period of 168 hours — 7 consecutive 24-hour periods
All hours worked during that fixed period are tallied to determine if the employee has exceeded 40 hours — and thus is owed overtime
FLSA requires that non-exempt workers be paid 1.5x their regular rate for any hours worked over 40 in a single workweek, regardless of the day the work occurs
As an hourly worker, how do I fill out my timecard when I worked overnight into the next day?
When entering work time that spans across midnight into the next day, you’ll need to enter the actual end time for when you finished working on both days worked during the shift.
For example, if you worked from 10:00 AM on Monday, through the night until 3:00 AM on Tuesday you’d enter your time as follows:
For the first day (Monday), enter the START time as 10:00 AM and then enter the END time as 11:59 PM
For the second day (Tuesday) enter the START time as 12:00 AM and then enter the END time as 3:00 AM
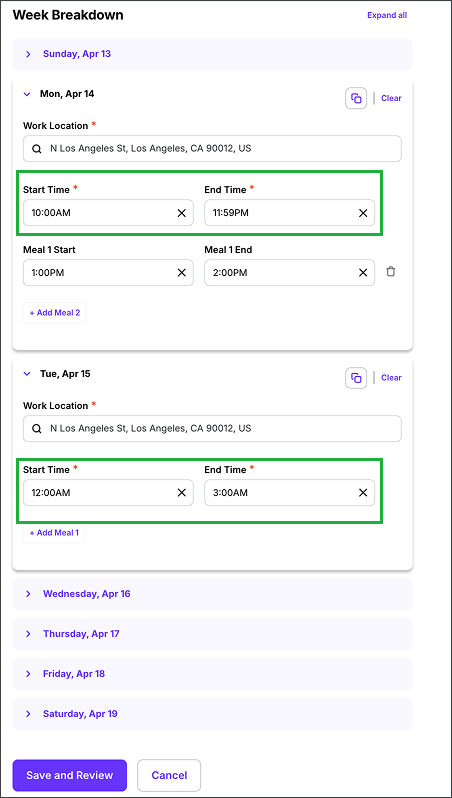
Example of a timecard filled out by a worker who started their shift on Monday, 10AM and ended at 3AM the following day
Can I print my timecard in Wrapbook?
At this time, Wrapbook doesn’t offer a print or “download PDF” option for your timecards. If you need a copy for your records, open your timecard on a computer and use your browser’s Print function (File → Print), then select Save as PDF.