Worker timecard creation is permission based
To create worker timecards, your account must have one of the following roles enabled:
Role: Company Admin, Company Manager, Project Coordinator
Custom role with: Timecards - Full access, Create and manage
This help article is for production administrators
To see how to fill out and submit timecards in Wrapbook as a production worker, click here.
How to create a worker timecard in Wrapbook
In Wrapbook, authorized production administrators can create timecards for workers using the following steps:
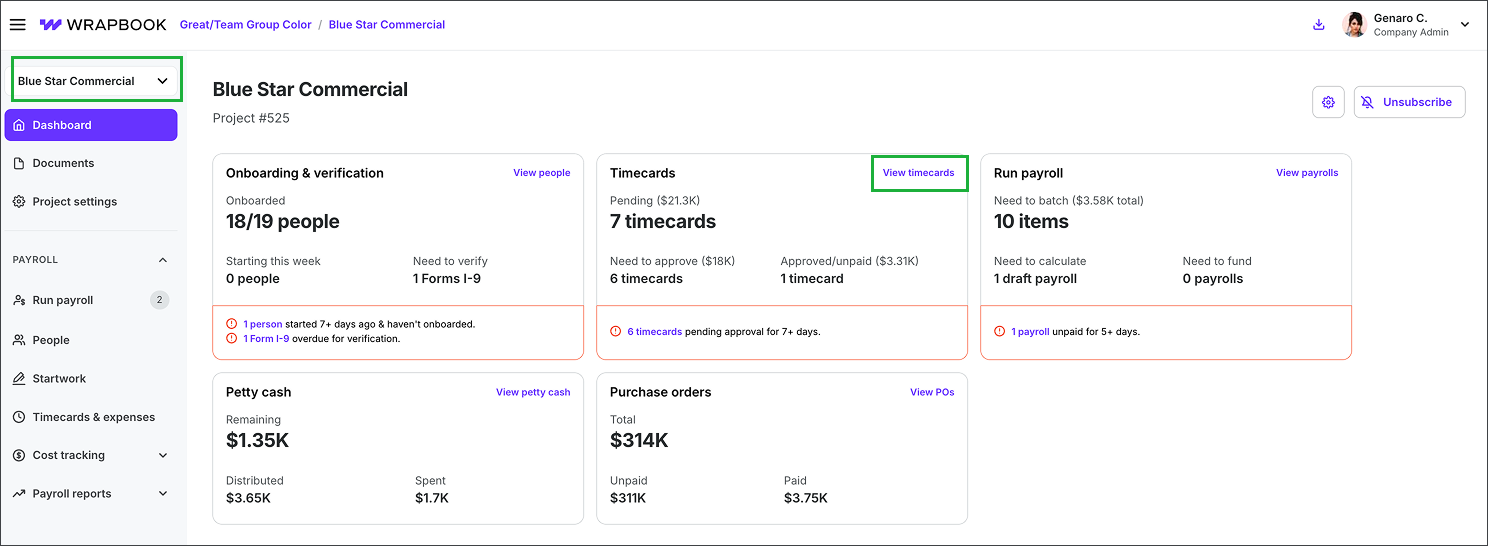
In the left-side navigation, click the dropdown menu and select the worker’s project
On the project dashboard, in the Timecards section, click View timecards
On the Timecards & expenses dashboard, click Add timecard
On the Worker timecard & expenses page, click the dropdown menu to select the work week
To select a worker, click the Create button next to their name in the Worker list. You can click the search icon, and Department filters to locate the worker in the list.
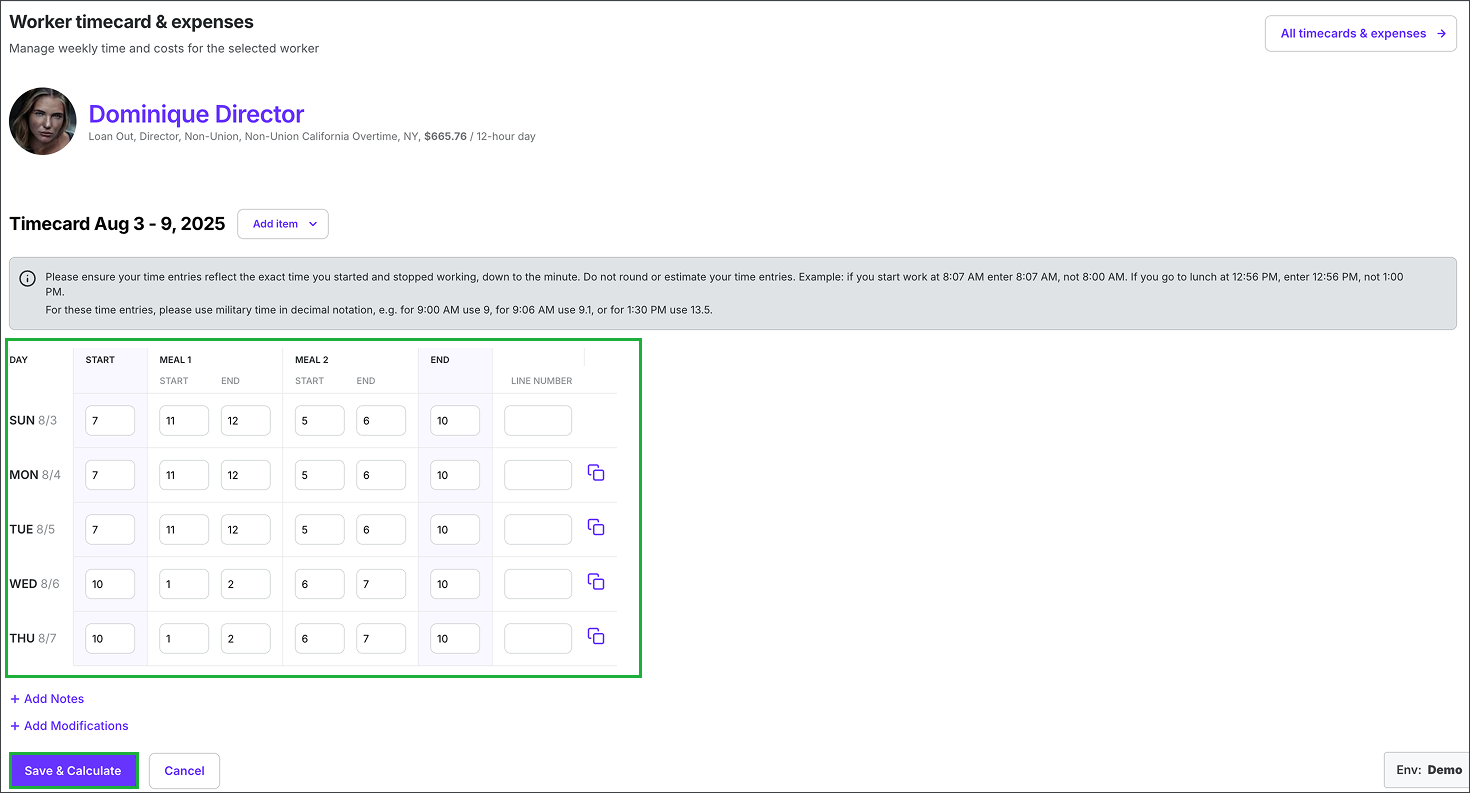
Click to add START and END times for the week, using military decimal time
Production workers will see their time in standard 12-hour notation
To copy the hours from a previous day, click copy icon
For workers with multiple rates, be sure to select the applicable rate
For workers with multiple work locations, be sure to select applicable location
If you have enabled cost tracking or the Production Accounting Suite (PAS), you can select a line number from the dropdown or enter them number manually
To include timecard notes that are visible to the worker and other authorized company team members click + Add Notes
To make a wage adjustment, click + Add Modifications, then select the Location and enter the Amount
When you’re finished, click the Save & Calculate button

Select the project, then click View timecards

Click Add timecard

Click the dropdown menu to select the work week, then click the Create button next to the worker

For each day worked, enter the START and END times, then click the Save & Calculate button
Using military decimal time
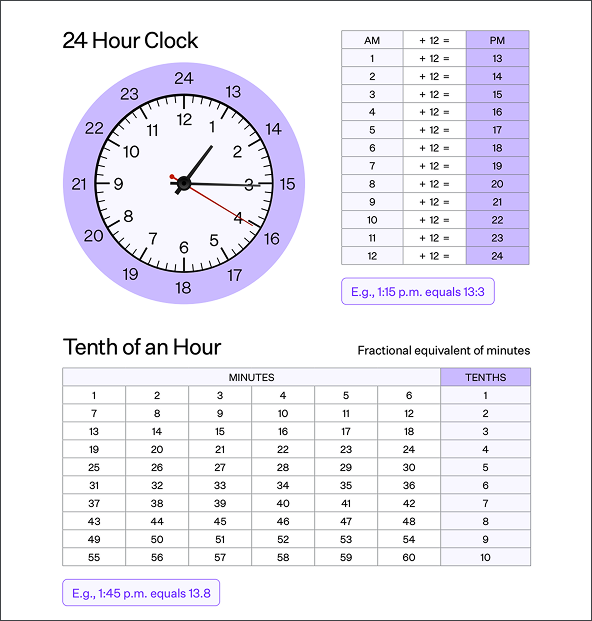
In Wrapbook, production administrators will need to use military decimal time when creating project worker timecards.
Here’s a quick guide to how this works:

Hours
Military decimal time uses a 24‑hour clock:
AM hours = 1-12
PM hours = 13 - 24
For example:
7:00 am = 7:00 in military time
1:00 pm = 13:00 in military time
Minutes
Military decimal time minutes are calculated by dividing the number of minutes by 60.
Here are some common minute-to-decimal equivalents:
6 min = 0.10
12 min = 0.20
15 min = 0.25
18 min = 0.30
24 min = 0.40
30 min = 0.50
36 min = 0.60
42 min = 0.70
45 min = 0.75
48 min = 0.80
54 min = 0.90