Looking for Direct ACH vendor payments?
Wrapbook offers two ways to pay vendors via ACH:
NACHA file (this article): Wrapbook generates a payment file that you download and upload to your bank. Requires CSM configuration.
Direct ACH vendor payments: Wrapbook sends the ACH transfer directly — no file upload required. Requires a one-time KYC setup.
If your company has Vendor Payments enabled, see the Direct ACH Vendor Payments Setup Guide (PAS) to get started.
Overview
Wrapbook's NACHA file method lets you pay AP invoices via ACH bank transfer by generating a payment file that you download and submit directly to your bank.
NACHA files
A NACHA file is a standardized electronic payment file format used by banks in the US for processing ACH transfers.
Here are the key points about NACHA files:
Most U.S. financial institutions that are part of the ACH network can process NACHA files, since it’s the standard format for ACH payments. To determine if your bank accepts NACHA, see
NACHA files contain specific header information and payment instructions that tell banks how to process transfers between accounts
For security reasons, these files require multi-factor authentication (MFA) to generate and download
Once generated, NACHA files cannot be edited or destroyed - they’re encrypted and permanently stored, but they can be voided
Once generated, it’s the payor’s responsibility to make sure the NACHA file is submitted to the bank that the payment is coming from. This typically involves logging into your company’s online banking portal, navigating to the ACH or payment section, and uploading the NACHA file. Be sure to confirm with your bank the exact directions for submitting NAHCA files for ACH bank transfers.
The effective date for payments is typically set to the next banking day plus one additional business day
Banks may also require test files (called prenotes) with $0 transactions to validate the format before allowing actual payments
How to find out if your bank accepts NACHA files
These banks are known to support NACHA file uploads for business clients:
JPMorgan Chase
Bank of America
Wells Fargo
Citibank
City National Bank
PNC Bank
U.S. Bank
TD Bank
Capital One (for business accounts)
Regions Bank
BB&T (now Truist)
Even if your company’s bank isn’t listed above, be assured that most U.S. banks follow NACHA guidelines and may still facilitate these file uploads. You can use these tips to learn more from your bank:
Look for the bank's ACH page, and mentions of NACHA file upload, ACH origination, or corporate ACH
Contact your company’s business banking representative to confirm whether the bank allows direct NACHA file uploads. You can ask for ACH Origination via File Upload specifically.
Requirements for using ACH to pay vendors
In order to use ACH to pay vendors:
Your company’s Wrapbook account must have the Production Accounting Suite (PAS) enabled
You’ll need to contact your company’s Wrapbook Customer Success Manager (CSM) to help you set up ACH payments in Wrapbook
Be ready to provide your CSM with the bank account number and routing number that will be used to send vendor payments
Know how to submit NACHA files to your bank - contact your bank for instructions if necessary
Add the vendor’s bank account number and routing number for payments
The AP invoice(s) for the vendor payment(s) must have a Bank account selected, a Payment type of Payment file selected, and it must have already been posted to the General Ledger (GL)
Adding vendor bank information for ACH transfers
Before you can use ACH to pay vendors, you’ll need to add the vendor’s bank number and routing number.
To learn how to create a new vendor, see Add a vendor.
To learn how to update an existing vendor, see Update vendor information
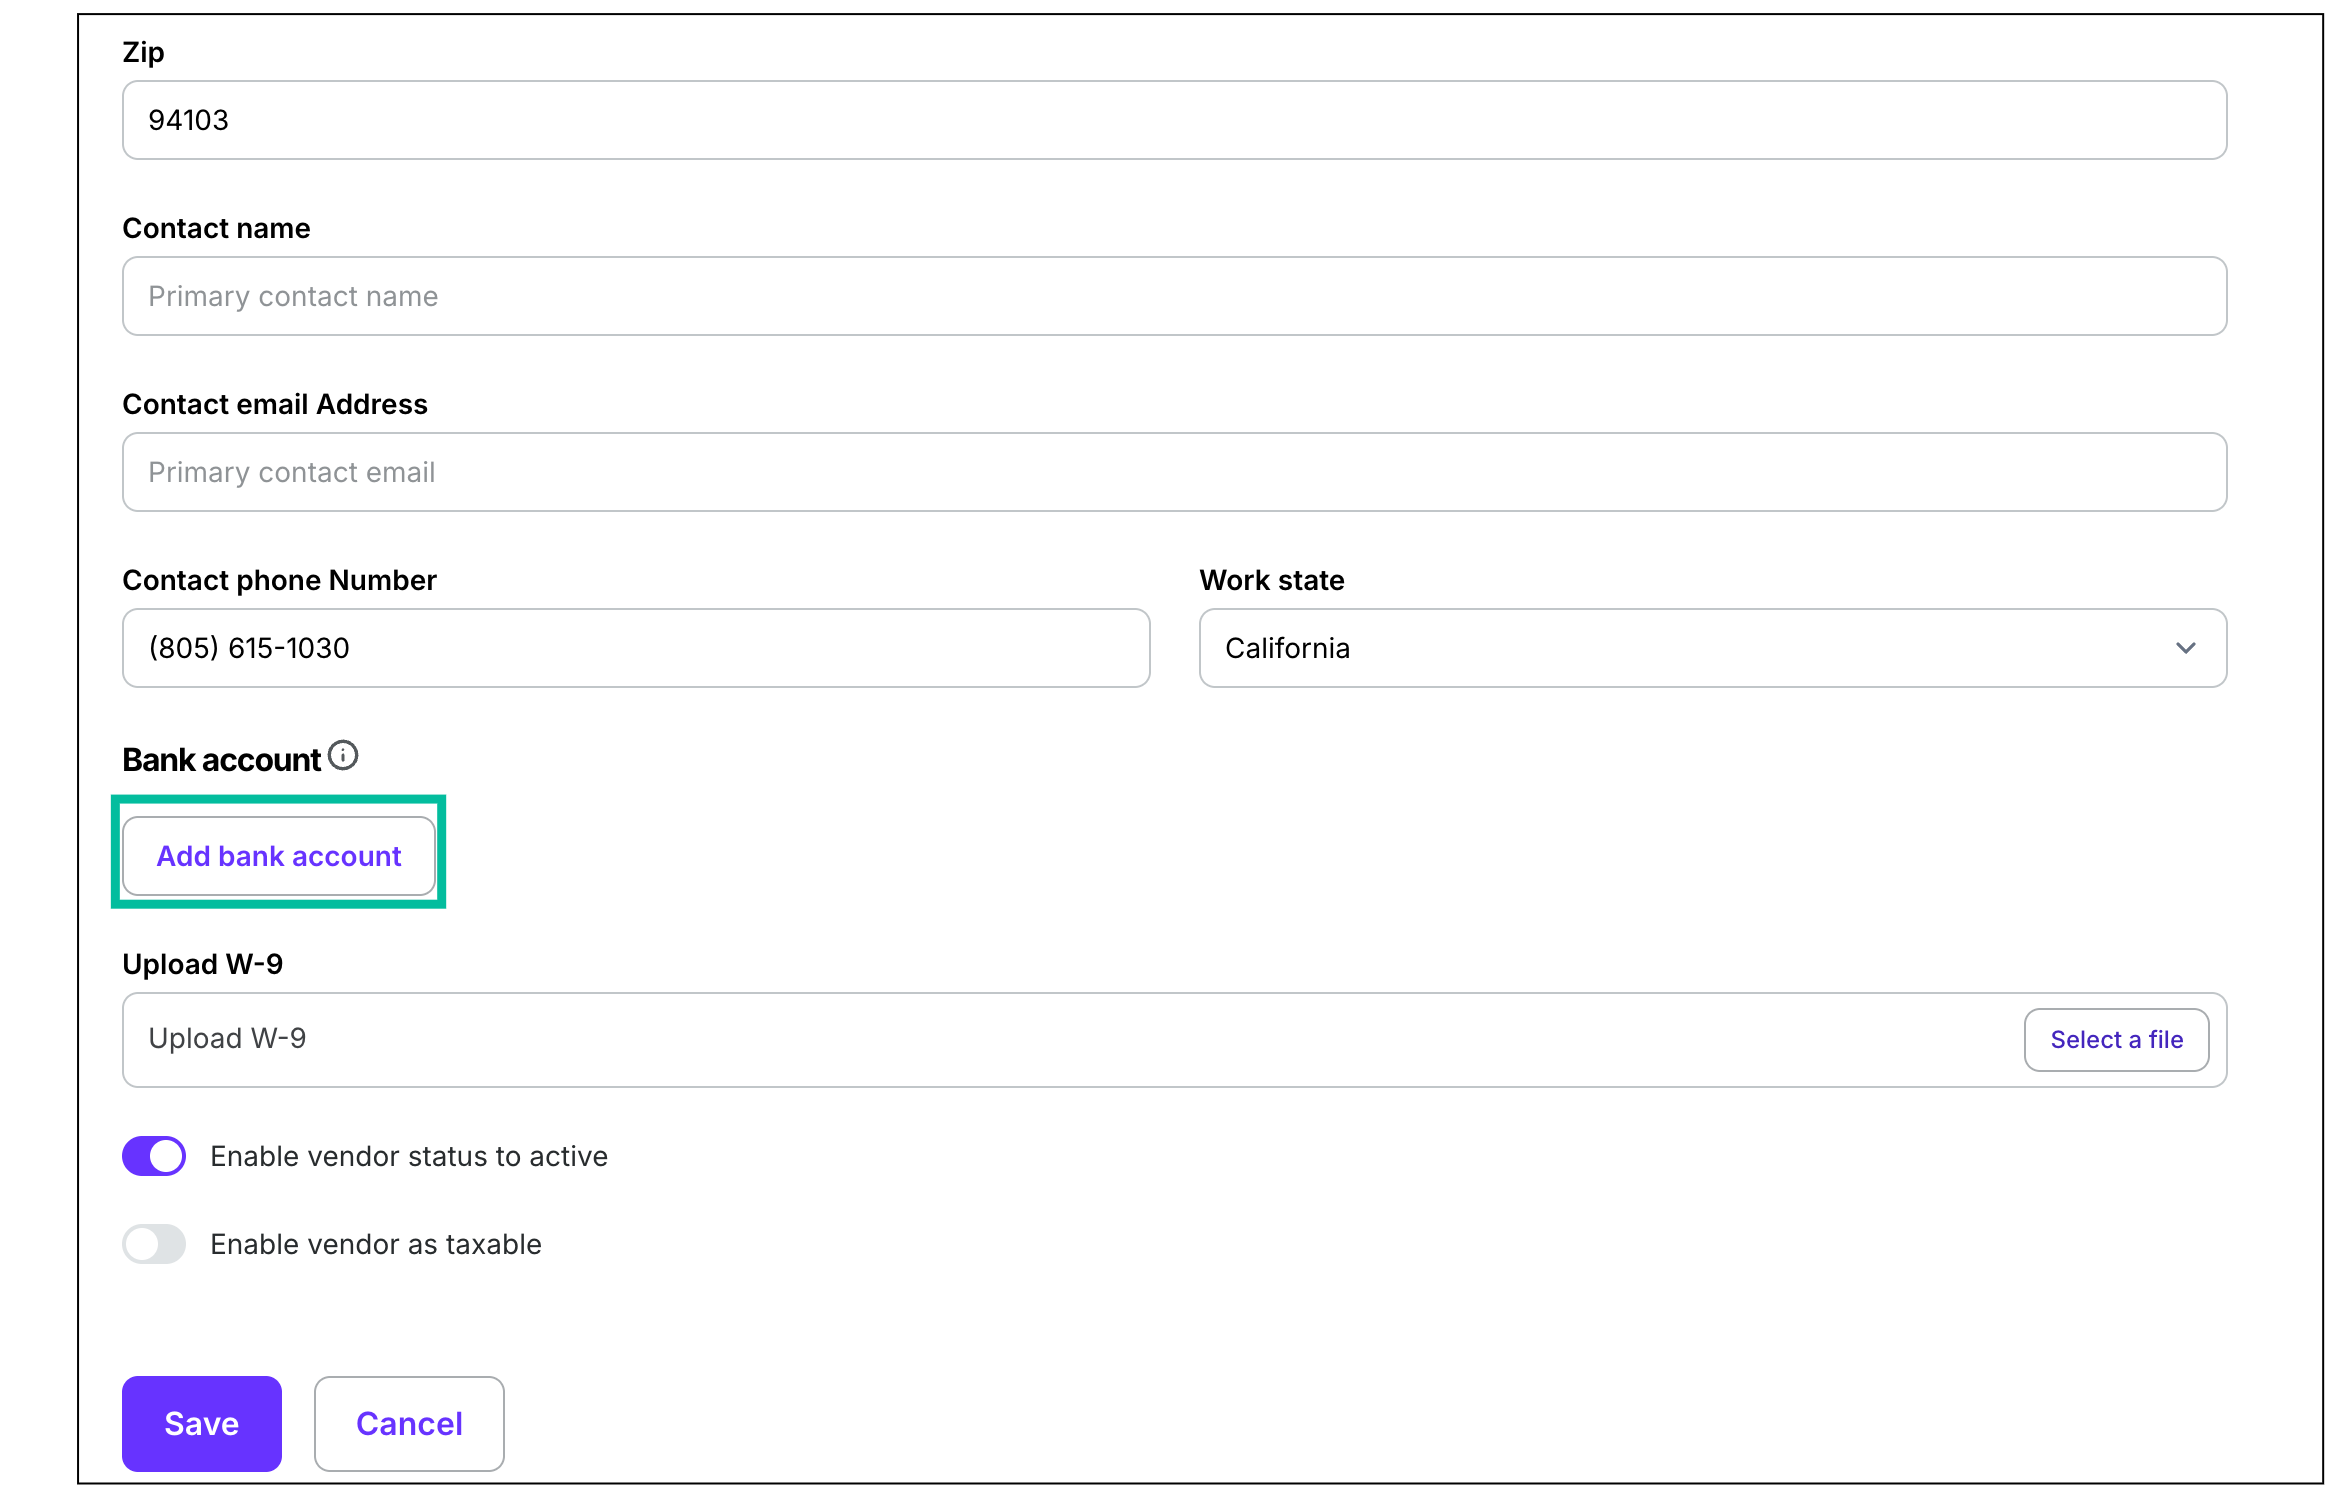
On the Vendors page, click the Add bank account button
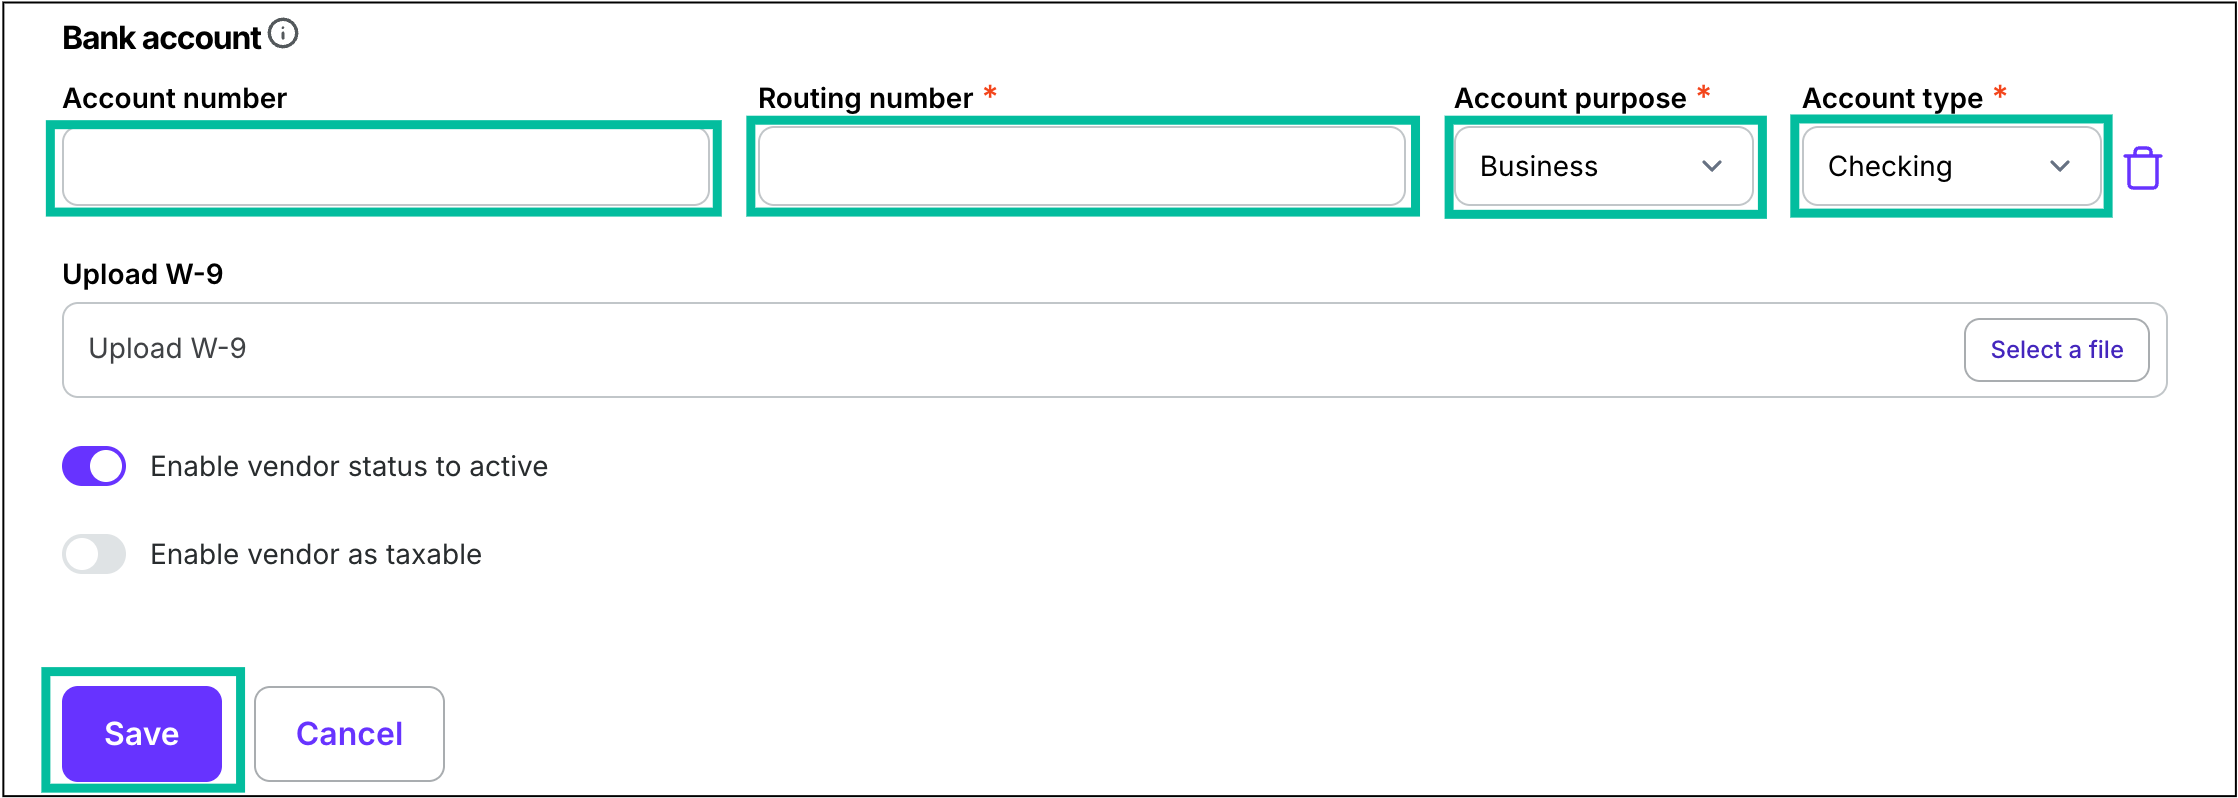
Add the Account number, Routing number, select the Account purpose and Account type, then click the Save button
Paying AP invoices via ACH bank transfer
Before you begin
NACHA file download must be configured for your company by your Wrapbook Customer Success Manager (CSM). If you don't see the ACH option for your NACHA-configured bank when creating a payment batch, contact your CSM or the Support Team.
Step 1: Create and post an AP invoice
Create your AP invoice using either the AP Inbox (OCR) or manual entry — whichever method your team uses. For full instructions, see Adding AP invoices in Wrapbook (PAS).
Regardless of how you add the invoice, make sure to set the following fields before saving:
Accounting bank — select your NACHA-configured bank (for example., CNB)
Payment type — select ACH
Once the invoice details are confirmed, save and post the invoice. For posting instructions, see Post AP transactions (PAS).
The invoice now appears on the Posted & unpaid tab with an Unpaid status.
Step 2: Create a payment batch
From the project’s Accounts payable dashboard, click the Create payment batch button
In the Create payment batch popup:
Bank — select your NACHA-configured bank
Payment type — select ACH
Click the Continue button
On the Select invoices to pay screen, click to check the invoices you want to include and then click the Create payment batch button at the bottom of the page
Now, the payment batch is created in Draft status and a Prepare ACH file button appears in the top-right corner of the batch.
Step 3: Prepare the ACH file
From the payment batch, click Prepare ACH file
If you’re not already on the payment batch page and need to find it, go to the project’s Accounts payable dashboard, click the Payments tab, and then click on the Batch #
A confirmation will appear: Payment batch processed and payments are being processed.
The batch status now changes from Draft to Needs action, and the Prepare ACH file button changes to Download ACH file.
Step 4: Download the ACH file
You can download the file two ways:
Option A — From the payment batch view:
Click the Download ACH file button in the top-right corner of the batch page.
Option B — From the Payments tab:
Click the Payments tab on the Accounts payable dashboard
Find the payment with Needs action status
Click the Download file button in the Action column
Using either option will open the Payment batch drawer, which displays the payment file details: filename, effective date, generated date, payee(s), TRX #, account and routing numbers, category, amount, and status.
Click the Download ACH file button at the bottom of the drawer. A Save popup appears — choose a location on your computer and save the file.
After the file downloads to your computer, a yellow verification banner appears in the drawer giving you the option to either:
Redownload
Confirm and mark as paid
Step 5: Submit the file to your bank
Open the downloaded .ach file and verify the contents look correct. Then log into your bank's online portal, navigate to the ACH or payment upload section, and upload the file. Contact your bank for their specific instructions.
Step 6: Confirm and mark as paid
Once your bank confirms the payments have been processed:
Return to the payment batch drawer in Wrapbook.
If the payment batch drawer is not already open, you can open it by going to the project’s Accounts payable dashboard, clicking the Payments tab, and then clicking on the Batch #
In the verification banner, click Yes, confirm and mark as paid
A confirmation appears: These payments are being posted to the general ledger.
Wrapbook marks the payments as Paid and posts the transactions to the GL.
If the file didn't download correctly: Click No, redownload in the banner to download the file again before confirming.
Note: One NACHA file is generated per payment batch. If you need separate files for different banks or vendors, create separate payment batches.
ACH returns
ACH returns can happen for a variety of reasons, but is typically the result of incorrect banking information or insufficient funds in the bank account.
When an ACH payment is returned you’ll need to void the NACHA file, resolve the issue(s) that caused the payment to be returned, update the AP invoice, and generate a new NACHA file for payment.
To void an NACHA file:
In the left-side navigation, click the dropdown menu to select the project
In the Project menu, expand Accounting, then click Accounts payable
On the Accounts payable dashboard, click the Payments tab
Click on the Payment #
In the Payment details drawer, click Void and cancel
In the Void and cancel invoice popup, under What you would like to do with the PO lines? click to choose either:
Close PO lines
Reopen PO lines - This will duplicate the PO lines and set their status to open
Click the Confirm button
Failed payments
Failed payments typically occur when the bank account information for the vendor is incorrect. If one or more payments in an ACH transfer fail, please contact your Wrapbook Customer Success Manager or the Support Team for assistance.