This help article is related to Cost tracking
In Wrapbook, production accountants and administrators can manage POs using either Cost tracking or the Production Accounting Suite.
POs are permission based
To update invoices attached to POs in Cost tracking, your account must have one of the following roles enabled:
Role: Company Admin, Company Manager, or Project Coordinator
Custom role with:
Accounting & Cost Tracking / Purchase orders - Full access, Manage, Approve only, or View only
Overview
Purchase order relief is a process that allows you to associate a payables invoice with existing POs, and track how much of the POs have been fulfilled. Relieving POs in Wrapbook helps you monitor which portions of a PO have been paid for through invoices in payables.
When a payables invoice has open POs, you'll see an alert that says Relieve open POs for this vendor with a number showing how many open POs there are.
The PO relief process enables you to:
Link invoices in payables to their corresponding POs
Track how much of each PO has been paid
Maintain visibility of remaining balances on partially fulfilled POs
Properly document the connection between approved purchases and actual payments
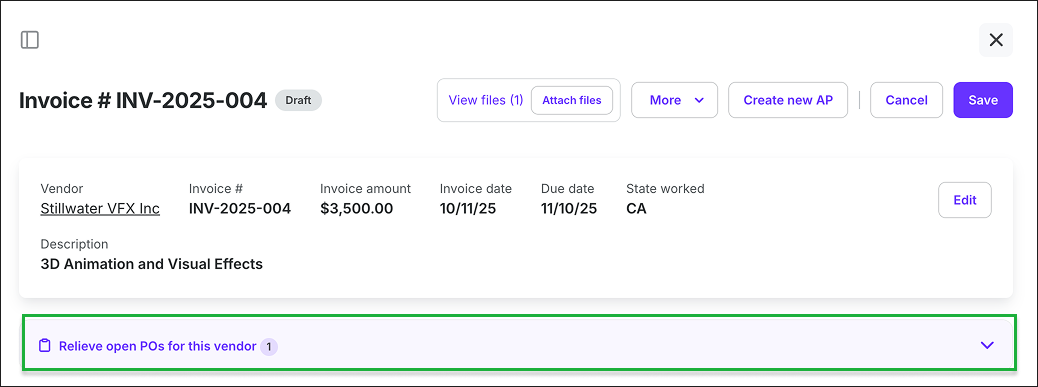
Example of an invoice in payables with an alert about open POs
How to relieve a PO in a payables invoice
To relieve open POs associated with a payables invoice:
In the left-side navigation, click the dropdown menu to select the project that you want to relieve POs for
In the left-side navigation, click to expand the Cost tracking menu, and then click Invoices
On the project’s Invoices dashboard, click the Invoice # that you want to relieve a PO for
Click Relieve open POs for this vendor
Click the checkboxes to select the line item(s) that corresponds to the PO you want to relieve. If you want to partially relieve an open PO, you can enter the amount in the Apply amount column
Click the Relieve button
After you click the Relieve button, the system will automatically update the relieved amount on the PO and link the payables invoice to the PO in the system.
How to view relieved purchase order lines
After relieving a PO, you may need to review the PO lines and how they’ve been adjusted. You can do this in Cost tracking from either:
The purchase order
The payables invoice
From the purchase order
In the left-side navigation, select the project that contains the PO that you want to review lines for
In the left-side navigation, expand the Cost tracking menu and click Purchase orders
Click on the PO# that you want to review
Scroll to the line items section
Relieved lines will display:
The relieved amount
The remaining available balance
The linked payables invoice(s)
You can see the relief details including the specific invoices associated with a line, by clicking the three dots and selecting View details to open a panel where you can review the information and click on the payables invoice number to open it.
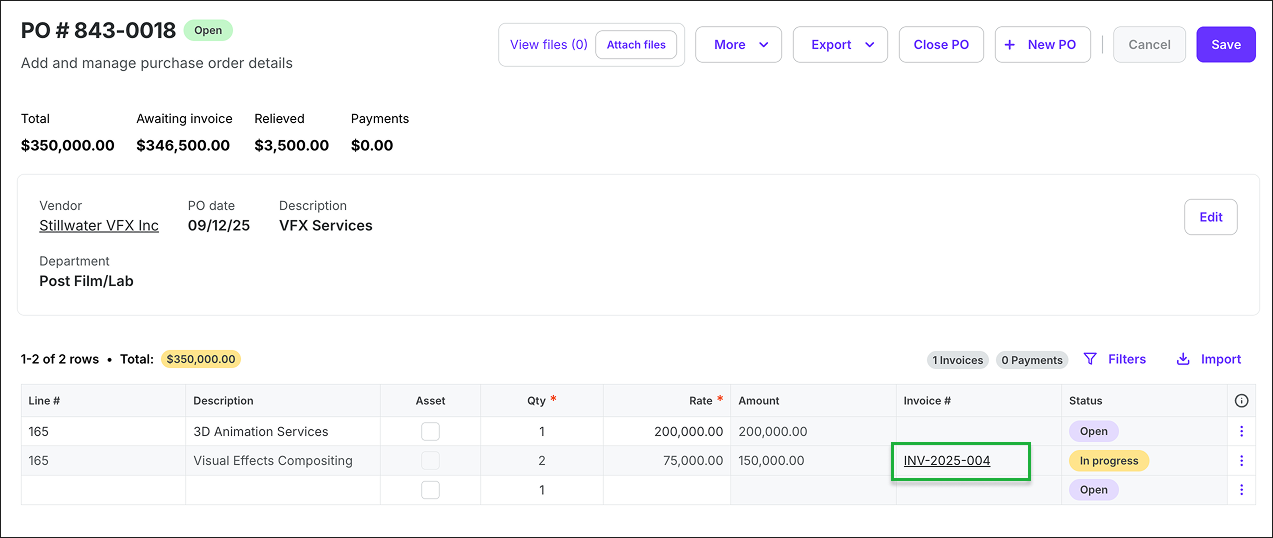
You can click the Invoice # next to relieved POs to see the details
From the payables invoice
In the left-side navigation, select the project that contains the PO that you want to review lines for
In the left-side navigation, expand the Cost tracking menu and click Invoices
On the payables Invoices dashboard, click on the Invoice # that you want to review the associated PO lines for
Under Invoice details, you can see the PO#s and details
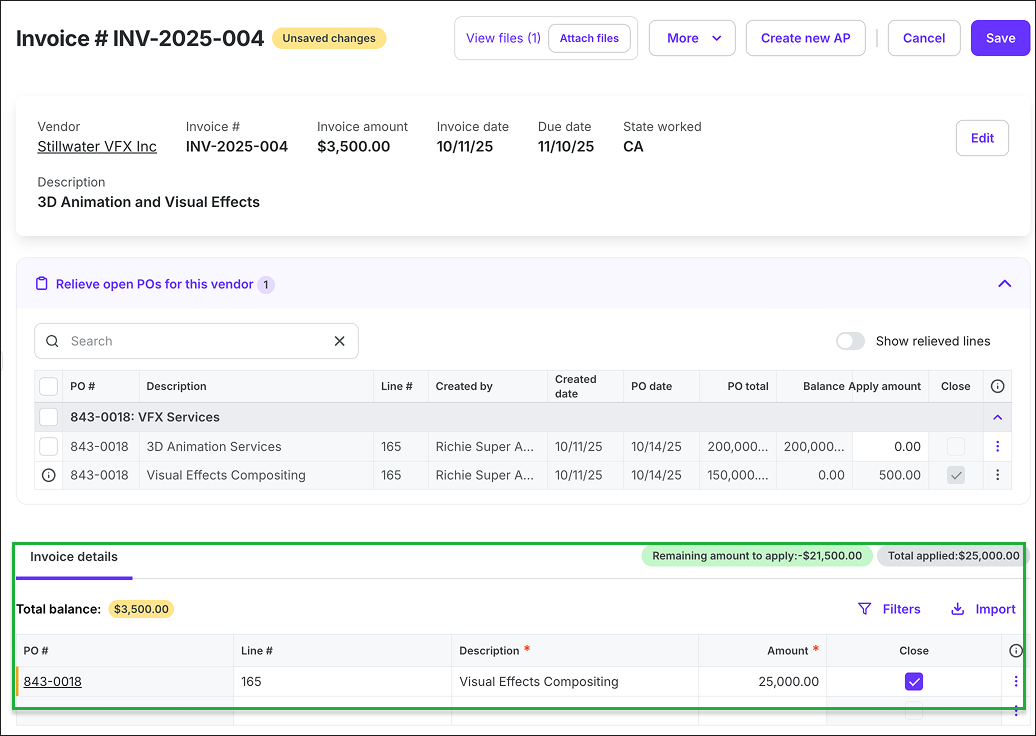
You can click Relieve open POs for this vendor, and then scroll down to Invoice details to see relieved POs