Inviting workers is permission based
To invite workers, your account must have one of the following roles enabled:
Role: Company Admin, Company Manager, Project Coordinator
Custom role with: Worker hiring and startwork - Full access, Project access only
To learn how to invite a worker to a project, click the arrow next to each of the five steps listed below.
Step One: Invite the worker
To invite the worker:
At the top of the left-side navigation, click the dropdown menu
In the dropdown menu, select the name of the project that you want to add a worker to
In the left-side navigation, click People
On the People dashboard, click the Invite worker button
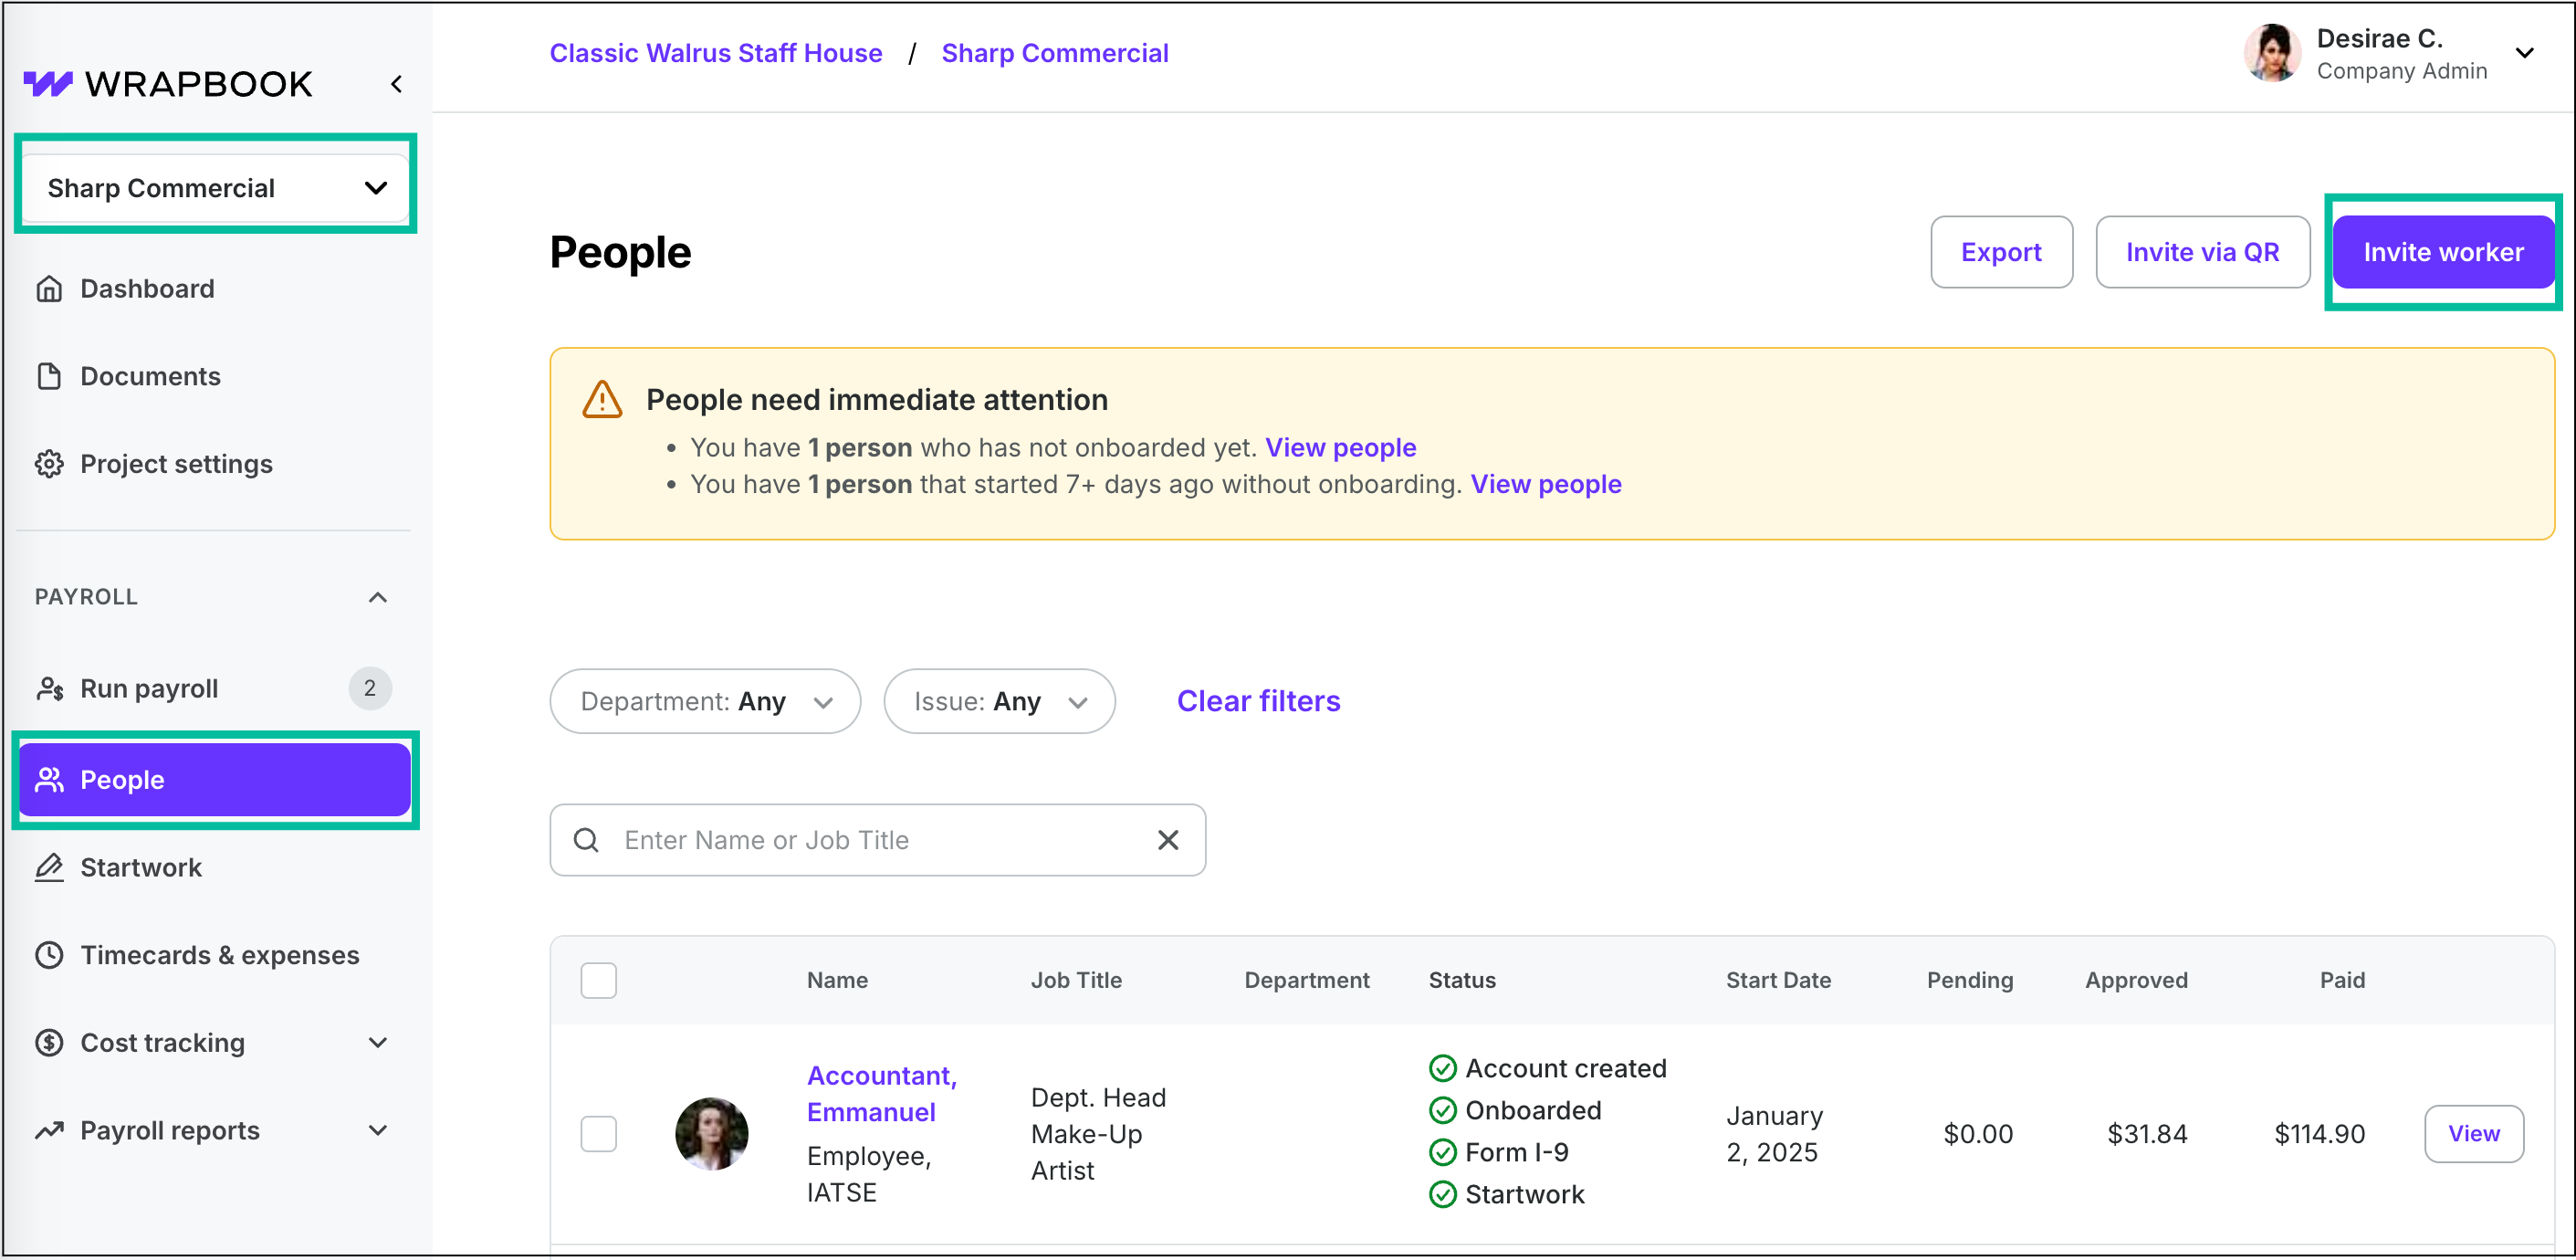
Select the project, click People, then click the Invite worker button
Step Two: Determine who will add the worker’s details
To determine who will add the worker’s details:
If the worker will add their details, click the Delegate all details to the worker tab
Note: When entering their details, workers will only be able to self-classify as an Employee or a Loan-Out. They won’t be able to self-classify as a Contractor, as Wrapbook does’t serve as the Employer of Record for contractors. To learn more, see Worker classification.
If you’re adding the worker’s details, click the Complete all worker details tab

If the worker will add their details, click Delegate all details to worker

If you’re adding the worker’s details, click Complete all worker details
Step Three: Choose an existing or new worker
To choose an existing or new worker:
Click to choose Existing worker or New worker
Existing workers
If you choose Existing worker, click the search box under Select existing worker to find and select the worker
New workers
If you choose New worker, you’ll be prompted to add certain details to the worker’s profile.
If you’ve delegated all details to the worker in Step Two, you’ll still need to add the following information:
Legal first name, Legal last name, and email
Department they’ll be working under (optional)
Under Agent information, click the checkbox if the worker has an agent. To learn more, see Agents.
If you’re completing all worker details, you’ll need to add specific information that informs how the worker will be paid. Click the arrow to learn more.
Required information for new workers
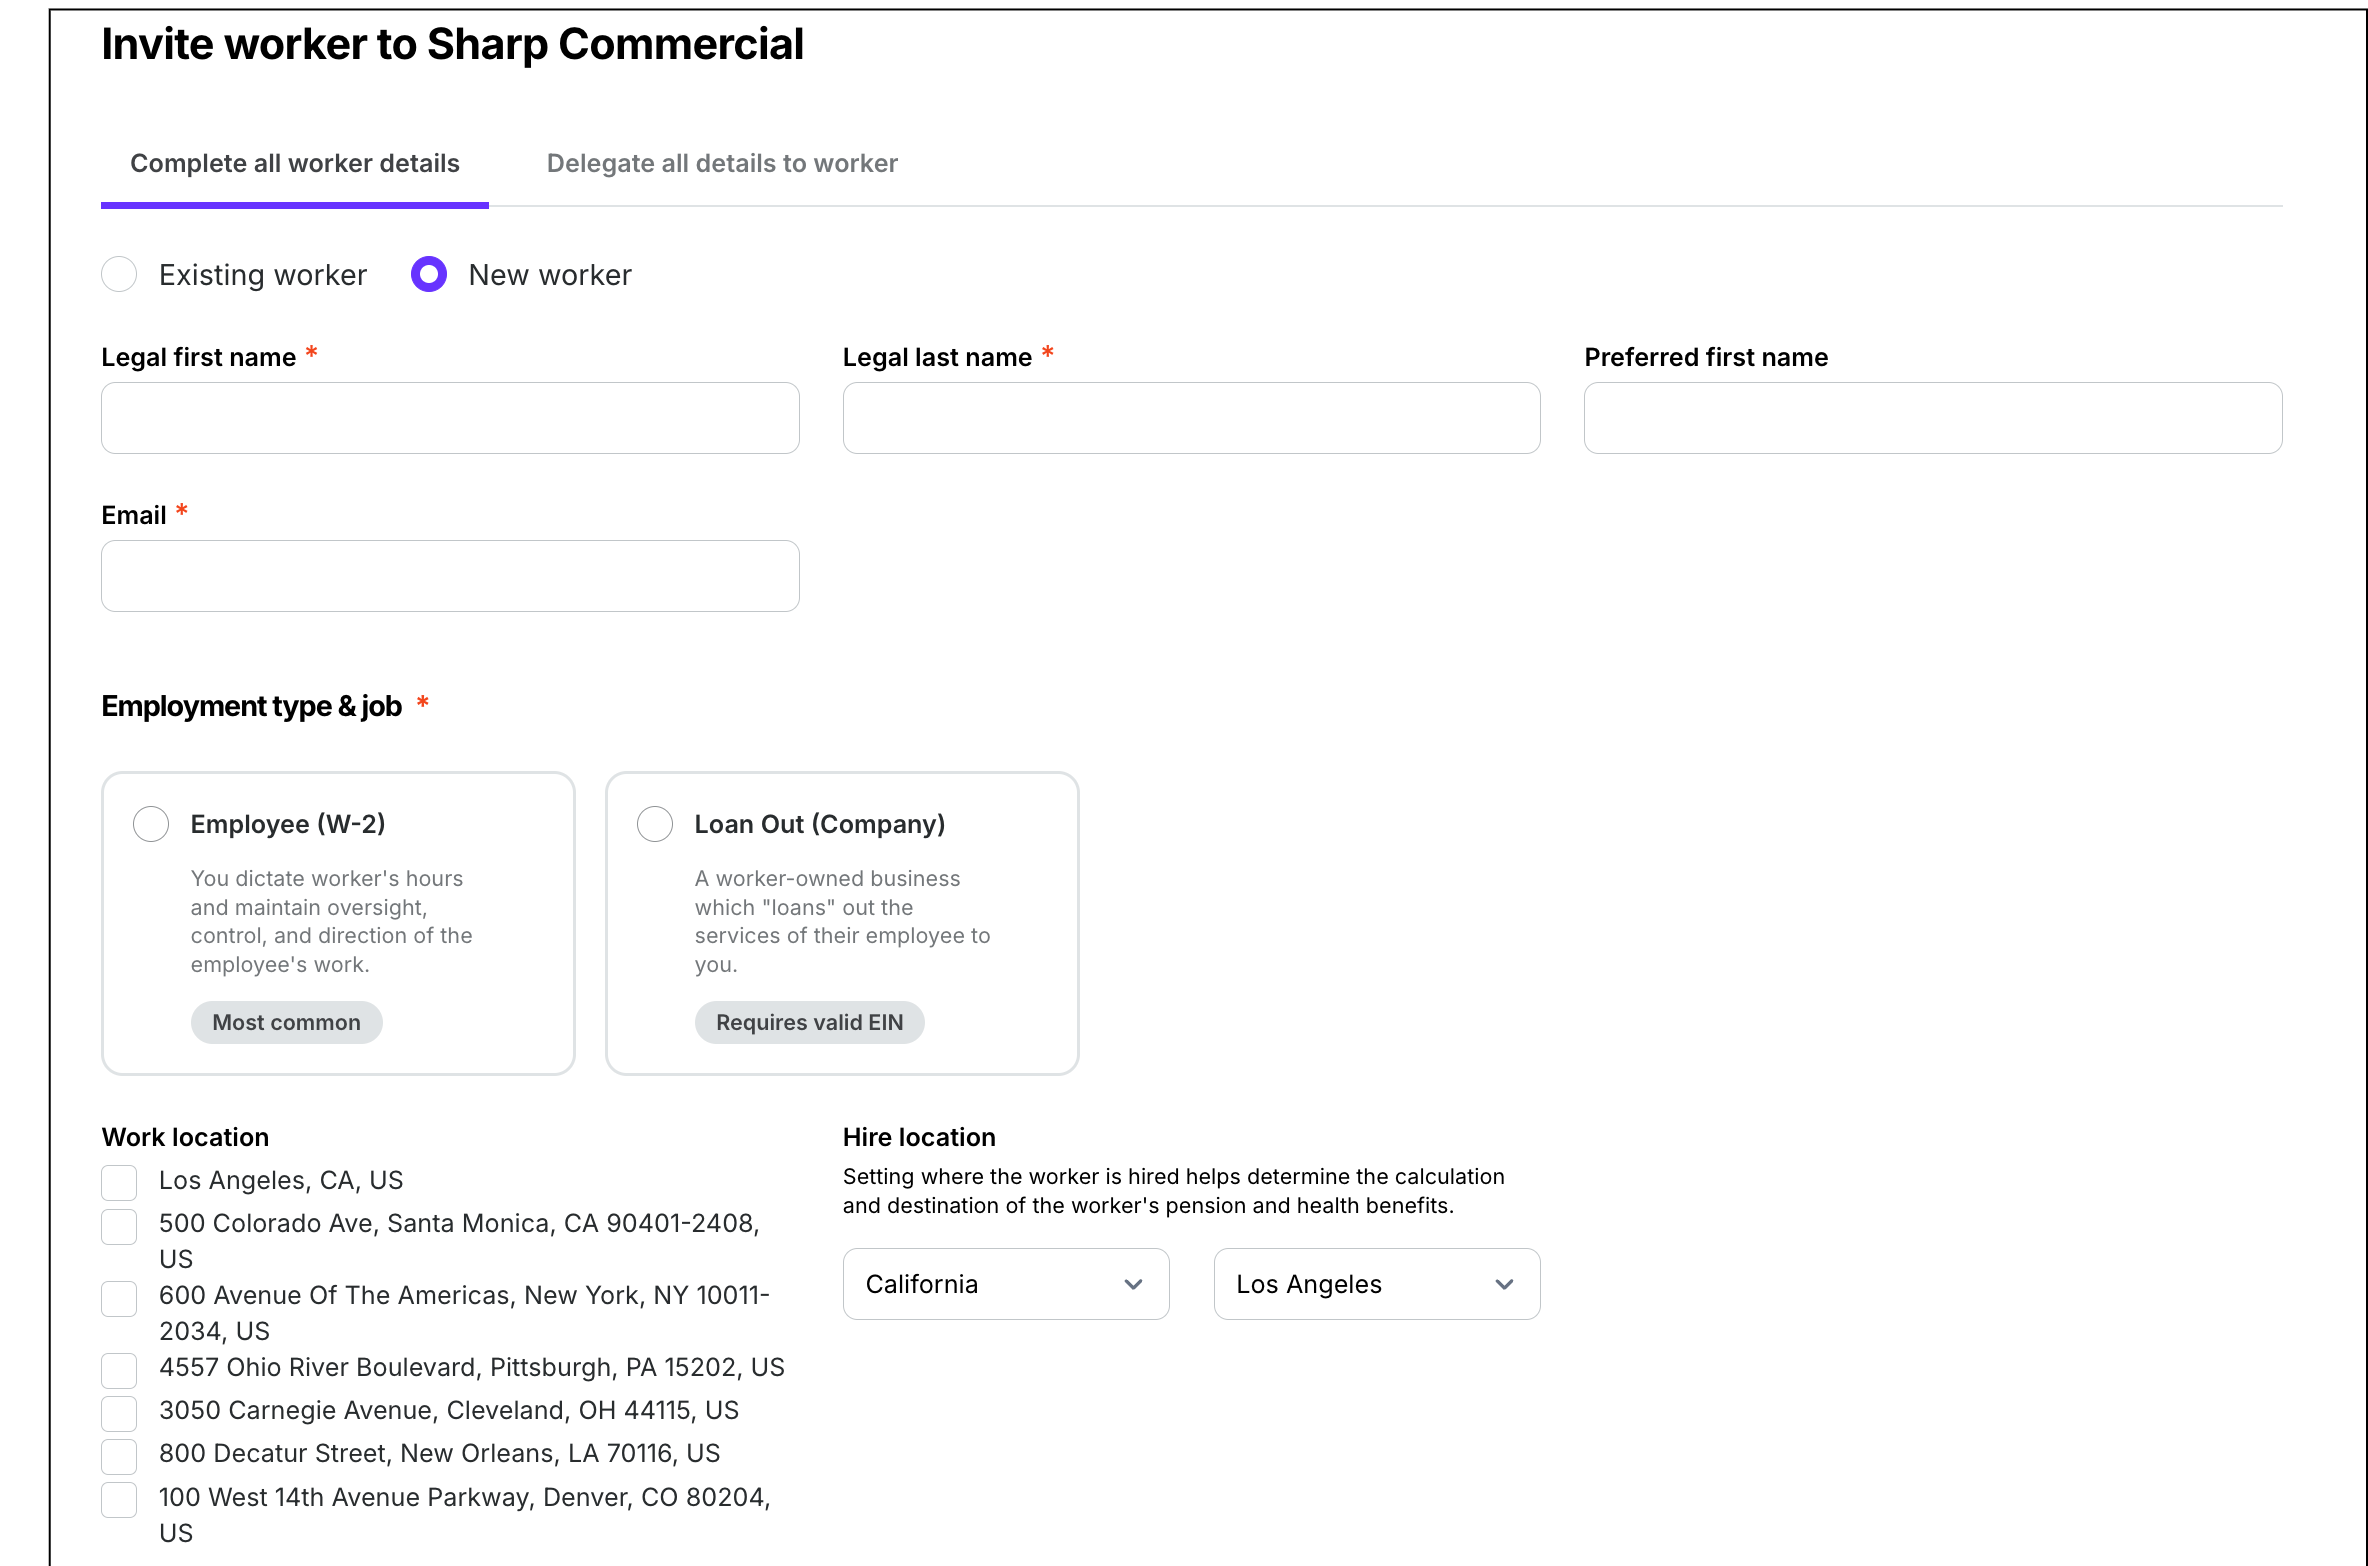
When you’re completing worker details, you’ll be prompted to enter the following information:
Legal first name, Legal last name, and email
Employee type & job
To learn more, see Worker classification
Work locations
The locations available for selection are based on what’s entered in the Project settings
To learn more, see Payroll
Hire location
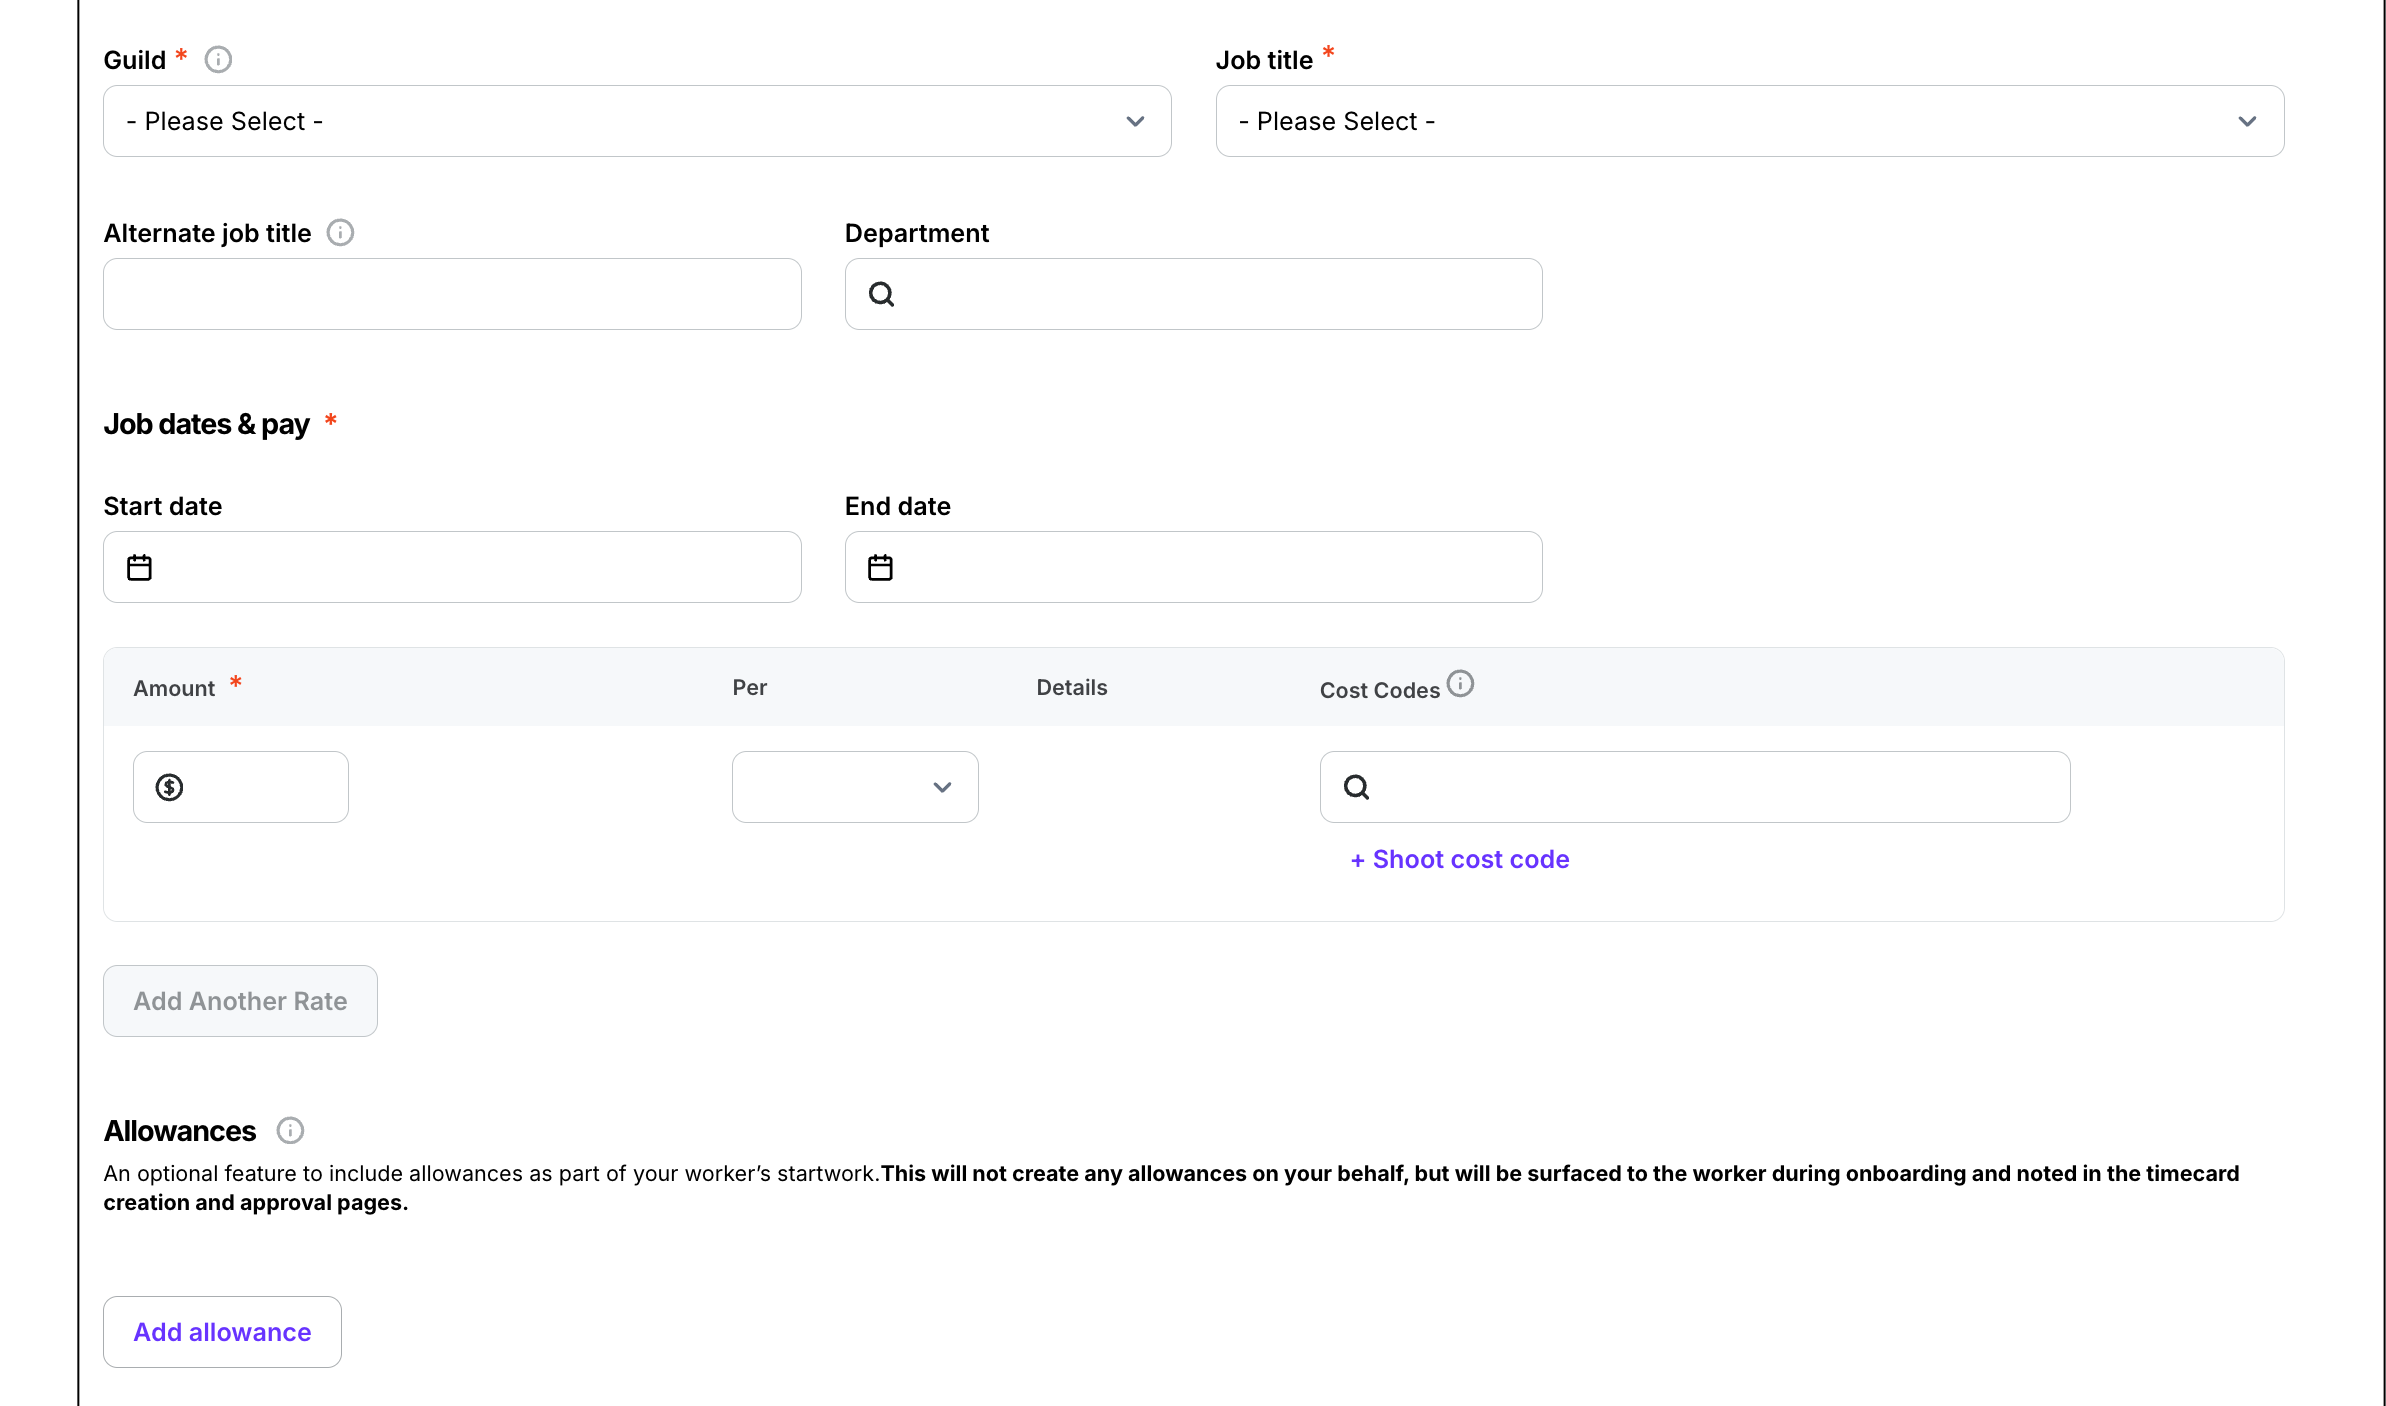
Guild and Job title
If the worker is a member of a union or guild, click the Guild dropdown menu to select it
If the worker is a member of more than one union or guild, you can make additional selections
When you select one or more guilds, the Job Title options will update
Click Job Title to make your selection
Job dates
Enter the worker’s Start and End dates
Pay
In the Amount and Per boxes, enter the details about the workers rates
The details will update based on what you enter
If Cost Tracking and the Budget Tracker are enabled for the project, you can assign Cost Codes and Shoot Codes. To learn more, see Cost Tracking
If the worker has more than one rate, click the Add another rate button and enter the details
Allowances
Click the Add Allowance button to add Allowance types and details that will be available on the worker’s timecards
Agent information
Under Agent information, click the checkbox if the worker has an agent. To learn more, see Agents
Travel days
Click the toggle to enable/disable travel days
When enabled, this worker will be able to add travel details on their timecard

On the Invite worker page, enter the required and optional information
Step Four: Assign startwork
To assign startwork:
In the Required startwork section, click the Assign startwork button
Select Packet or Documents
In the panel, click the checkboxes to select the startwork packet or documents that the worker is required to complete
Once you’ve finished selecting startwork, click the Assign button
The startwork assigned will now be listed under Required startwork on the worker’s profile.
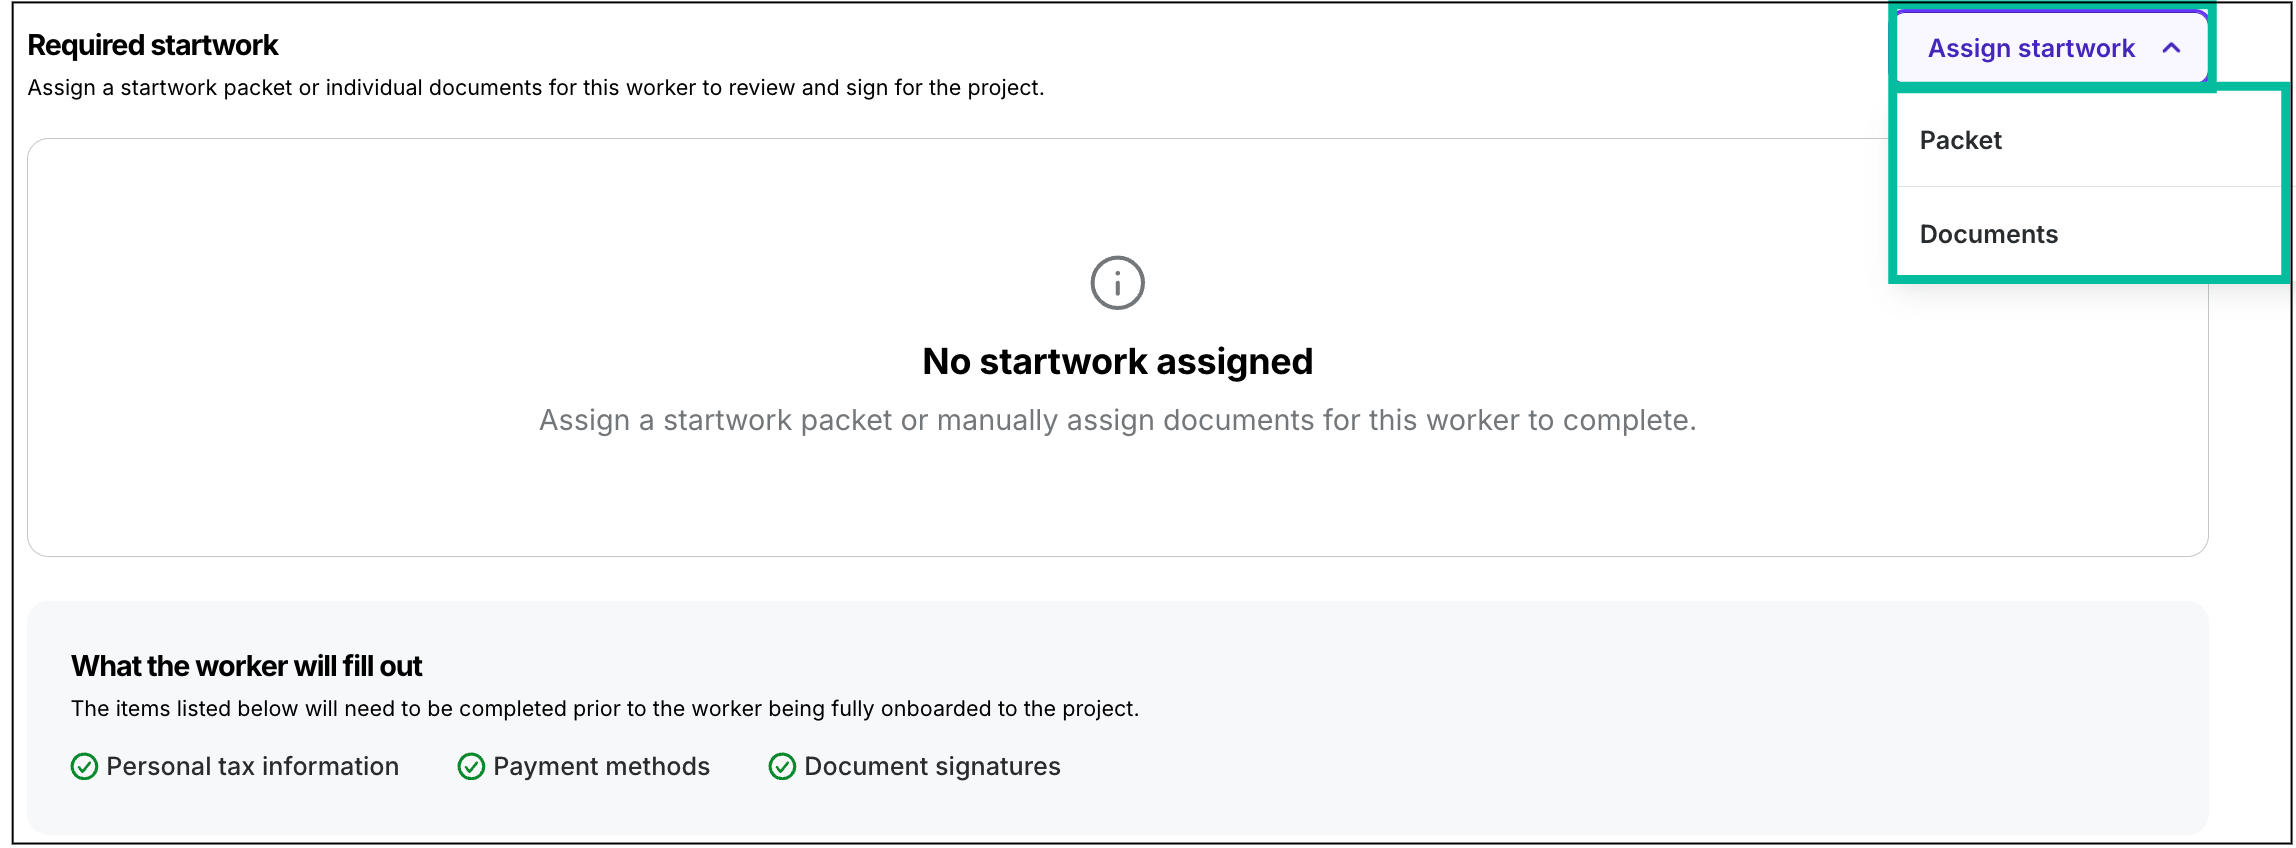
Click Assign startwork, then make your selection
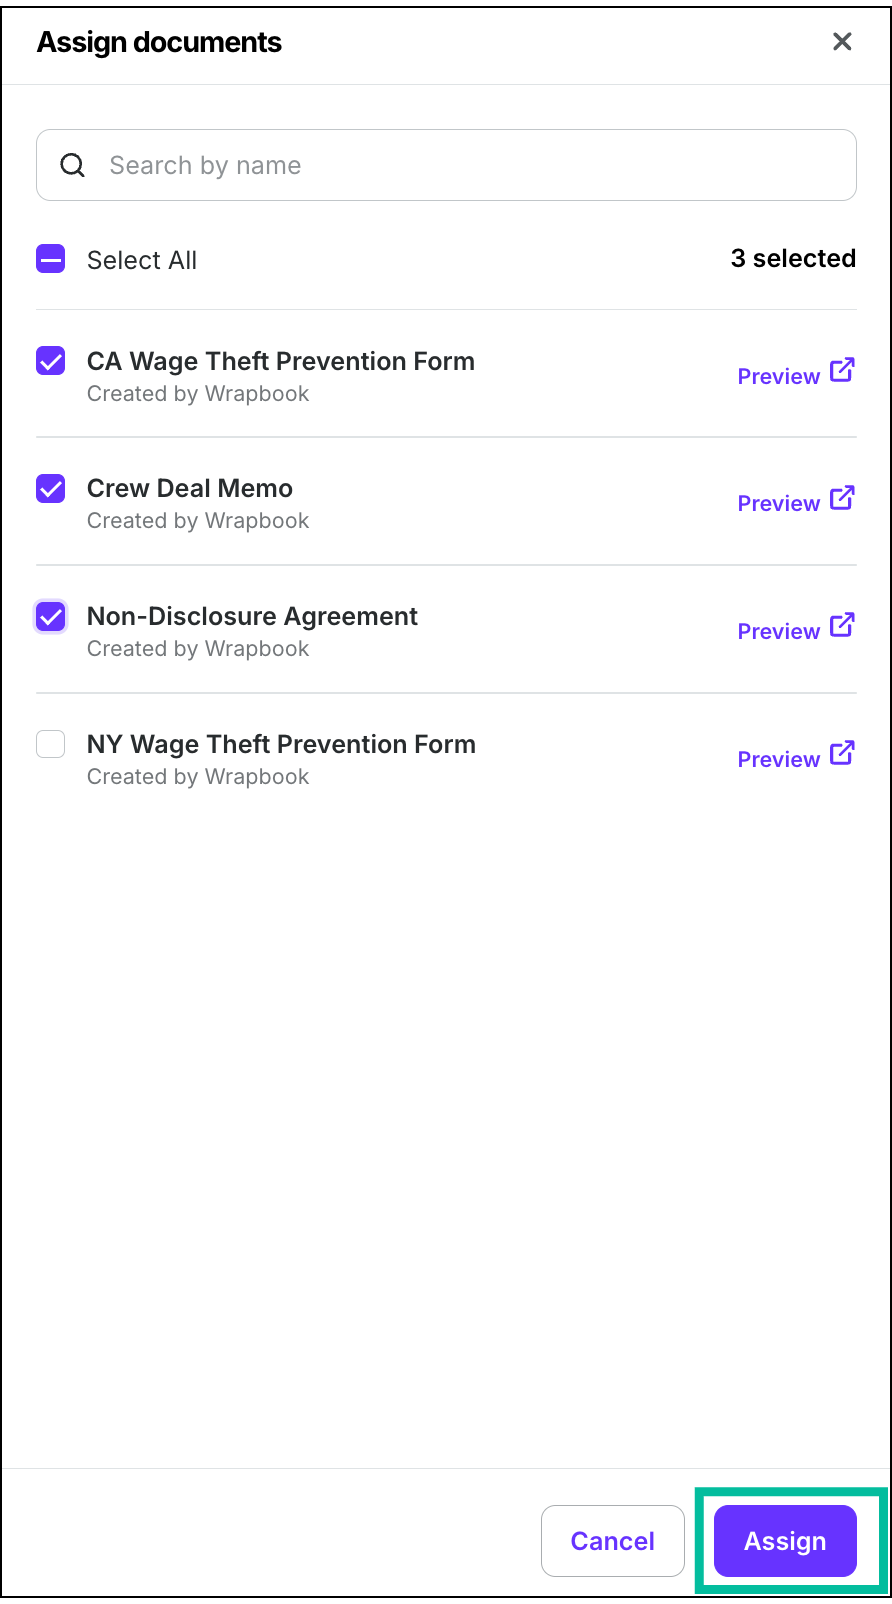
Select the startwork and then click the Assign button
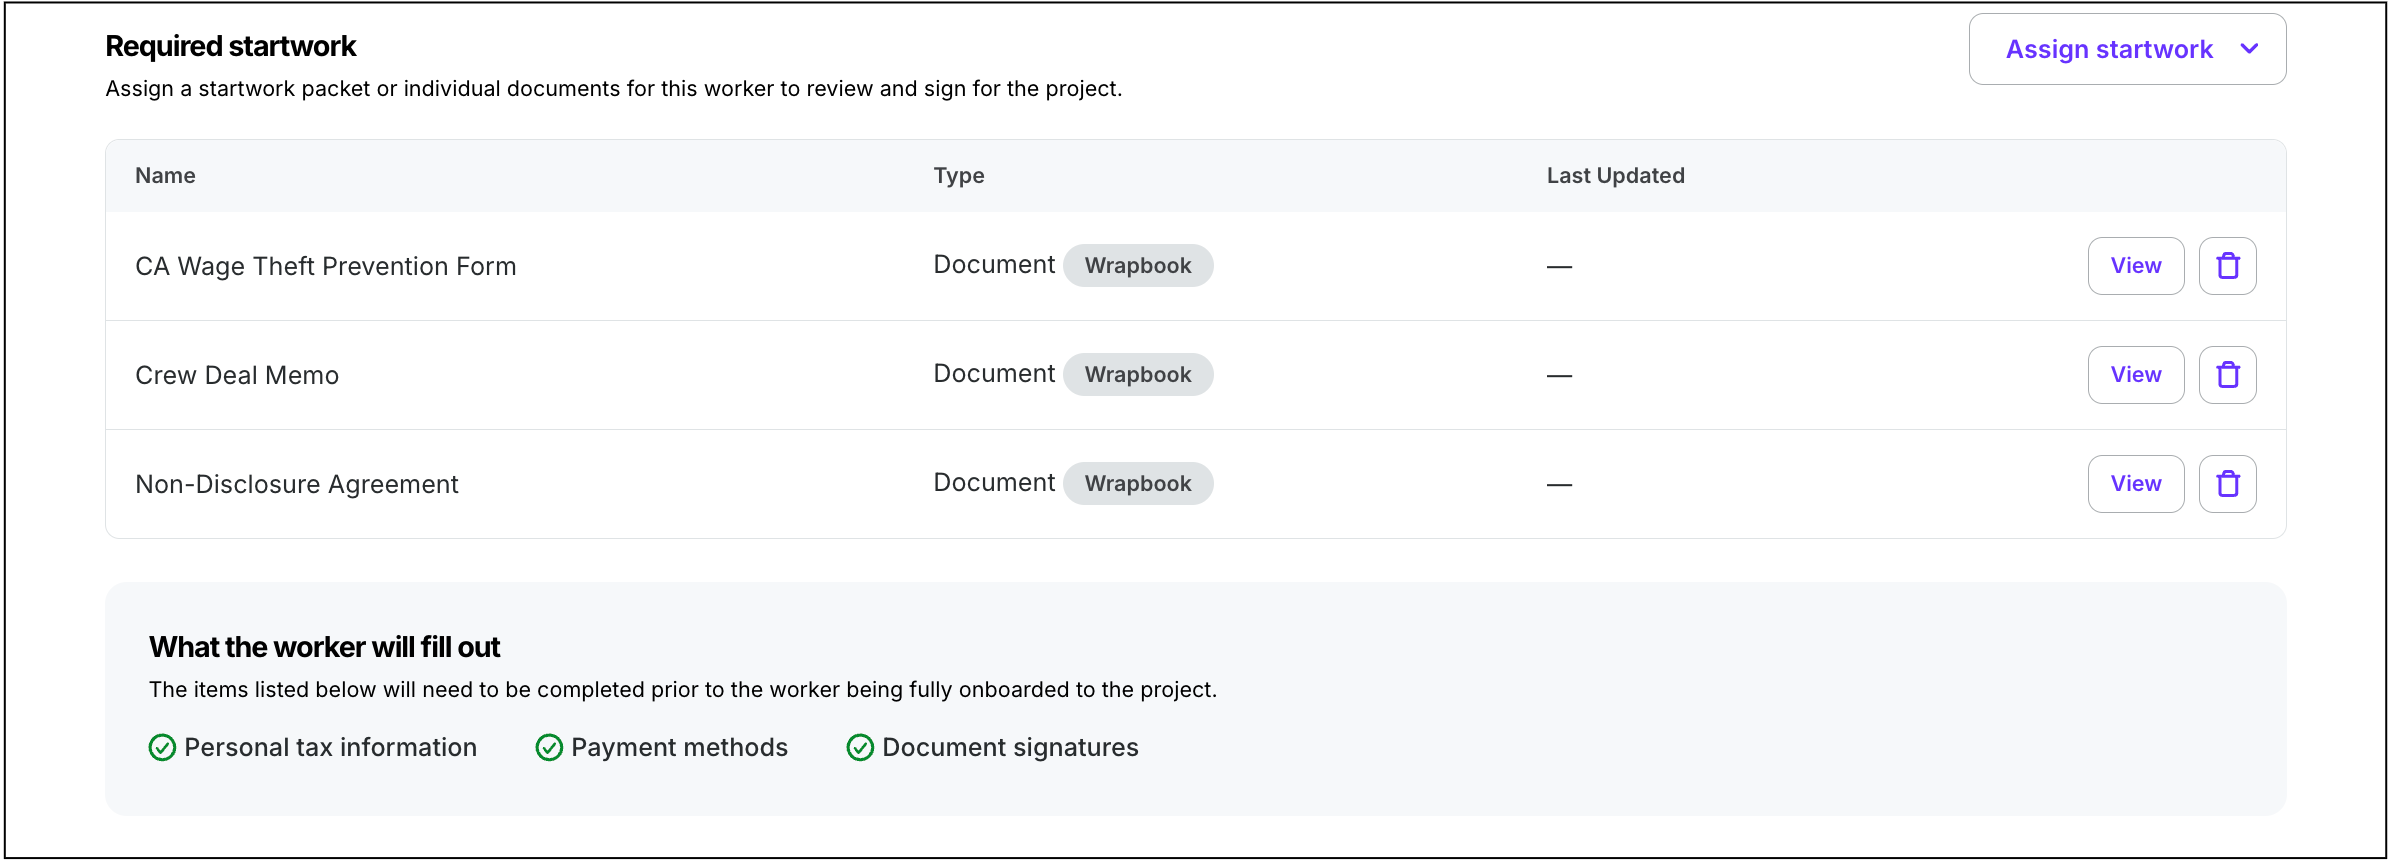
The documents selected will appear under Required startwork
Step Five: Send the invite
To send the invite:
In the Invite Message box, enter a message that the worker will see in their email invitation
If you’d like to receive a copy of the invitation, click the checkbox to enable Send a copy to my email
Review all of the details that you entered for the worker. It’s important to double-check all information before sending the invitation, as errors in SSN or legal name can delay the onboarding process.
Once you’re ready to send the invite, click the Save button to send the invite
The project invite will have the email subject line, "Welcome, [Your Name]! - [Project Name]" and will be sent from [email protected]
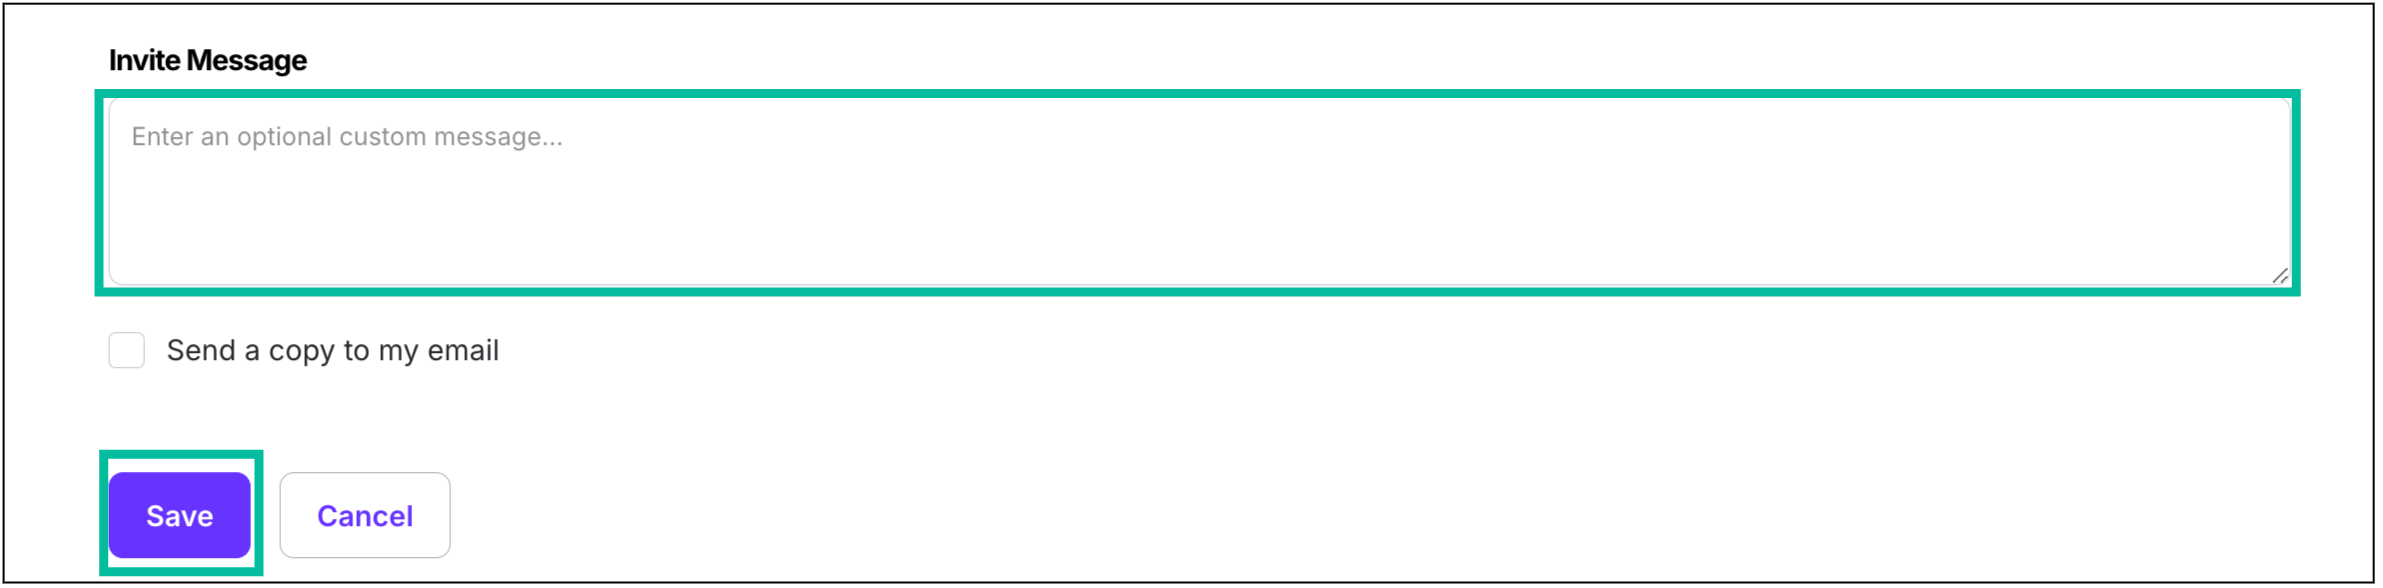
Add an Invite Message , double-check all details entered, and then click the Save button
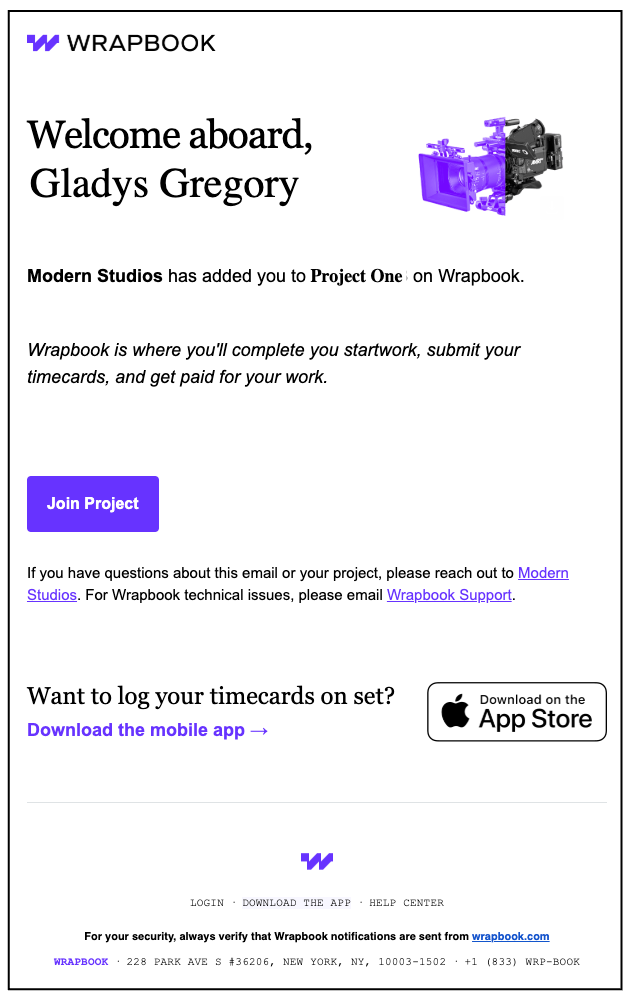
Example of the email a project worker receives when they’re invited to a project