Vendor payments in Production Accounting are permission based
To use PAS to pay vendors, your account must have one of the following roles enabled:
Role: Company Admin, Accountant
Custom role with: Accounting & Cost Tracking / Vendor payments - Full access
Overview
Wrapbook's Production Accounting Suite (PAS) gives you two options for paying vendors by check:
You can print checks directly from Wrapbook using your own check stock
You can write checks outside of the system and record the payments in Wrapbook to keep your books up to date
Note: Before you can pay vendors, the AP invoices must be posted and batched. To learn more, see About vendor payments (PAS).
How to print paper checks in Wrapbook
Before you print paper checks, make sure of the following:
Multi-Factor Authentication (MFA) is enabled on your Wrapbook account
You have MICR check stock paper
Your printer is configured for check printing
Verify check stock alignment before printing large batches
Keep track of used check numbers
Maintain adequate check stock inventory
Review all payment details before finalizing the check run
Always store check stock in a secure location and limit access to authorized personnel only
How to print paper checks for vendor payments:
In the left-side navigation, click the dropdown menu, and select the project that you want to print paper checks for
In the left-side navigation expand the ACCOUNTING menu, click Accounts payable
On the project’s Accounts payable dashboard, click the Payment batches tab
Click the batch number
Enter the Payment # for each payment and then, click the Save Payment Details button
On the Check run page, confirm the checks that will be printed, and then click the Print Checks button
Your computer’s PDF viewer will open and display the checks. Use your PDF viewer to print the checks.
After checks are printed, return to the Check run page in Wrapbook and click either the All checks printed button or the Check print errors button
After you click All checks printed button:
Click the Back to check run summary link at the top of the page to see the details of all your check runs
The latest run of checks that you just printed will now appear on this list
If you click the Check print errors button:
An editable view of the Check run page will open where you can select any checks for reprinting
Click the Reprint checks button
In the popup, you have the option to enter notes about why the checks are being reprinted, then click the Reprint button
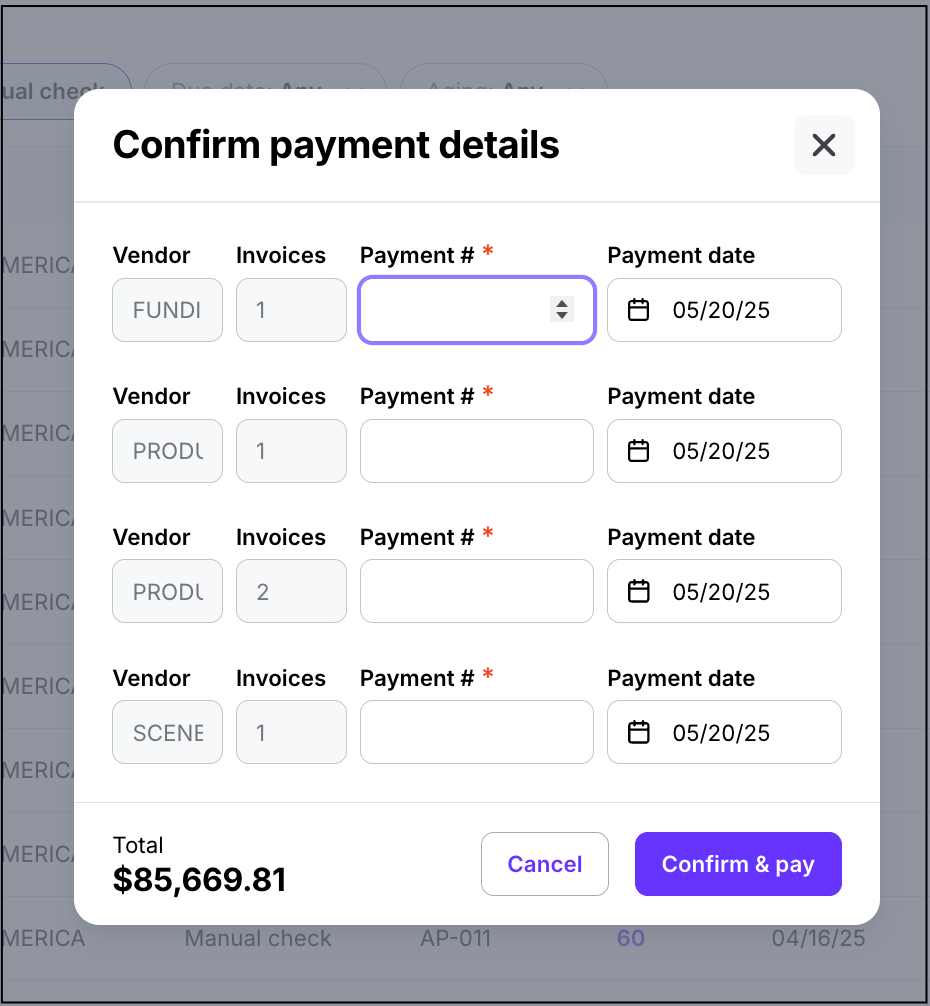
In the Confirm payment details popup, enter the Payment #s and then click the Confirm & pay button
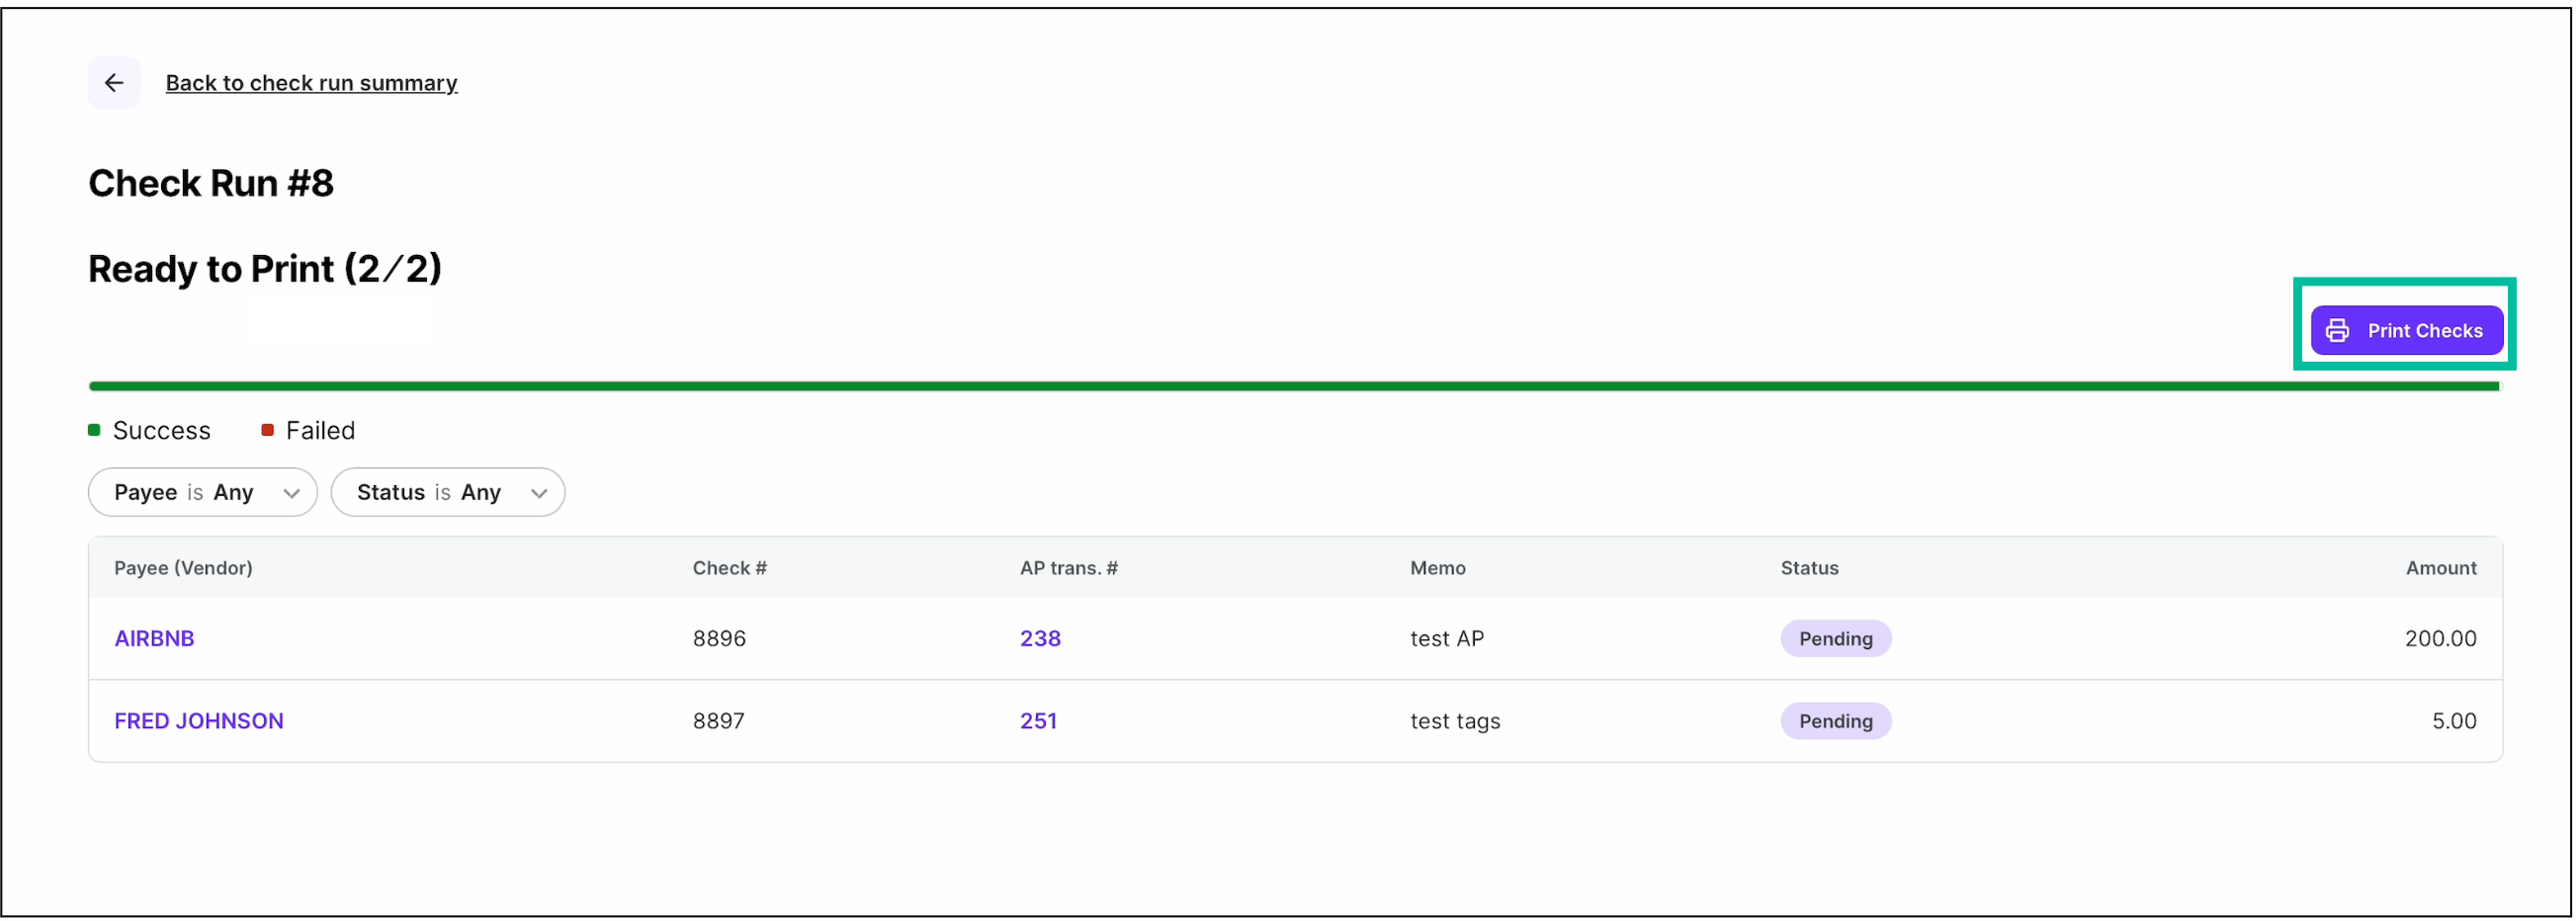
Confirm the checks to be printed, then click the Print Checks button
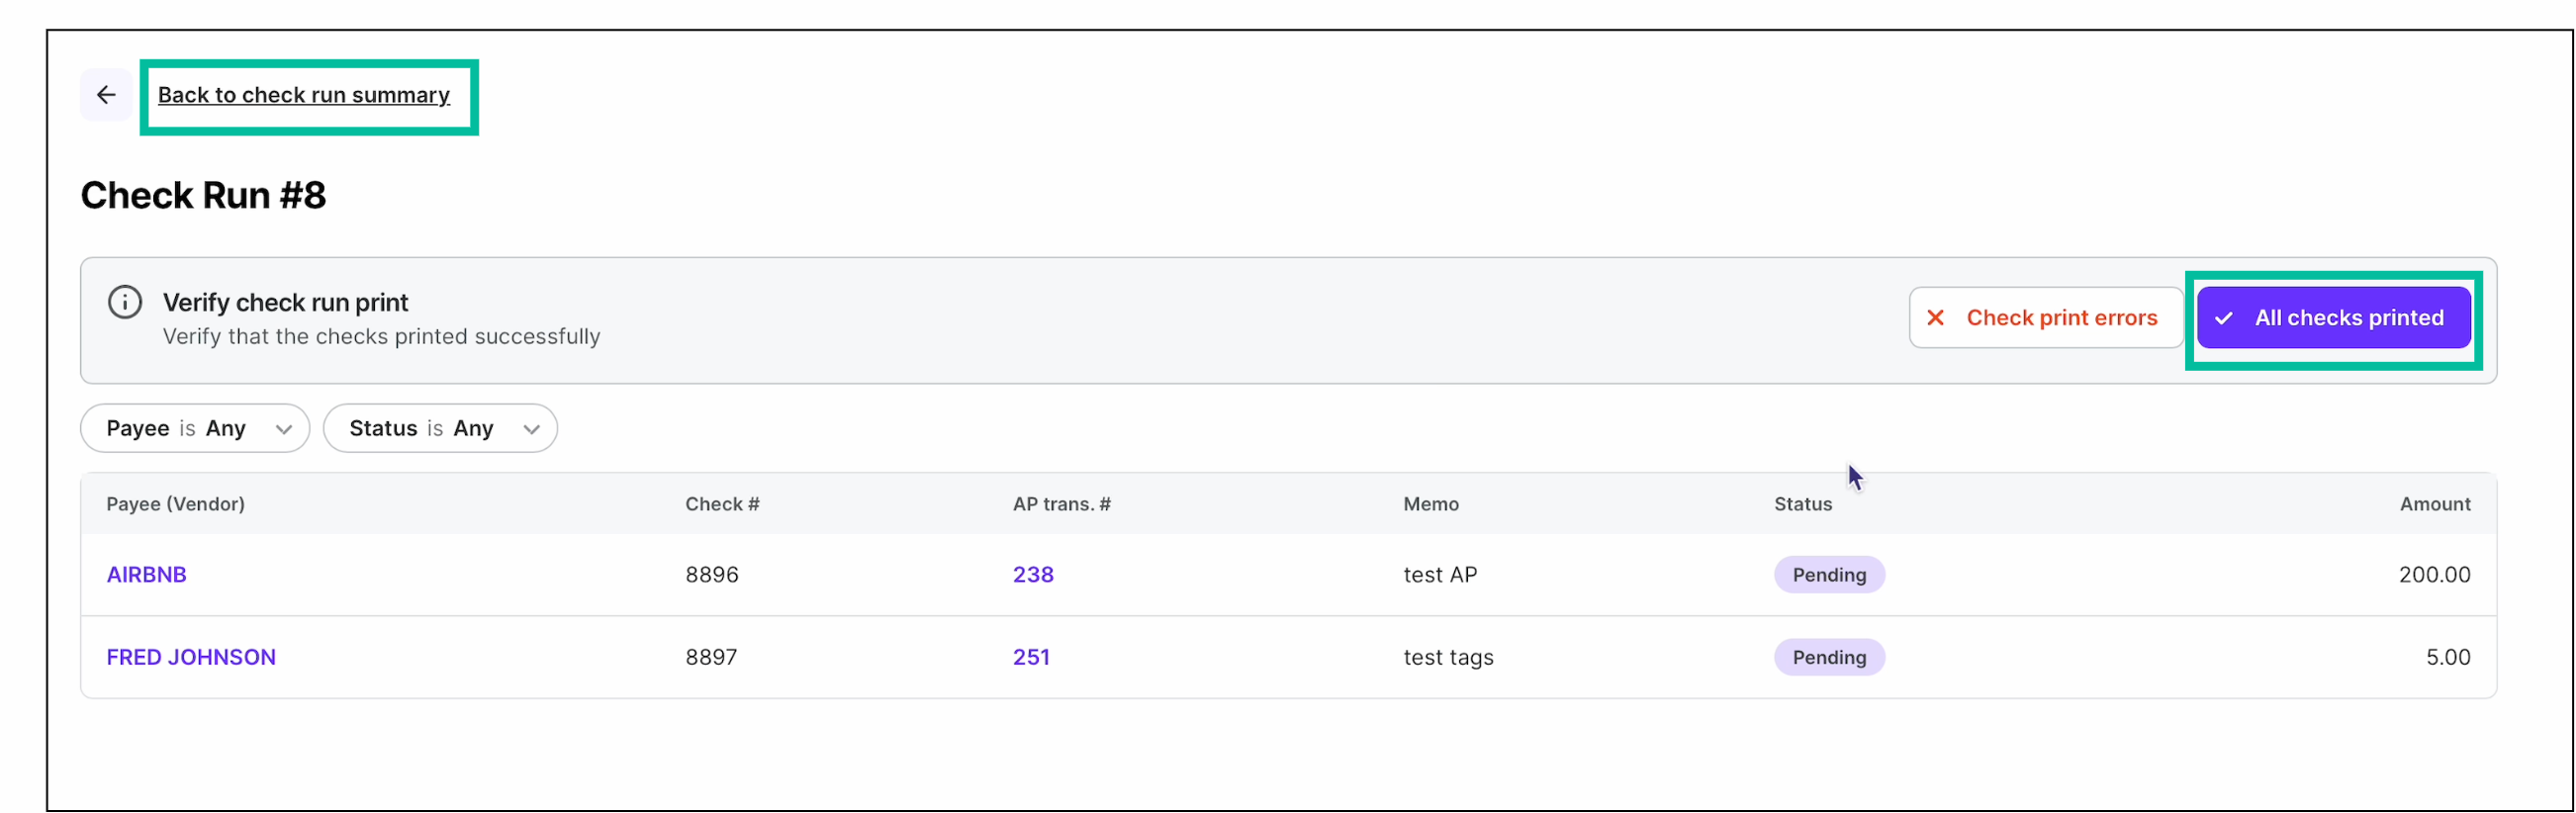
When printing is successful, click the All checks printed button, and then click Back to check run summary
How to record a manual check payment (using your own checks)
If you prefer to write or print checks outside of Wrapbook, you can still record those payments in PAS to keep your books accurate and up to date. The key is to select Manual check as the payment type, rather than Check (which triggers Wrapbook's check printing workflow) when batching the invoices.
Notes:
You can pay multiple invoices in a single manual check payment batch
The Payment # you enter is how Wrapbook tracks the payment internally. Using your actual check number is recommended for easy reconciliation
Payment numbers cannot be edited after the fact, so double-check your check number before confirming
How to record vendor payments made by manual check:
In the left-side navigation, click the dropdown menu, and select the project that you want to record check payments for
In the left-side navigation expand the ACCOUNTING menu, click Accounts payable
On the project’s Accounts payable dashboard, click the Payment batches tab
Click the batch number
Enter the Payment # for each payment and then, click the Save Payment Details button
Click the Mark as paid button to record the payments in Wrapbook
What happens next:
Once confirmed, the payments will be recorded on the Accounts payable dashboard Payments tab, and the invoices will be listed in the Paid tab