Payroll is permission based
To run payroll, your account must have one of the following roles enabled:
Role: Company Admin, Company Manager, Project Coordinator
Custom role with: Payroll information - View all, View basic, Payroll preparation - Full access, Create update, Create, Payroll processing - Full access, Allow decline, Allow
Production accountants and administrators can run payroll from a project’s PAYROLL dashboard.
Go to the project PAYROLL dashboard
To run payroll:
From the left-side navigation, click the dropdown menu
Select the name of the project that you want to see payroll for
In the left-side navigation, click PAYROLL to expand the menu
In the PAYROLL menu, click Run payroll
Start the payroll workflow
When you click the Run payroll button on the Payroll dashboard, the Run payroll page will open. At the top of the page, a progress bar updates as you move through each step in the workflow.
If you close the Wrapbook window at any point during the payroll workflow, the payroll will be saved as a Draft and will be accessible from the Payroll dashboard.
The payroll workflow steps are listed below.
Click the arrow next to each step to see the instructions.
1. Invoices and payments
Resolve any payroll alerts
If there are any timecards that need to be reviewed, an alert will appear at the top of the page. Click View timecards to review the items. To learn more, see Timecards.
Review pending items
Use the table of Pending Items to see information about payables including: Recipient, Department, Item, Date, Reviewer, and Amount. Click the table headers to sort the items in the list
You can use the search bar and filters to find specific items
The Total dollar amount of all selected items in the list is displayed at the bottom of the table
Updating pending items
By default all payables listed will be selected. To exclude a payable from the list click the checkbox to unselect.
In the Item column, you can click on any payable to review it, update it by clicking the pencil icon, or decline it
Once you’ve finished, click the Go to Review button to proceed to the next step in the workflow. After you click the button, Wrapbook will begin calculating payroll deductions and net pay.
Is the Go to Review button disabled? Click the arrow to learn more.
A greyed-out Go To Review button means that either your company hasn’t been approved to run payroll or the production is not approved for Workers' Compensation. If you have not attended a Wrapbook Onboarding Webinar to be approved to run payroll, please contact your Client Success Manager (CSM). If the issue is Workers' Compensation related, check to see if a WC COI exists in the project's Documents folder. If not, email workerscomp@wrapbook.com.
2. Review payroll
At the top of the Review payroll page, are:
The Payroll number
The date payroll was Created
The Last Edit date
For your review, payroll items are listed by Recipient and separated into sections for Employee Wages, Contractor & Loan-Out Payments, and Reimbursements.
Click the arrow next to each section to learn more.
Employee Wages
In the Employee Wages table you can:
Click on a Recipient to see their profile
Click on an item in the Payables column to see its details
Click a dropdown menu in the Pay Frequency column to make updates if necessary
Hover your cursor over the information icons in the Deductions column to see breakdowns
Remove a Recipient and their items from the list, by clicking the X at the end of the row
If the Recipient has more than one payable, the confirmation popup will allow you to Select All or select individual payables to remove
When you’re ready, click the Remove button in the confirmation popup
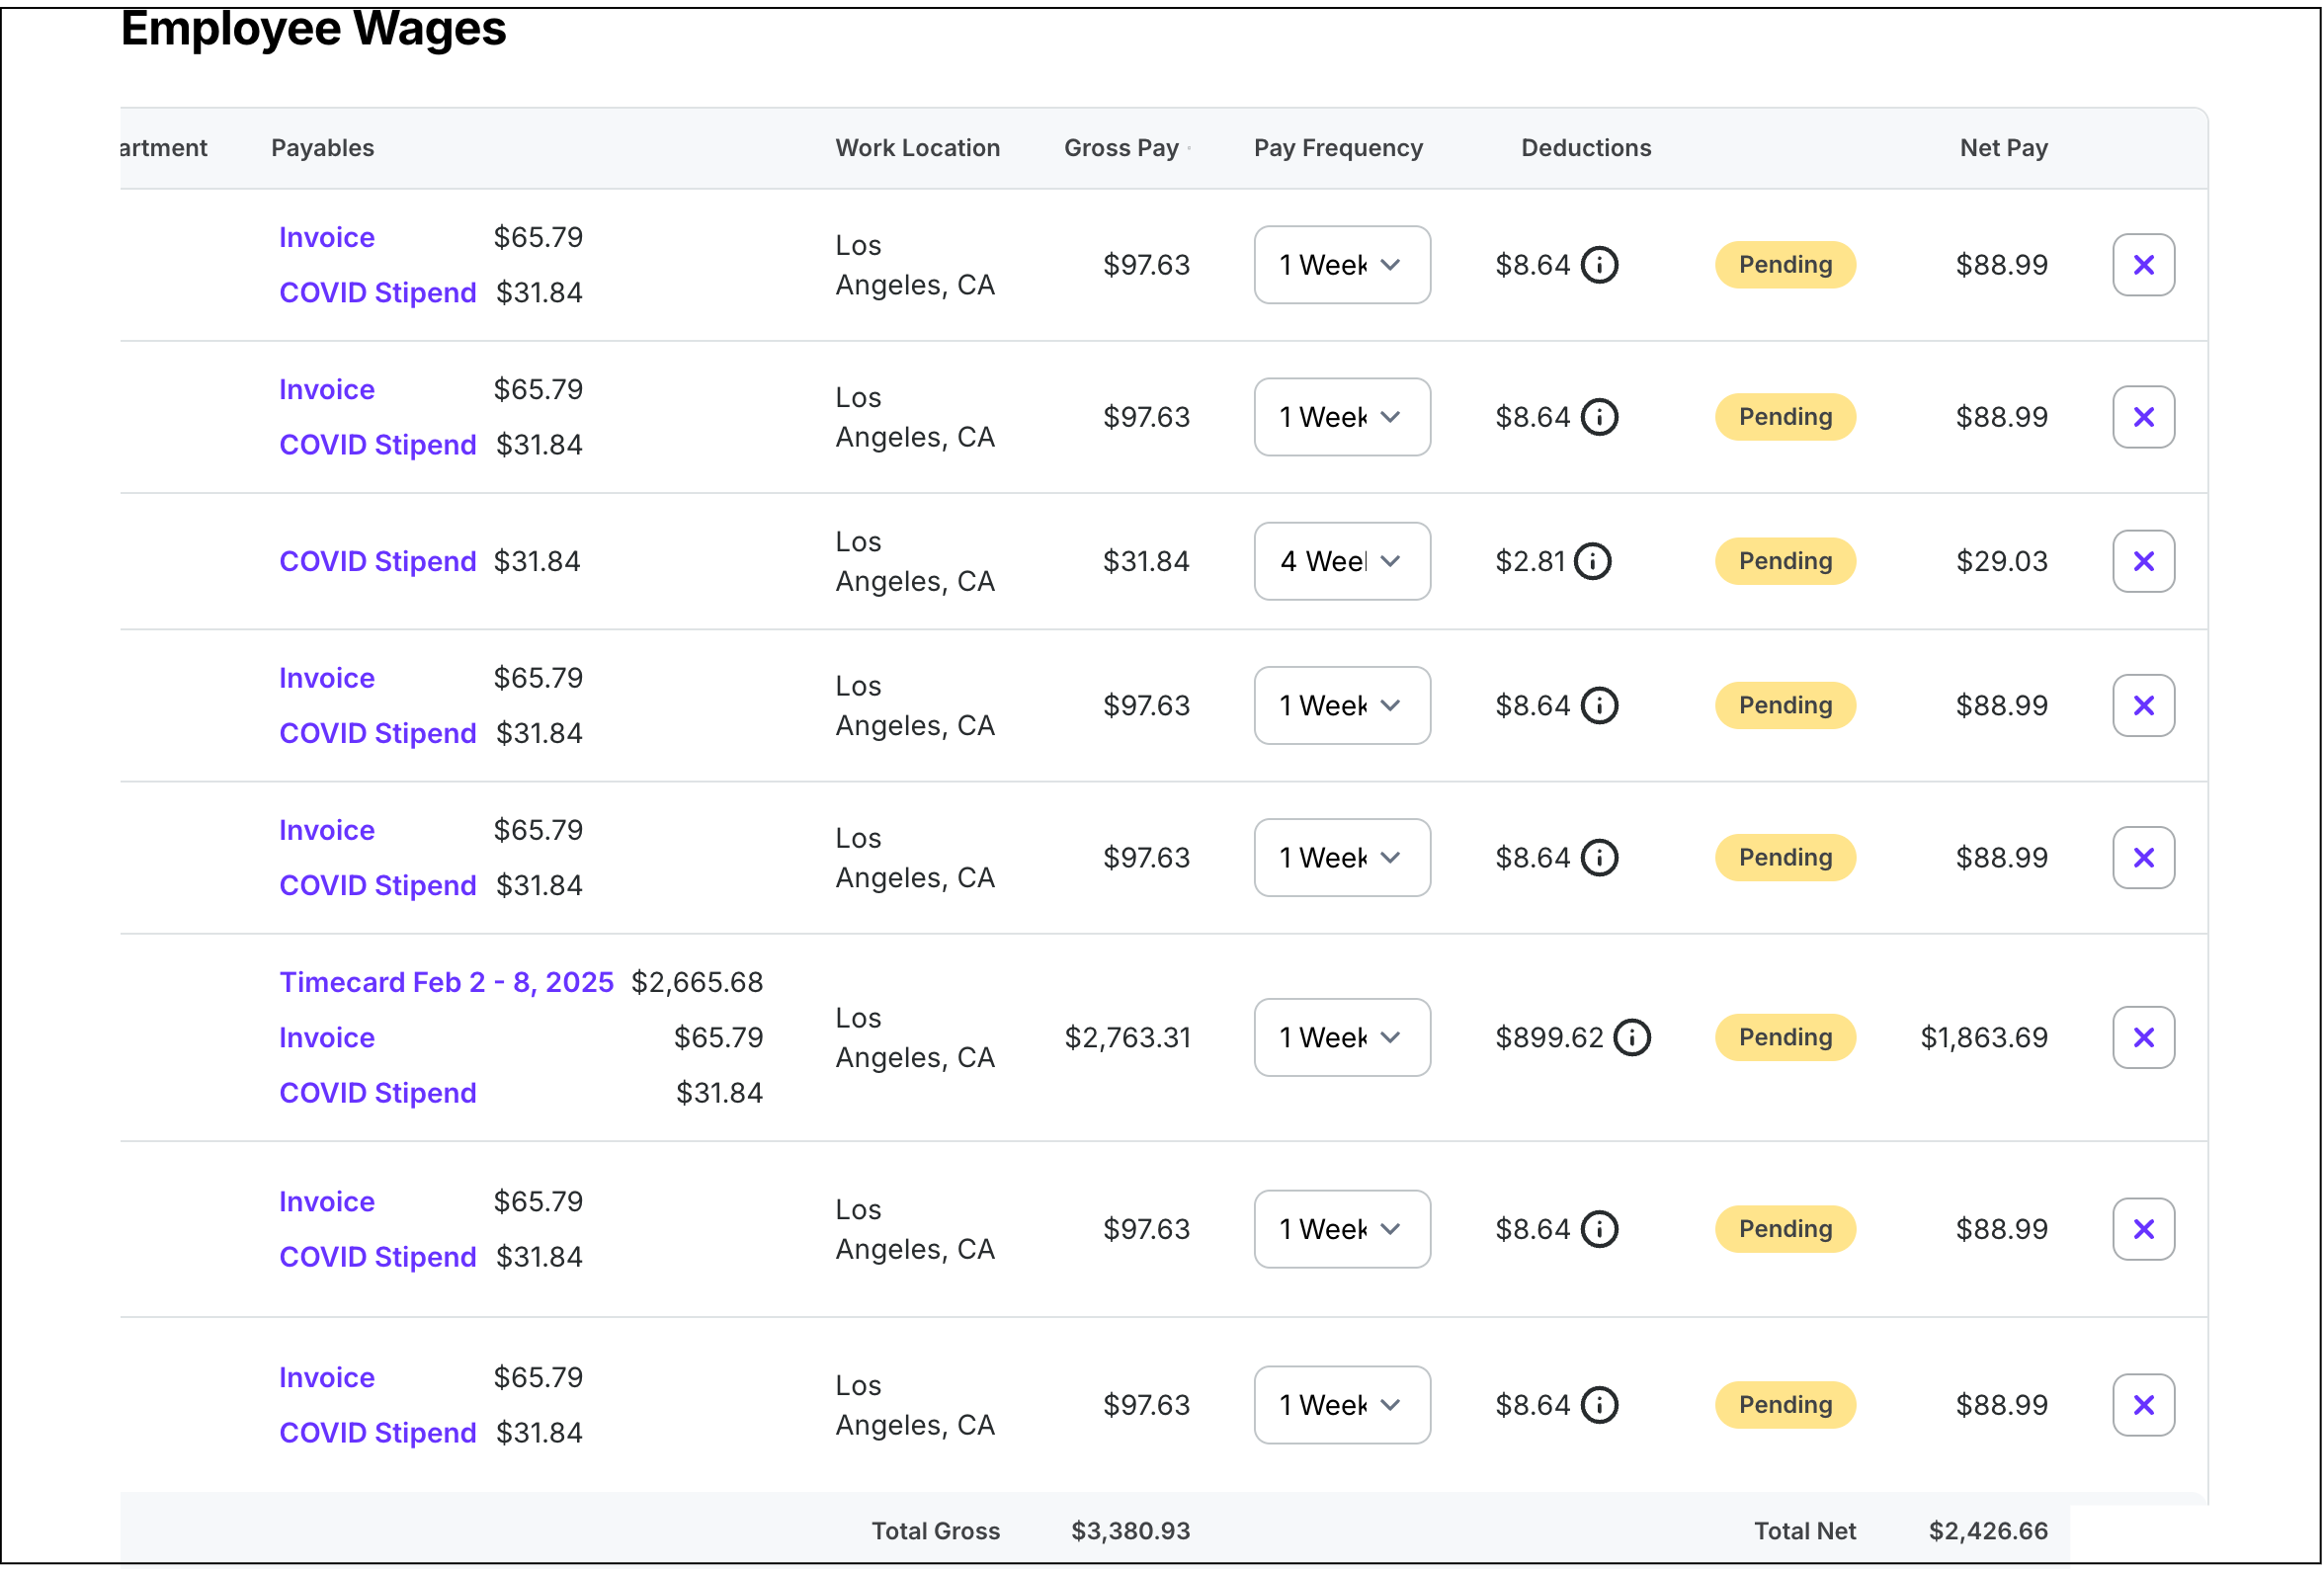
Example of the Employee Wages table
Contractor & Loan-Out Payments
In the Contractor & Loan-Out Payments table you can:
Click on a Recipient to see their profile
Click on an item in the Payables column to see its details
Remove a Recipient and their items from the list, by clicking the X at the end of the row
If the Recipient has more than one payable, the confirmation popup will allow you to Select All or select individual payables to remove
When you’re ready, click the Remove button in the confirmation popup
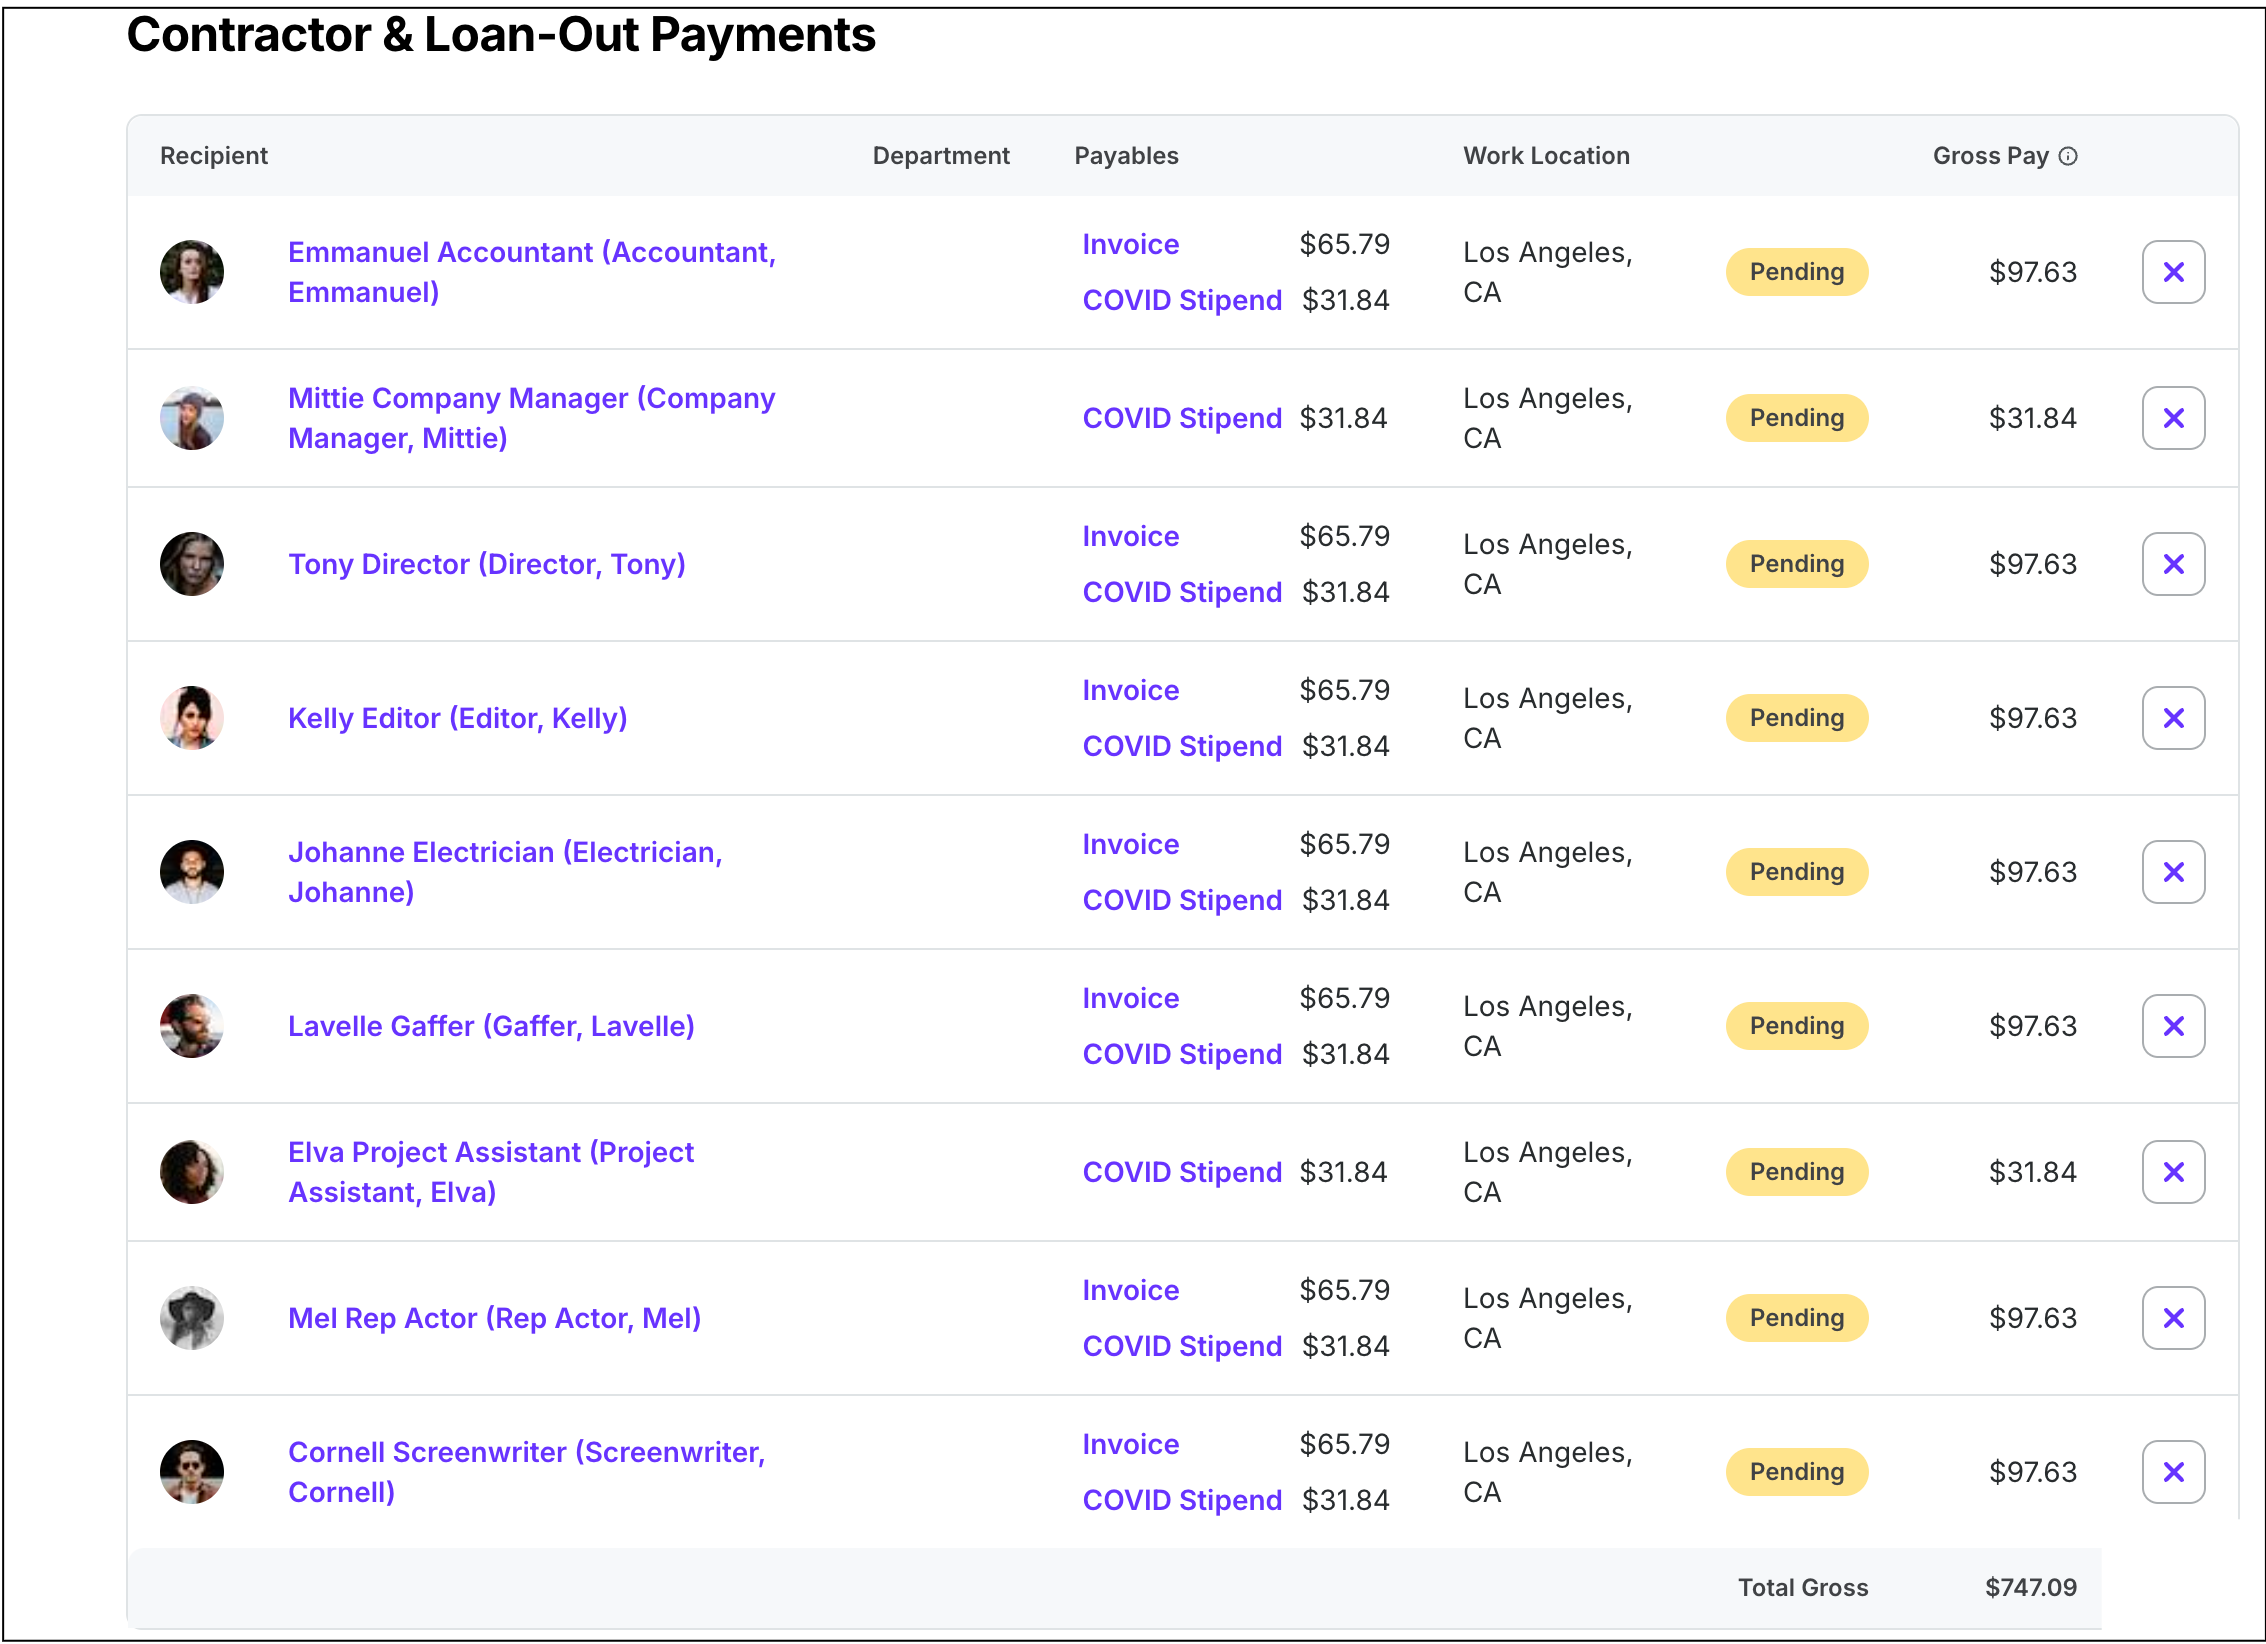
Example of the Contractors & Loan-Out Payments table
Reimbursements
In the Reimbursements table you can:
Click on a Recipient to see their profile
Click on an item in the Payables column to see its details
Remove a Recipient and their items from the list, by clicking the X at the end of the row
If the Recipient has more than one payable, the confirmation popup will allow you to Select All or select individual payables to remove
When you’re ready, click the Remove button in the confirmation popup
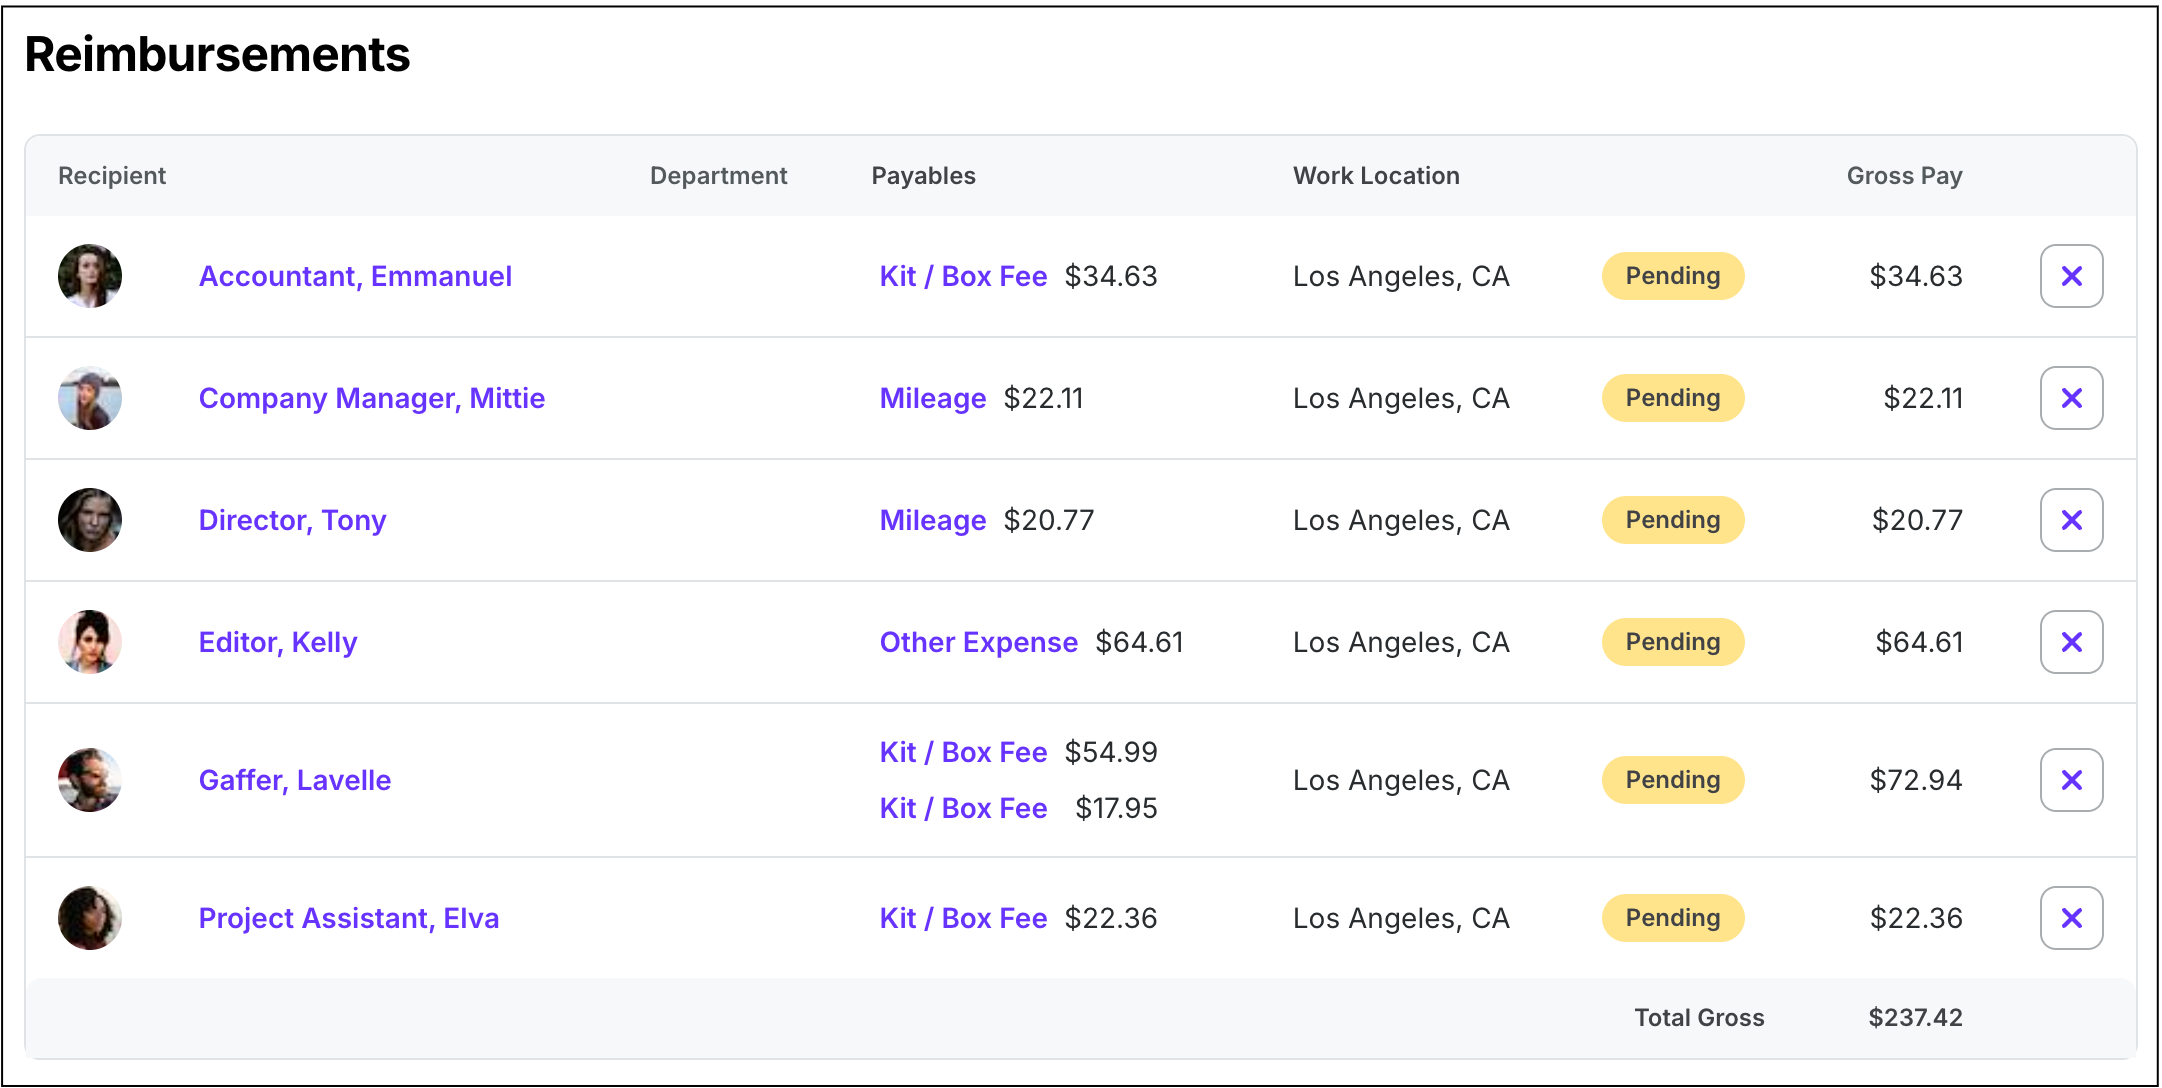
Example of the Reimbursements table
Union payroll
If you’re running payroll for a union project, a Wrapbook Payroll Specialist will be needed to calculate employer taxes before funding. Click Calculate Taxes to initiate this process. You’ll receive an email confirming the payroll was submitted to Wrapbook for review. Once calculated, a second communication will be sent notifying you calculations are complete and the payroll is ready for funding.
Summary
The Summary section of the Review Payroll page is where Totals are listed.
In the Summary, you can click the toggles to see a breakdown for: Wages, Employer Fees & Contributions, and Workers’ Compensation.
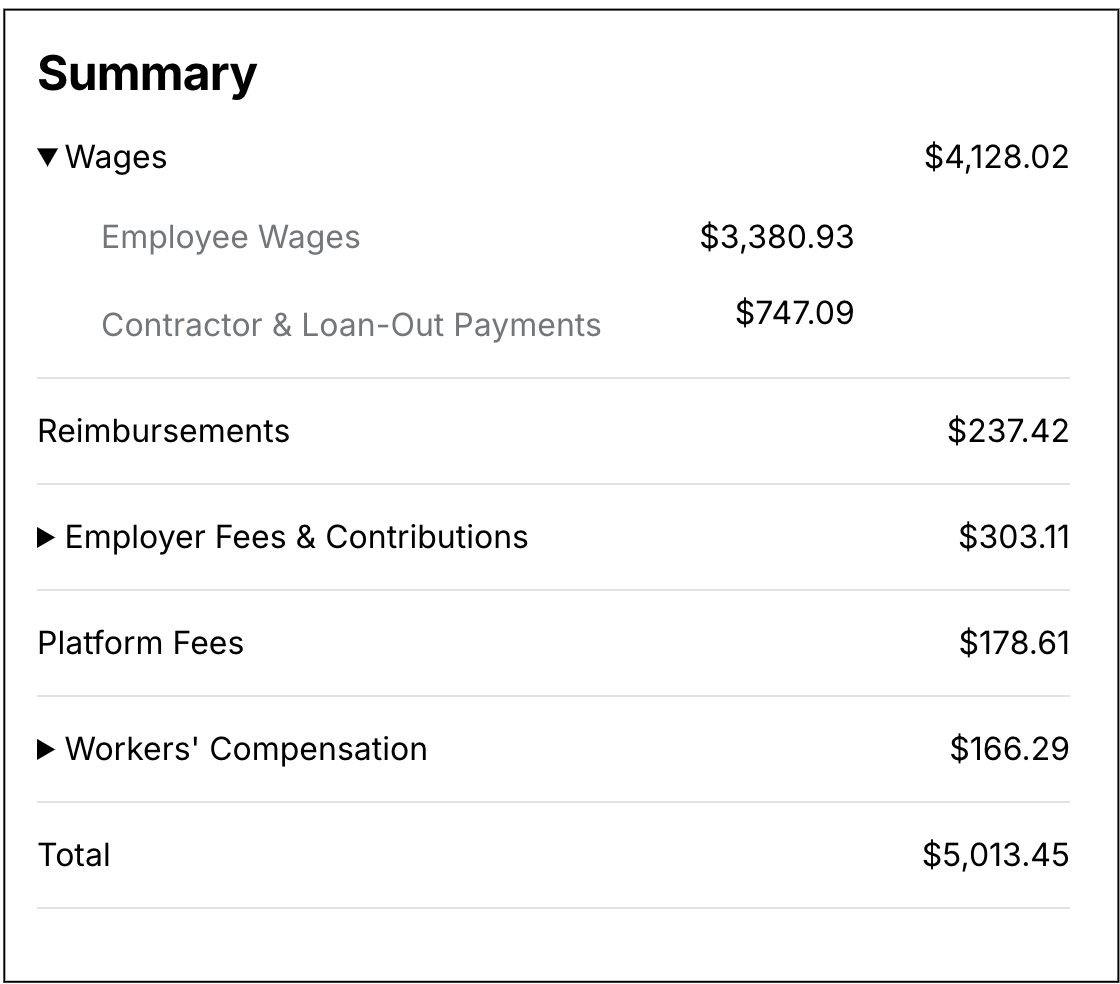
Example of the Summary section of the Review payroll page
If there any attestations at the bottom of the Review payroll page, you’ll need to click the checkbox to confirm before proceeding to the next step in the payroll workflow.
Export all to PDF
At the bottom of the Review payroll page, you can click the Export all to PDF button and select Timecards Only or All Payables to generate a list of payables in the payroll.
Payroll Log
At the bottom of the Review payroll page, you can click the Payroll Log button to generate a file that’s compatible with the following accounting tools:
CAPS+ (combined fringes)
CAPS+ (fringes by section)
Hot Budget (no headers)
Hot Budget (with headers)
Acumatica NFS
Showbiz
When you’re ready to move to the next step in the payroll workflow, click the Continue to Fund Payroll button.
3. Fund payroll
View invoice
At the top of the Run payroll page, you can click the View invoice button to generate a PDF of the payroll funding invoice.
The first page:
Provides key details about the payroll such as payroll ID and the date
Includes the entire total of the payroll you want to process
The second page:
Is a breakdown of payments by category including Employee wages, Kit fees, Expenses, Employer FICA, Federal Unemployment, Employer Medicare, State Unemployment, Workers’ Compensation, Employer Union Fringes, and Wrapbook Platform Fee
The third page:
Is a complete fringes report, including any union dues, for your payroll as well as our fees and your wages

Click View Invoice at the top of the Run payroll page
Funding summary
At the bottom of the Review payroll page, is a summary of how payroll will be funded
If your company has linked multiple bank accounts to a project, you’ll have the option to select a bank account from a dropdown to fund the payroll
Click the button to fund the payroll
Note, the fund payroll button that’s displayed depends on the payroll’s funding method. For example, if payroll is being funded via an ACH transfer, the button will say, Debit Bank Account. If the payroll is being funded via net terms, the button will say, I will send.
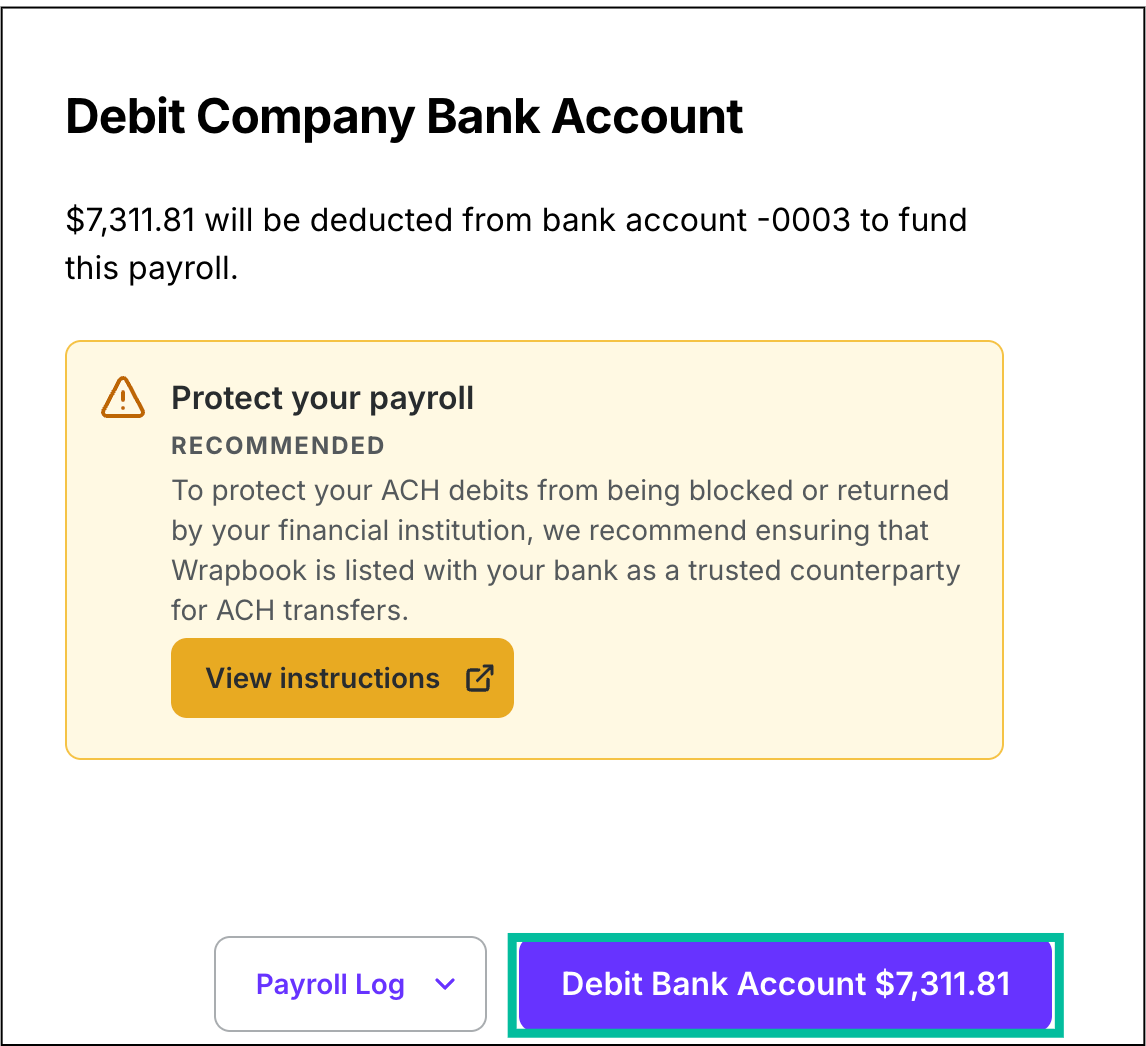
Click the purple button to fund payroll
4. Complete
After you fund payroll, you’ll see a confirmation message confirming that payroll has been submitted to Wrapbook for processing
The message also includes details specific to your company’s funding method and an estimated pay date for workers who accept direct deposits
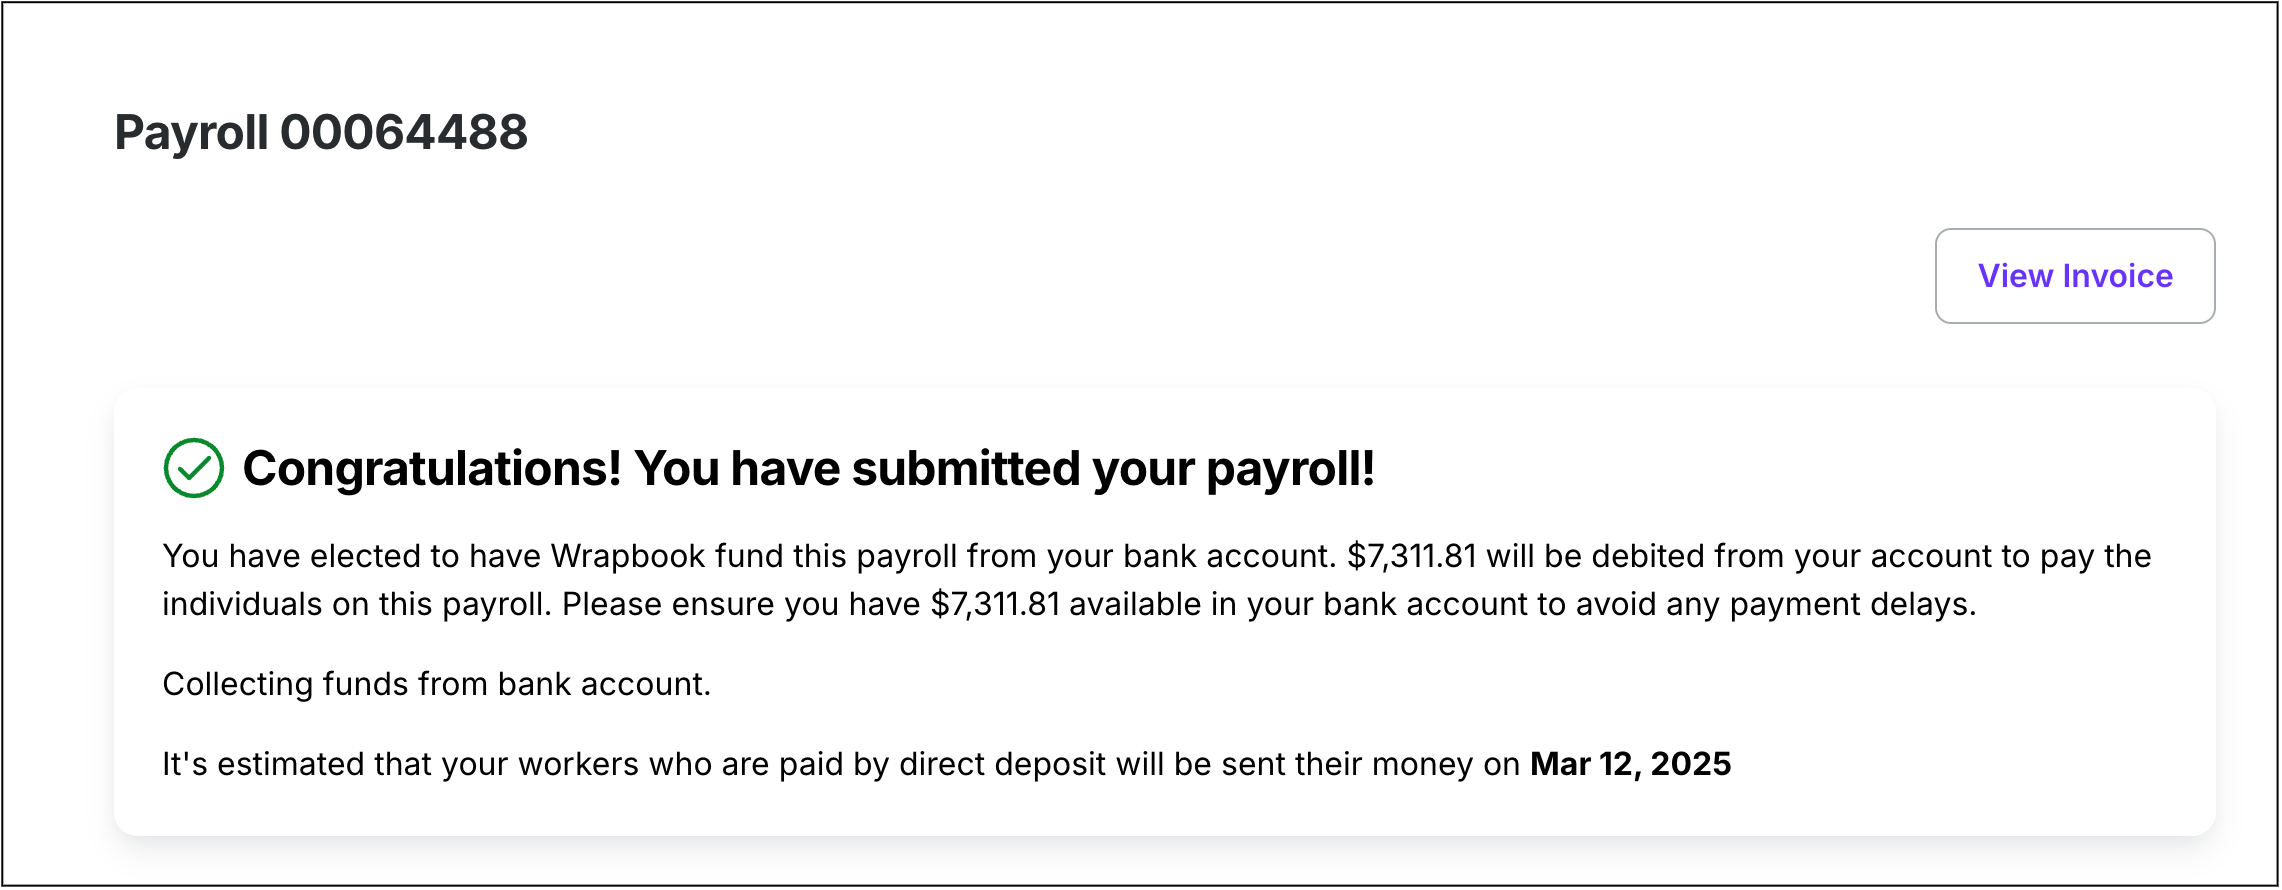
Example of the Payroll Submitted confirmation message