Overview
A fringe report gives you a detailed breakdown of fringe costs; like union benefits, payroll taxes, workers' comp, across payroll, a project, or company. This report is especially valuable for productions that need to track true labor costs for budgeting, union reporting, or cost reconciliation.
The report includes key information such as:
Project and worker details
Gross wages and employer payroll taxes
Workers' compensation insurance
Union benefits (health, pension, annuity)
Fringe rates and total fringe costs
Fringe reports can be created in the following file formats:
PDF
CSV

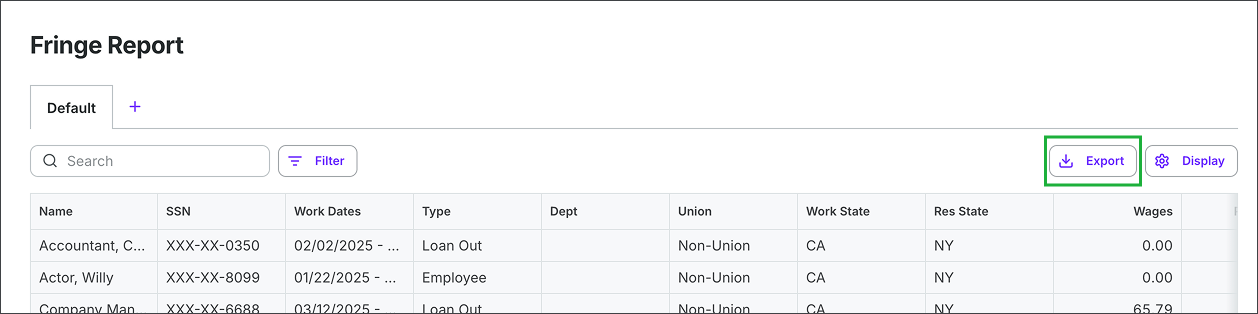
Example of a Fringe Report in Wrapbook
How to create a fringe report
You can create a fringe report from either:
The company-level Reports dashboard, or
A project's Payroll reports menu
Create a fringe report from the company's Reports dashboard
To create the fringe report:
In the left-side navigation, click the dropdown menu
In the dropdown menu, select All projects
In the left-side navigation, click Reports
On your Reports dashboard, under Fringe Report, click the View report button
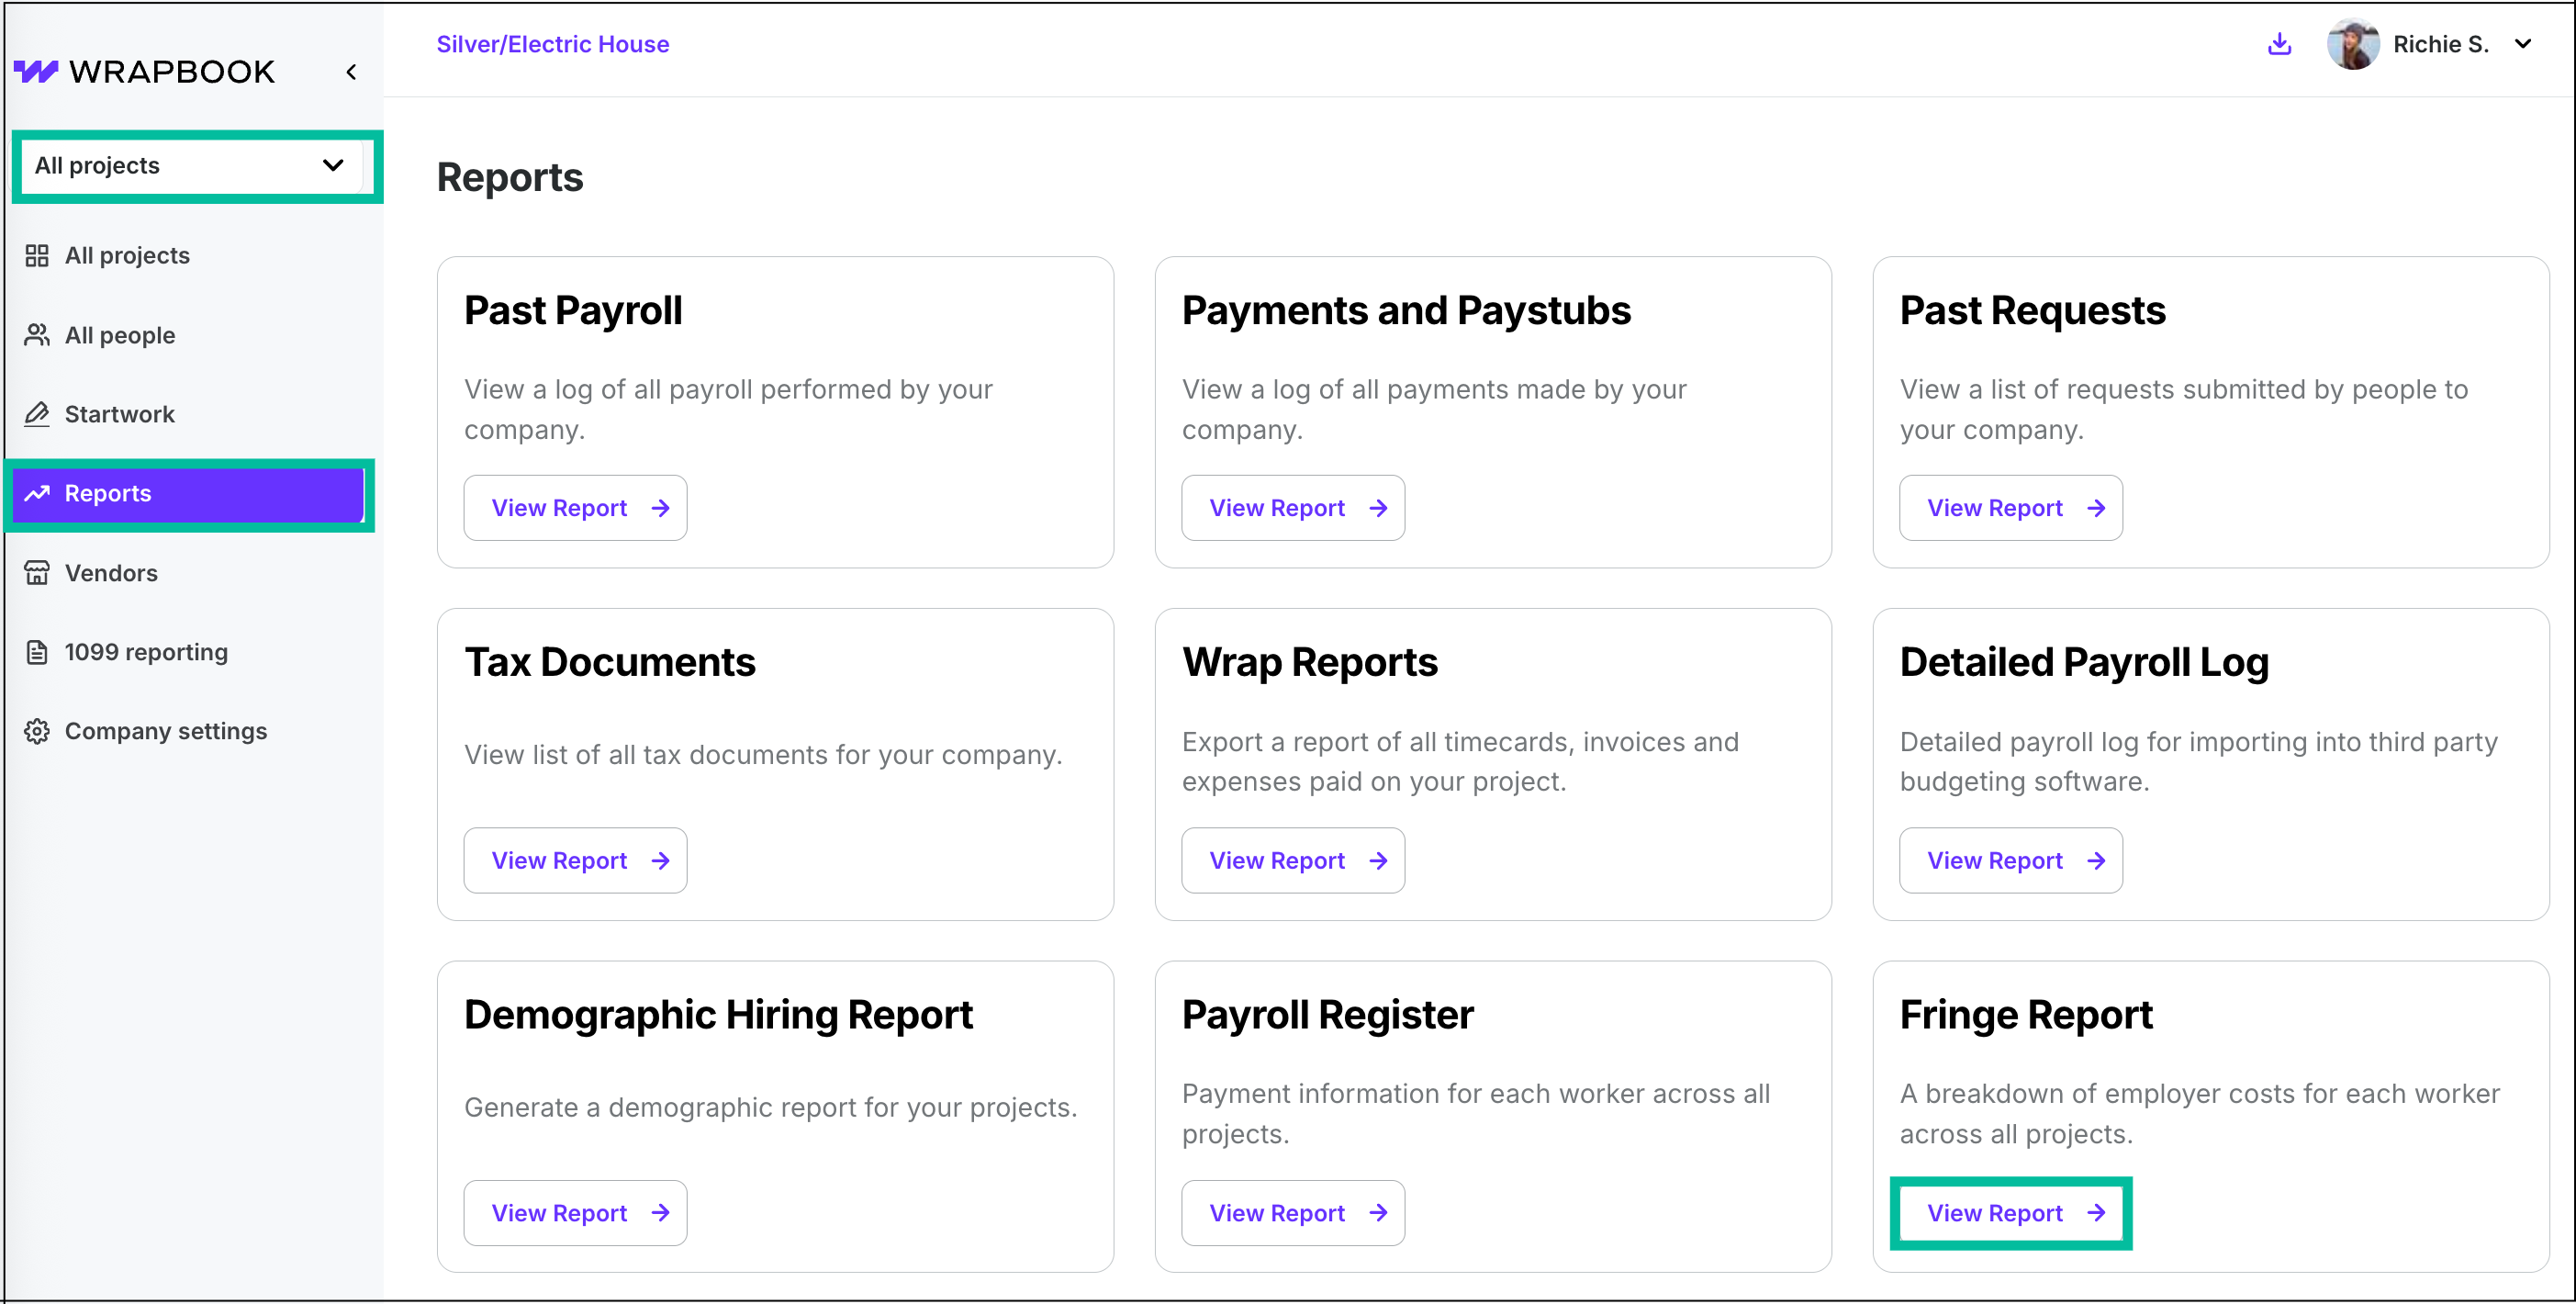
In the left-side navigation, click the dropdown menu and select All projects, click Reports, and then click the View Report button under Fringe Report
Create a project-level fringe report
To create a project-level fringe report:
In the left-side navigation, click the dropdown menu
In the dropdown menu, select the project that you want to run a fringe report for
In the left-side navigation, click Payroll reports
On the Payroll reports dashboard, click the View button next to Fringe Report
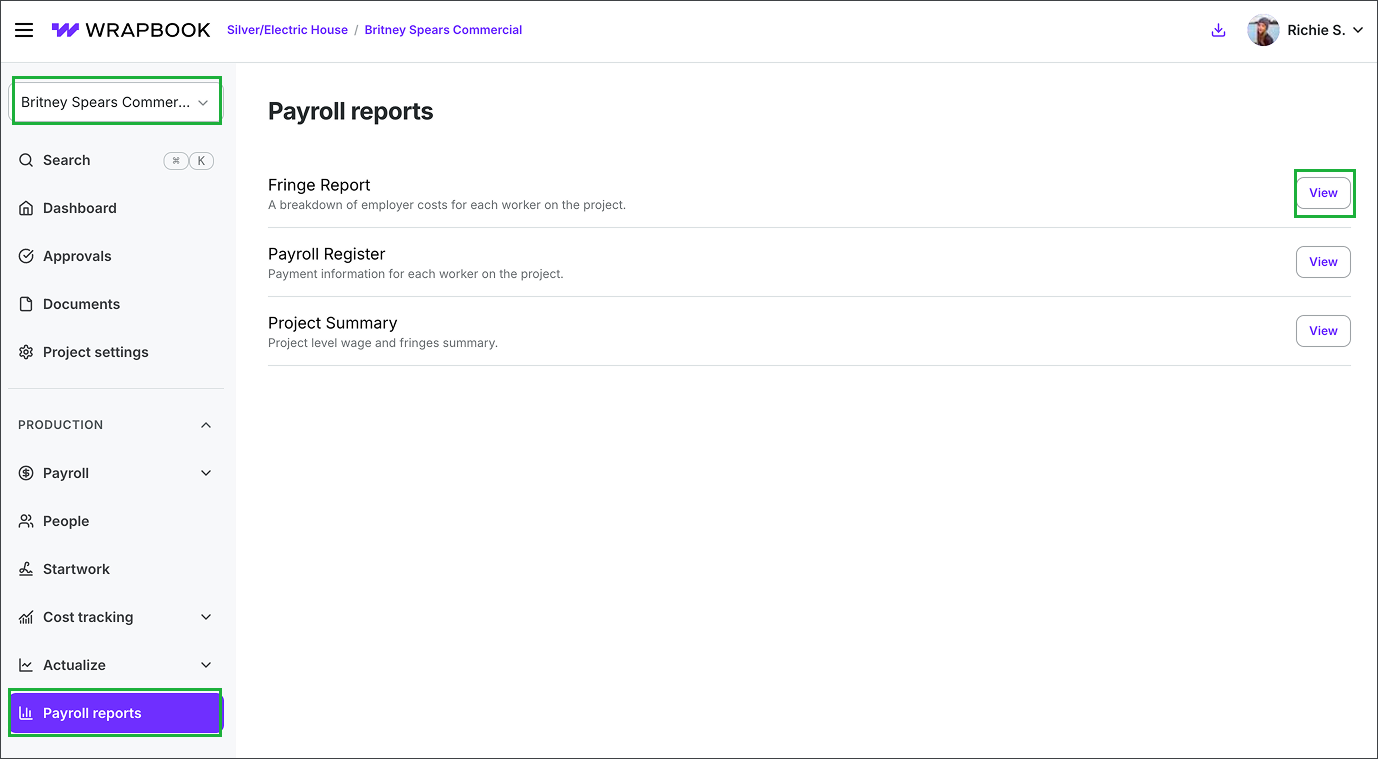
Select a project, click Payroll reports, then click Fringe Report
Search, filter, and customize columns in your fringe report
Once you're on the Fringe report dashboard, you can use the search bar and filters to customize what data appears in the report.
Search by worker name
Use the Search bar at the top of the report to find a specific worker by name.
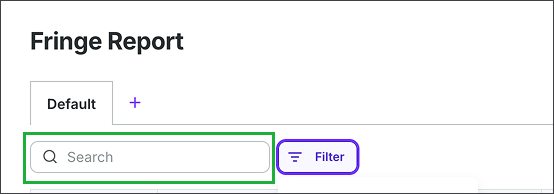
Search by worker name
Apply filters
Click the Filter button to apply any of the following filters:
Project (available for company-level reports only)
Batch ID
Check Issued Date
Department
Local #
Residential State
Union
Week Ending
Work State
Worker Type
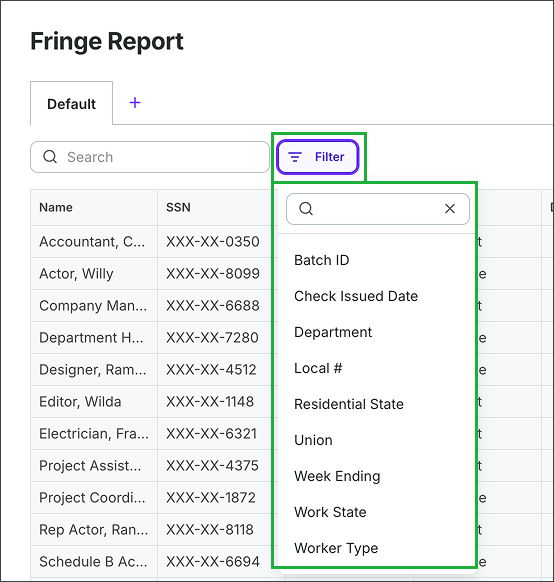
To customize the data shown in the Fringe Report, click the Filter button and then in the dropdown menu, click to select the type of information that you want to see.
Customize columns
Click the Display button to show or hide specific columns in the report table.
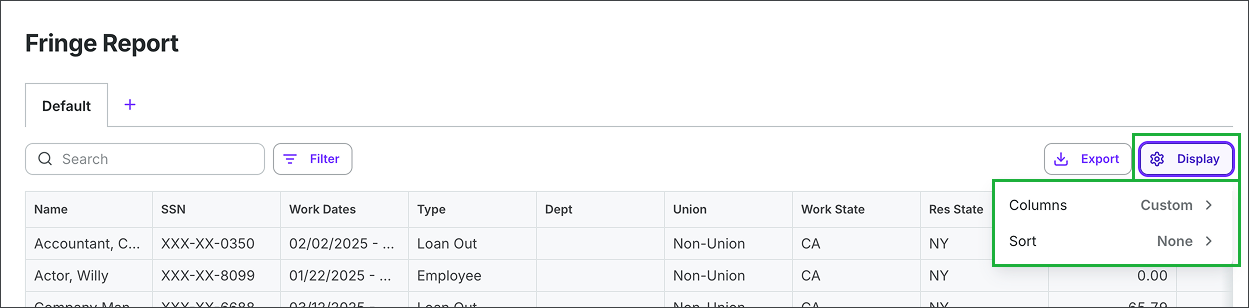
To customize and sort the Fringe Report columns, click the Display button, and then make your selections.
Save custom views
You can save a customized version of your Fringe Report as a named tab, making it easy to return to the same filters and settings without reconfiguring them each time.
How to create a new view
On the Fringe Report dashboard, Click the + button next to the Default tab
In the New view popup, enter a name for your view
Click the Save button
Your new view opens as a tab. Apply any filters or display settings you want and they'll be saved with that view.
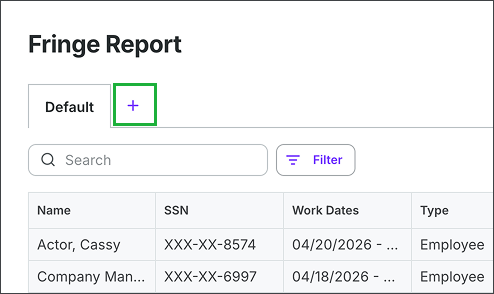
To create a new custom view of the Fringe Report, click + next to the Default tab
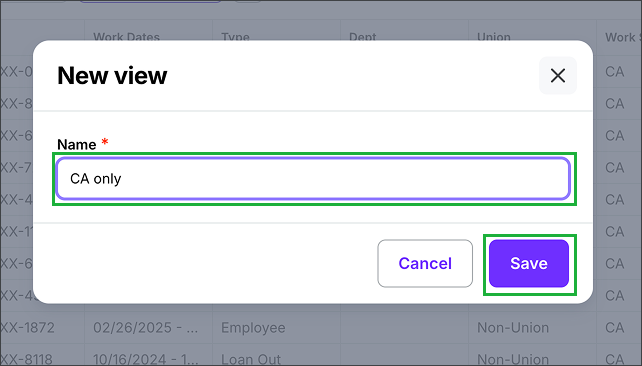
Enter a name for the view and then click the Save button
Manage your views
To rename, duplicate, or delete a view, click the dropdown arrow on the view's tab and select an option:
Rename — update the view's name
Duplicate — create a copy of the view with its current filters
Delete — permanently remove the view
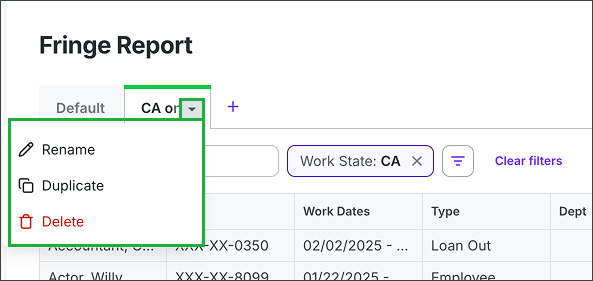
To rename, duplicate or delete a custom view, click the small arrow within the tab, and then make your selection from the dropdown menu
Export your fringe report
Once you've configured your report, you can save it to your computer:
On the Fringe report dashboard, click the Export button in the top-right corner
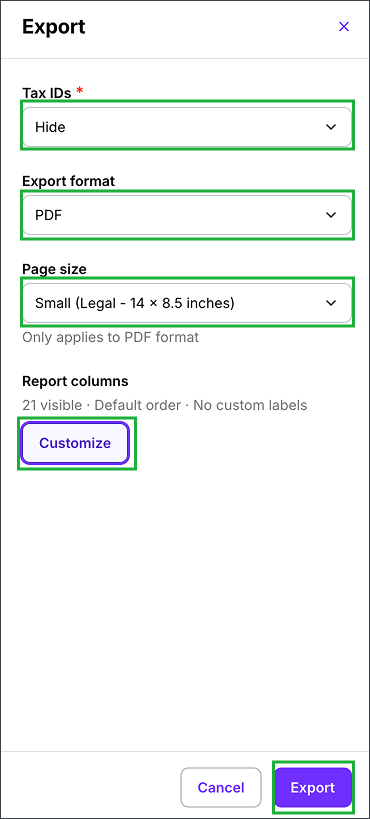
In the Export drawer, use the dropdown menus and the Customize button to select your export preferences for:
Tax IDs - show/hide
Export - CSV, XLXS, or CSV
Page size
Report columns - show/hide
When you’re ready, click the Export button
The Fringe Report will be saved to your computer. You’ll also be able to access the Fringe Report from your downloads in Wrapbook.
To download a copy of the Fringe Report, click the Export button
In the drawer, you can click on the dropdown menus and select from the options to customize the export of the Fringe Report. Click the Customize button to show/hide columns. When you’re ready, click the Export button.