Overview
A cost report in Wrapbook compares budgets to actual expense transactions, including purchase orders (POs)
Cost reports can be used by production accountants to:
Track budget versus actual spending
Monitor department costs
Forecast remaining expenses
Cost reports can be generated to include any of the following:
Summary view
Detail view
Combined summary/detail
Cost reports can be exported in multiple formats:
PDF
XLSX (Excel)
CSV (raw data export)
How to create a cost report
In order to create a cost report, Wrapbook’s Production Accounting Suite must be enabled.
Once PAS is enabled, you can begin creating your report by going to Accounting reports dashboard:
In the left-side navigation, click the dropdown menu
In the dropdown menu, select the name of the project that you want to create a cost report for
In the left-side navigation, expand the ACCOUNTING menu, and click Accounting reports
On the Accounting reports dashboard, click the Create report button next to Cost report
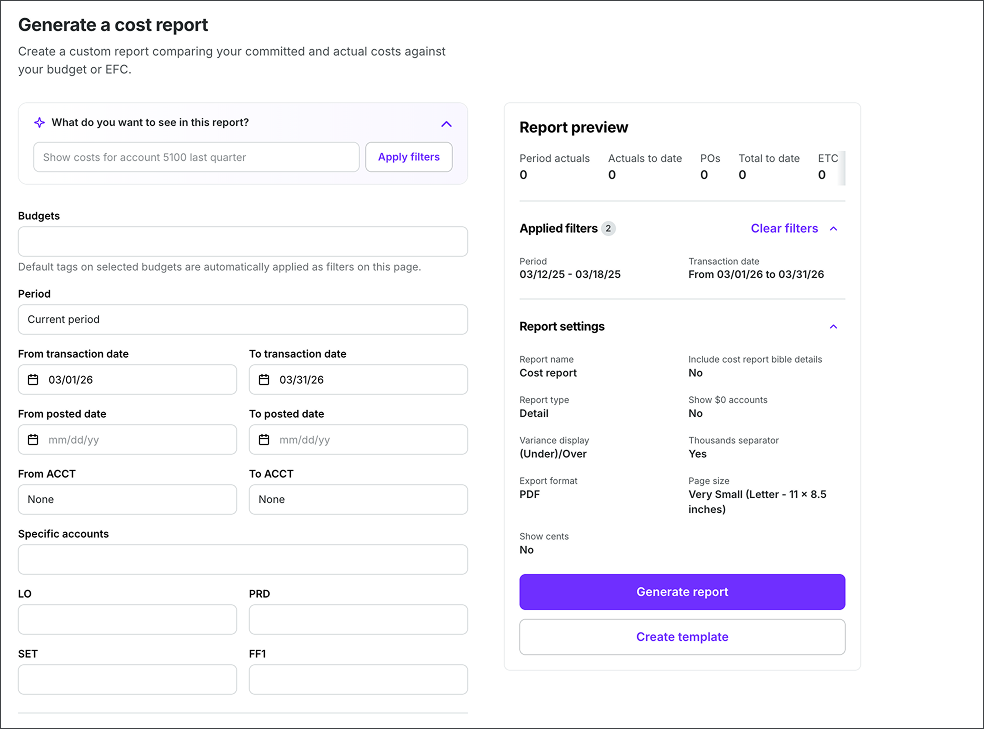
Screenshot of the Generate a cost report page
With PAS enabled, you can also access cost reports from the project’s Budget/EFC dashboard:
In the left-side navigation, click the dropdown menu
In the dropdown menu, select the name of the project that you want to create a cost report for
In the left-side navigation, expand the ACCOUNTING menu, and click Budget/EFC
On the Budget/EFC dashboard, click the Cost report button
What do you want to see in this report?
On the Generate a cost report page, under What do you want to see in this report?, you can use simple conversational language to describe what data you want to include in the report.
Here’s how it works
Under What do you want to see in this report? type a description of the data you want to show in the report
.png)
Type a description of the information that you want to see in the report
Cost report manual filters
You can apply the following filters to the cost report:
Period range
Transaction date range
Posted date range
ACCT numbers
LO
PRD
SET
FF1
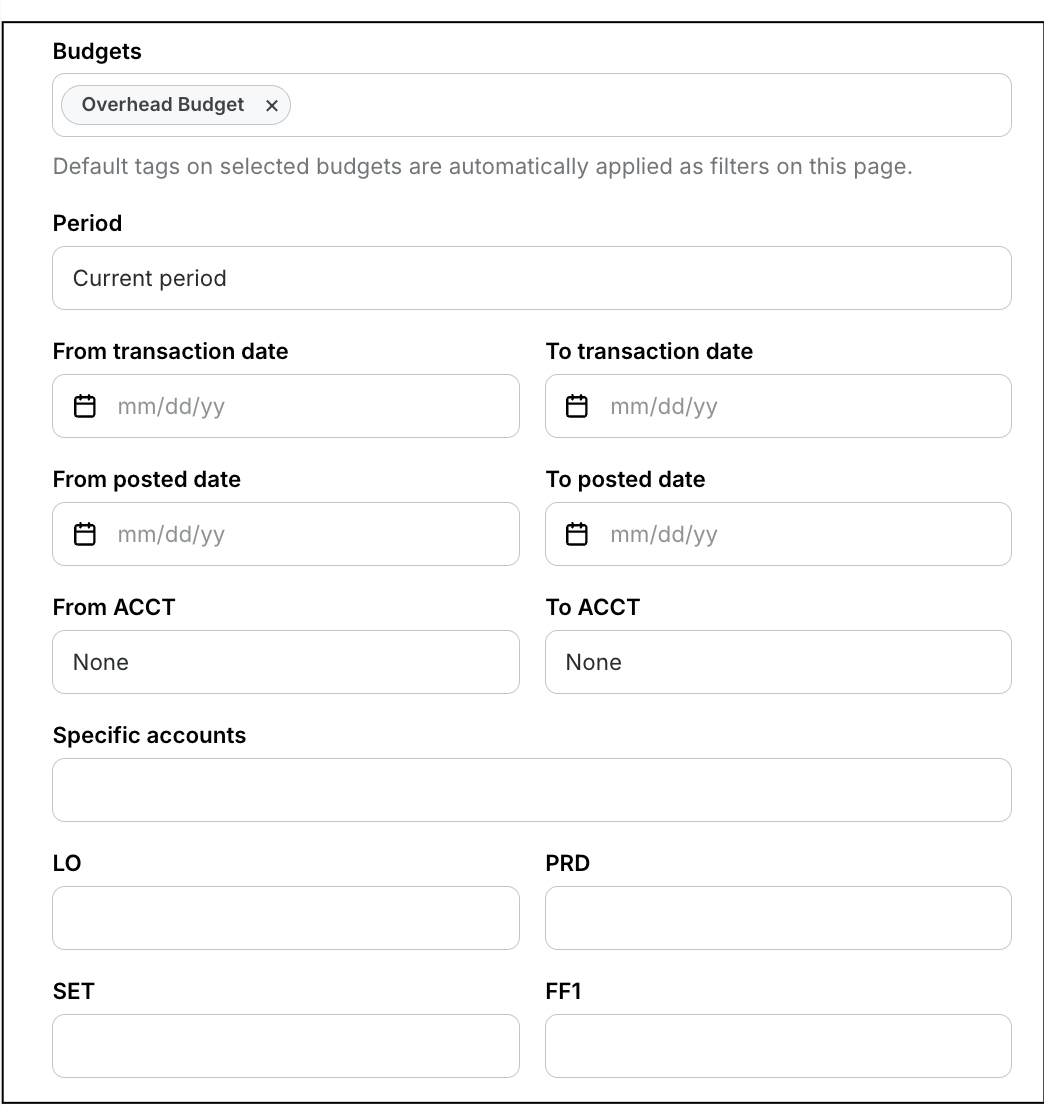
Screenshot of the cost report filter options
Cost report settings
Before you generate a cost report, you’ll be prompted to enter the following information in the Report settings section:
Report name
Report type (Detail or Summary)
Export format (PDF or CSV)
Page size (Letter, Legal, Ledger/RA3 or 2x Ledger/RA2)
You’ll also have the the options to:
Include cost report bible details
Show $0 accounts
Decide how variance/period period should be displayed
Show cents
Edit the report columns
Under Report columns, you can click the Customize button to the following columns:
Account
Description
Period actuals
Actuals to date
POs
Total to date
ETC
EFC
Budget
Approved overages
Total budget
Variance
Period variance
% complete
After clicking Customize, use the customize Report Columns popup to:
Select or remove columns — check or uncheck the boxes next to each column name
Rename a column — click an existing column name and type a new one
Reorder columns — hover over the four-dot icon to the left of a column name, then drag it to a new position
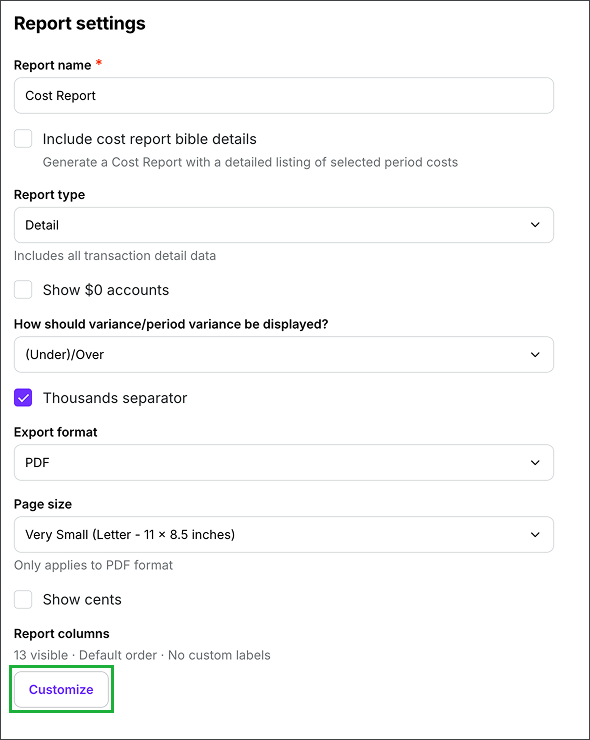
Screenshot of cost report settings options. Click the Customize button to choose which columns to include in the report, update column names, and change the column order.

Check the columns you want to include, click a column name to rename it, and use the four-dot handle to drag it into a new position
Preview your cost report
In the Report preview section of the Generate a cost report page, you can see how the report will appear based on the filters and settings you’ve applied.
Generate your cost report
On the Generate a cost report page, click the Generate report button
After you click the button, your report will begin automatically downloading to your computer. You’ll receive an email once it’s ready.
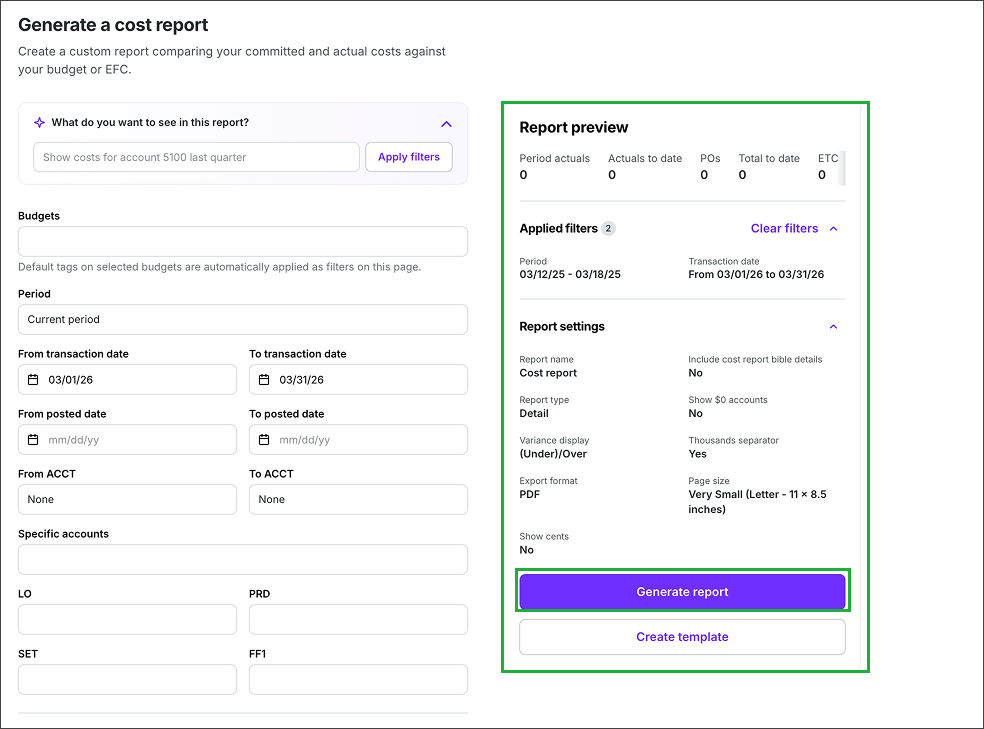
Use the Report preview to see an overview of the data in your report, then click the Generate report button
Create a cost report template
Report templates allow you to save your preferred settings for your trial balance reports. Instead of adjusting settings every time you generate a report, you can create and save templates for quick access to your preferred views.
Create a template
Go to the Generate a cost report page
In the Apply filters section, add the filters that you want to use for your report template. Use the Report preview to see an overview of what will be included in the report.
Once you are satisfied with the way the report is configured, click the Create template button
In the Create template popup, enter a template Name. You can click the checkbox to Set as default (optional)
Click the Save button
The template that you’ve just created will now appear as an option in the Custom template dropdown menu when you return to the Generate report page. If you set the template to be the default, it will automatically be selected in the dropdown menu.
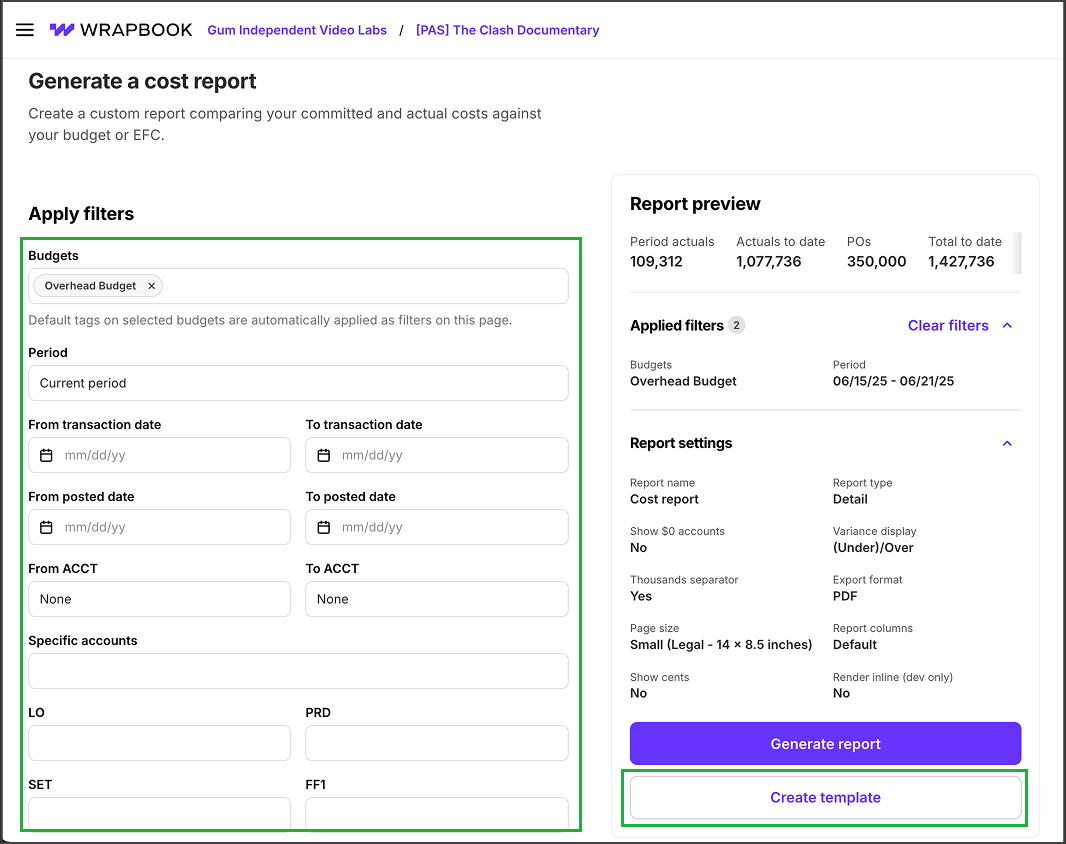
Click to apply filters, then click the Create template button
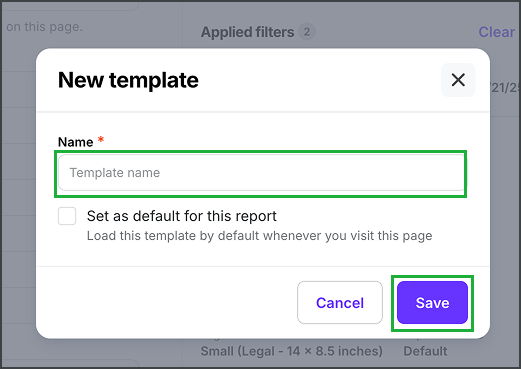
Enter a Name, click to Set as default for this report (optional), and then click the Save button
Set as default, rename, duplicate, or delete an existing template
Once a template has been created, you can set it as the default, update its name, duplicate it, or delete it using the following steps:
In the left-side navigation, click the dropdown menu
In the dropdown menu, select the project that you want to update a cost report template for
In the left-side navigation, expand the ACCOUNTING menu and then click Accounting reports
On the Accounting reports dashboard, click the Create report button next to Cost report
On the Generate a cost report page, under Templates, click the dropdown menu to select the template that you want to update
Click the gear icon, and then select an option: Set as default, Rename, Duplicate, or Delete

Select the template, click the gear icon, and then make your selection
Updating a template
If you make changes to a template, a Save changes button will appear next to the template’s name
To preserve the changes be sure to click the Save changes button before running a report or leaving the page

Click the Save changes button to update the template