Overview
A General Ledger (GL) report in Wrapbook is a comprehensive record of all financial transactions in the accounting system. It allows production accountants to:
View all posted transactional debit and credit activity for every account
Research and audit specific transaction data across different dimensions like accounts, periods, and tags
Generate customized reports with filters for various data points
The GL report can be exported in multiple formats:
PDF (sorted and subtotaled by account code)
XLSX (includes formulas and subtotals)
CSV (raw data export)
How to create a GL report
In order to create a GL report, Wrapbook’s Production Accounting Suite must be enabled.
Once PAS is enabled, you can begin creating your report by going to the Generate a general ledger report page:
In the left-side navigation, click the dropdown menu
In the dropdown menu, select the name of the project that you want to access the GL for
In the left-side navigation, expand the ACCOUNTING menu, and click Accounting reports
On the Accounting reports dashboard, click the Create report button next to General ledger
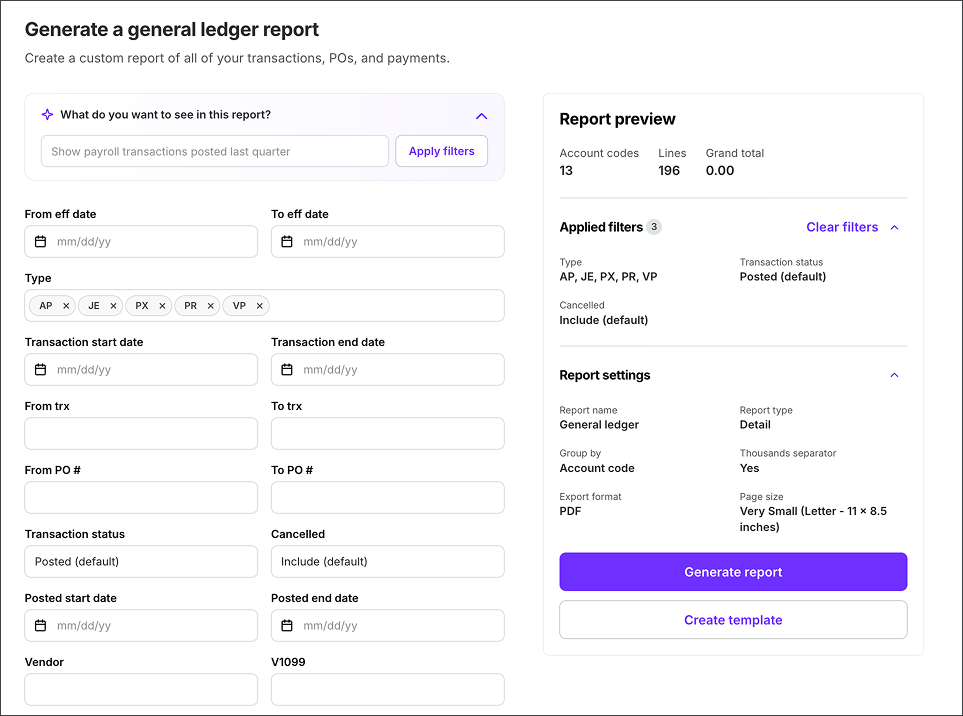
Example of the Generate a general ledger report page
What do you want to see in this report?
On the Generate a general ledger report page, under What do you want to see in this report?, you can use simple conversational language to describe what data you want to include in the report.
Here’s how it works
Under What do you want to see in this report? type a description of the data you want to show in the report
Here’s some examples of requests you can make:
Show me all transactions for vendor Home Depot
Display all qualified expenses in Louisiana
What transactions occurred in the previous period?
Show me all post-production costs
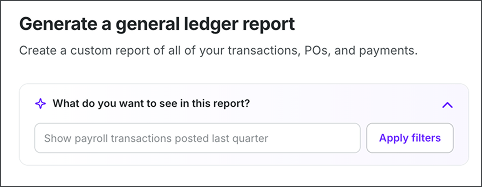
Type a description of the information that you want to see in the report
GL report manual filters
You can also use the Apply filters section of the General ledger report page to manually select filters.
Click the arrow to see the complete list of filters
Filter | Description |
|---|---|
Eff date | Filter transactions based on the effective date (start and end date range). |
Type | Filter by transaction type: Accounts Payable (AP), Distribution Change (DC), Journal Entry (JE), Payroll (PR), Vendor Payment (VP), Open Purchase Order (Open PO), Petty Cash (PC), and PCard (PX). |
Transaction start date / Transaction end date | Select the date range of transactions to display |
From trx / To trx | Select a range of transactions based on their reference number. |
From PO# / To PO# | Select a range of purchase orders based on their reference number. |
Transaction status | Filter by Posted (default), Unposted, or All statuses. |
Cancelled | Choose whether to Include (default), Exclude, or show Only cancelled transactions. |
Posted start date / Posted end date | Filter transactions based on when they were posted to the General Ledger. |
Vendor | Select specific vendors to include in the report. Vendors must be added on the Vendors page before they appear as options. |
V1099 | Select vendors with US tax form 1099 status. |
Account type | Filter by account classification: Asset, Liability, Expense, Income, or Equity. |
1099 | Select transactions that have been assigned a US tax form 1099 tax code. |
Asset | Choose whether to show transactions related to production assets. |
Line description | Filter transactions by a specific line description — only transactions with a matching line description will be included. |
Line amount minimum / Line amount maximum | Filter transactions based on their individual dollar amounts. |
Include starting/ending balances | Check to display the starting and ending balances for the selected period range. |
Paid AP invoices | Filter to show Accounts Payable invoices that have been paid. |
From pmt / To pmt | Filter transactions by paid AP invoices payment number range — enter a starting and ending payment number to narrow results to a specific set of payments. |
Payment start date / Payment end date | Filter paid AP transactions to a specific date range based on when the payment was made. |
Ref | Filter transactions by reference number — enter a reference to find transactions associated with a specific payment or record. |
From account / To account | Filter transactions by a chart of accounts range — select a starting and ending account to include only transactions that fall within those accounts. |
Specific accounts | Select individual account codes instead of a numeric range. |
LO | Filter by work location tag. |
PRD | Filter by production or episode tag. |
SET | Filter by set tag. |
FF1 | Select from your customized Free Fields |
Bank | Filter transactions associated with a specific bank account. |
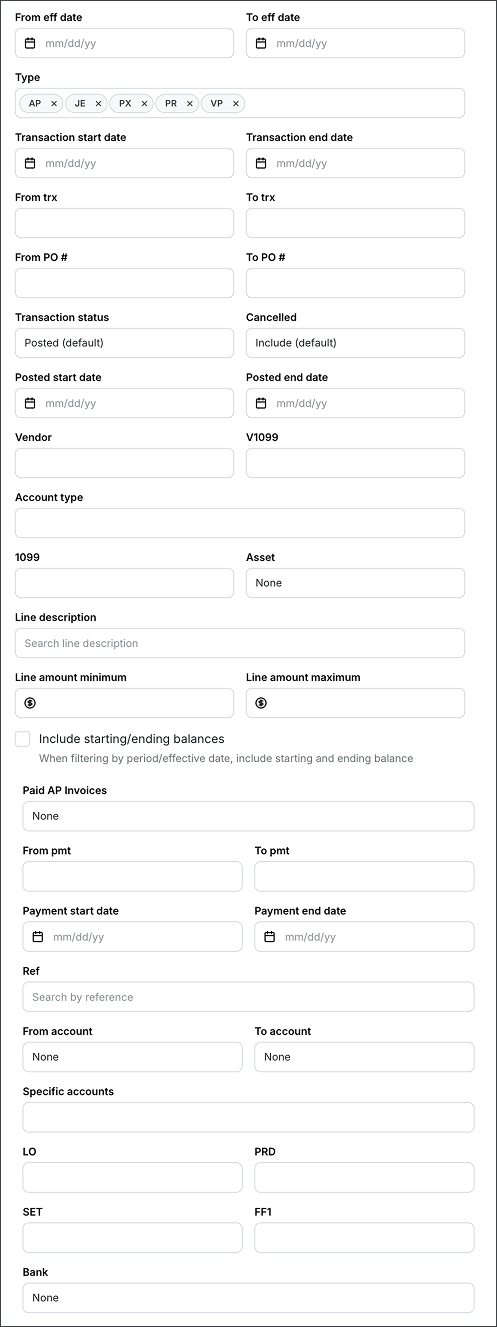
Screenshot of the manual filters available on the Generate a general ledger report page
GL report settings
Before you generate a GL report, you’ll be required to enter the following information in the Report settings section:
Report name
Report type (Detail or Summary)
Group by (Account code, Account type, Transaction vendor, Line vendor, Transaction type, Transaction #, Ref # Tag (LO), Tag (PRD), Tag (SET), Tag (FF1), Ungrouped)
Export format (PDF or CSV)
Page size (Letter, Legal, Ledger/RA3 or 2x Ledger/RA2)
Show Thousands separator
If you want to display a thousands separator on your GL report, click to enable this option
Customize
Under Report columns, you can click the Customize button to the following columns:
Curr
LO
PRD
Account
Account description
SET
FF1
TRX
TRX date
Type
Eff date
Period
Vendor
Line description
Ref
Post date
Pmt date
Pmt
PO
1099
V1099
Asset
Amount
After clicking Customize, use the customize Report Columns popup to:
Select or remove columns — check or uncheck the boxes next to each column name
Rename a column — click an existing column name and type a new one
Reorder columns — hover over the four-dot icon to the left of a column name, then drag it to a new position
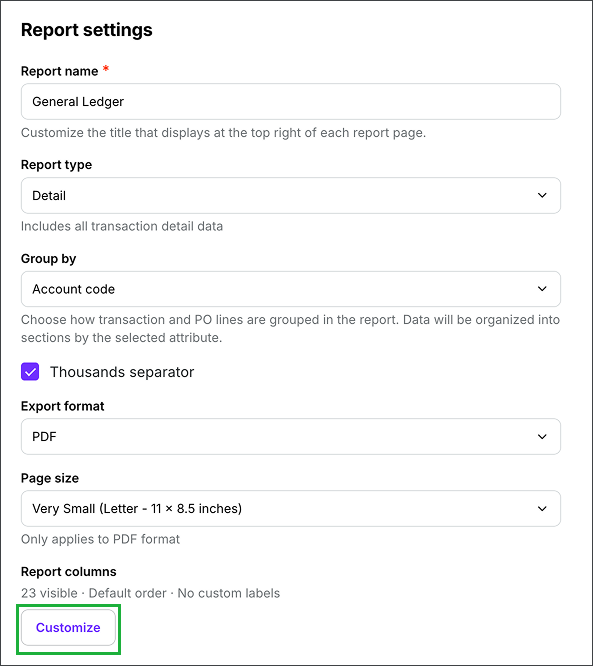
Screenshot of GL settings options. Click the Customize button to choose which columns to include in the report, update column names, and change the column order.

Check the columns you want to include, click a column name to rename it, and use the four-dot handle to drag it into a new position
Preview your GL report
In the Report preview, you can see the types of data that will appear in the report based on the filters and settings you’ve applied.
Generate your GL report
On the General ledger report page, click the Generate report button
After you click the button, your report will begin automatically downloading to your computer. You’ll receive an email once it’s ready.
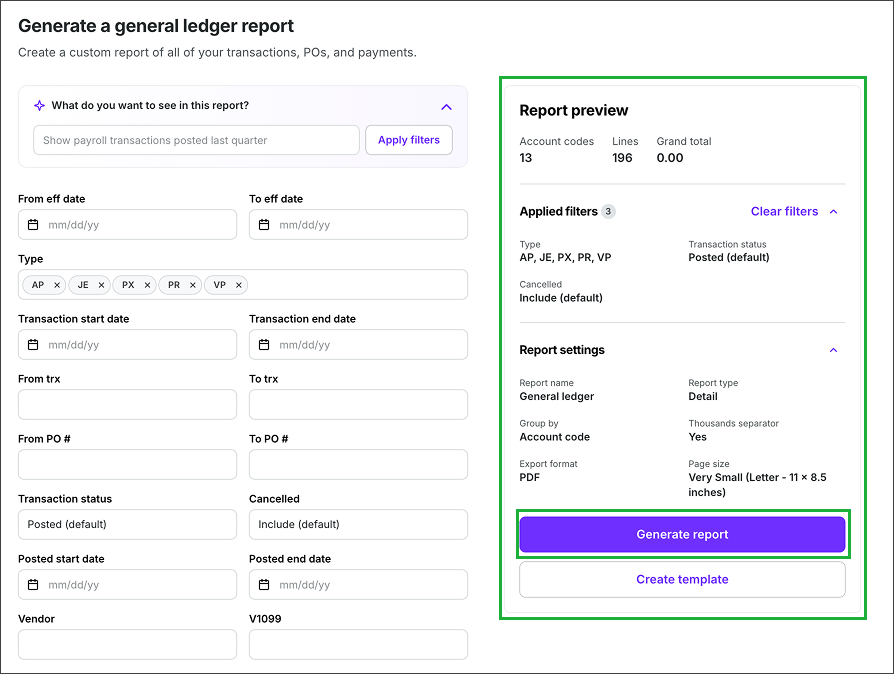
Example of a GL Report preview. Click the Generate report button to begin your download.
.png)
Example of a GL report generated in Wrapbook
Create a GL report template
Report templates allow you to save your preferred settings for your GL reports. Instead of adjusting settings every time you generate a report, you can create and save templates for quick access to your preferred views.
Create a template
Go to the Generate a general ledger report page
In the Apply filters section, add the filters that you want to use for your report template. Use the Report preview to see an overview of what will be included in the report.
Once you are satisfied with the way the report is configured, click the Create template button
In the Create template popup, enter a template Name. You can click the checkbox to Set as default (optional)
Click the Save button
The template that you’ve just created will now appear as an option in the Custom template dropdown menu when you return to the Generate report page. If you set the template to be the default, it will automatically be selected in the dropdown menu.
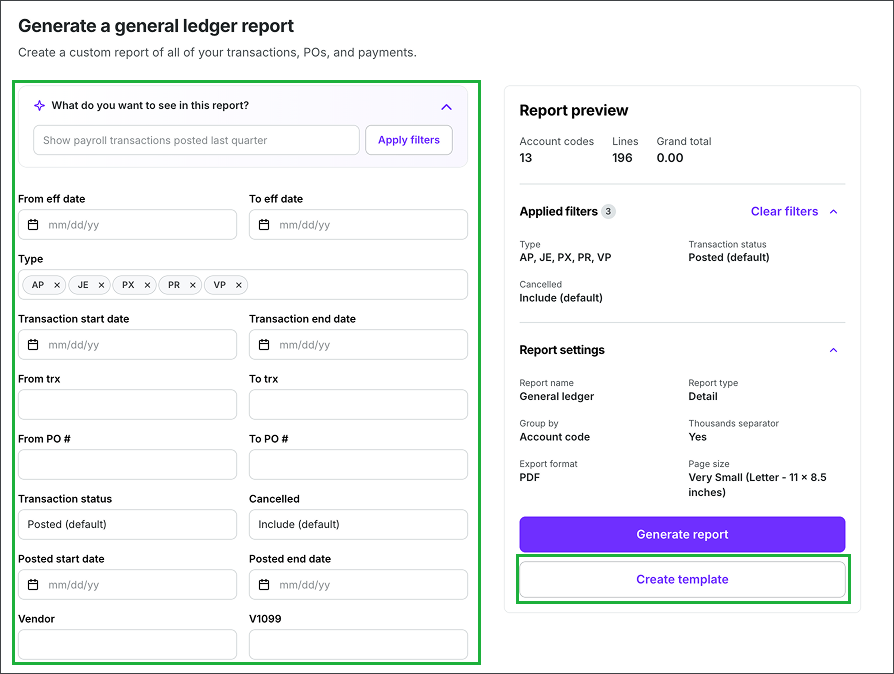
Click to apply filters, then click the Create template button
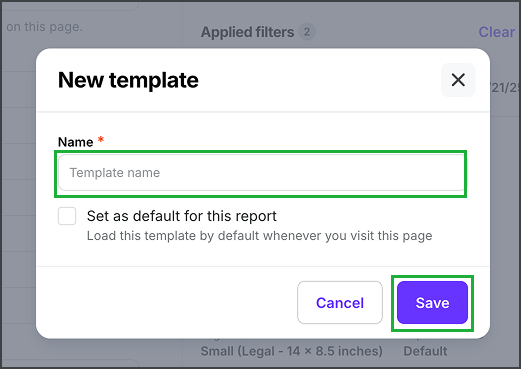
Enter a Name, click to Set as default for this report (optional), and then click the Save button
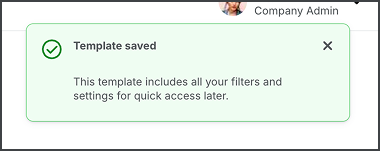
A notification will appear confirming that your template has been saved
Set as default, rename, duplicate, or delete an existing template
Once a template has been created, you can set it as the default, update its name, duplicate it, or delete it using the following steps:
Go to the Generate a general ledger report page
On the Generate a general ledger report page, under Templates, click the dropdown menu to select the template that you want to update
Click the gear icon, and then select an option: Set as default, Rename, Duplicate, or Delete
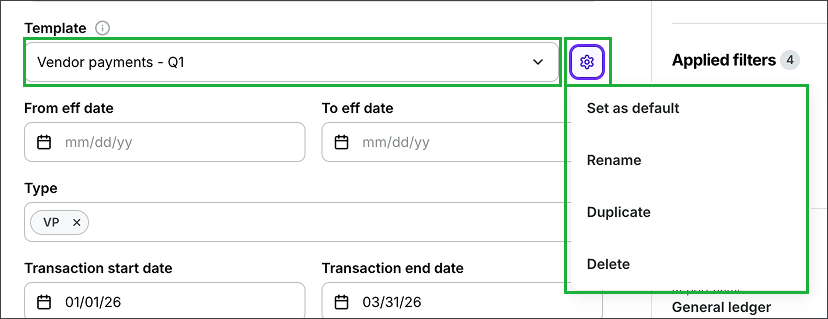
Select the template, click the gear icon, and then make your selection
Updating a template
If you make changes to a template, a Save changes button will appear next to the template’s name
To preserve the changes be sure to click the Save changes button before running a report or leaving the page

Click the Save changes button to update the template