The following help article provides general instructions on how to complete this form in Wrapbook. If you have questions about how to complete this information based on your specific situation, consult with a legal professional.
U.S. Citizenship and Immigration Services (USCIS) requires U.S. employees to complete and sign Form I-9: Section 1, Employee Information and Attestation no later than their first day of employment.
This process involves two steps:
Enter your information in Section 1, Employee Information and Attestation, and sign the form
Provide your supporting documents (optional)
To see USCIS instructions for completing Form I-9 as an employee, see Completing Section 1, Employee Information and Attestation
To see USCIS requirements for supporting documents, see Form I-9 Acceptable Documents
1. Complete Section 1, Employee Information and Attestation
In Wrapbook, you’ll be prompted to complete Section 1 of Form I-9 during onboarding.
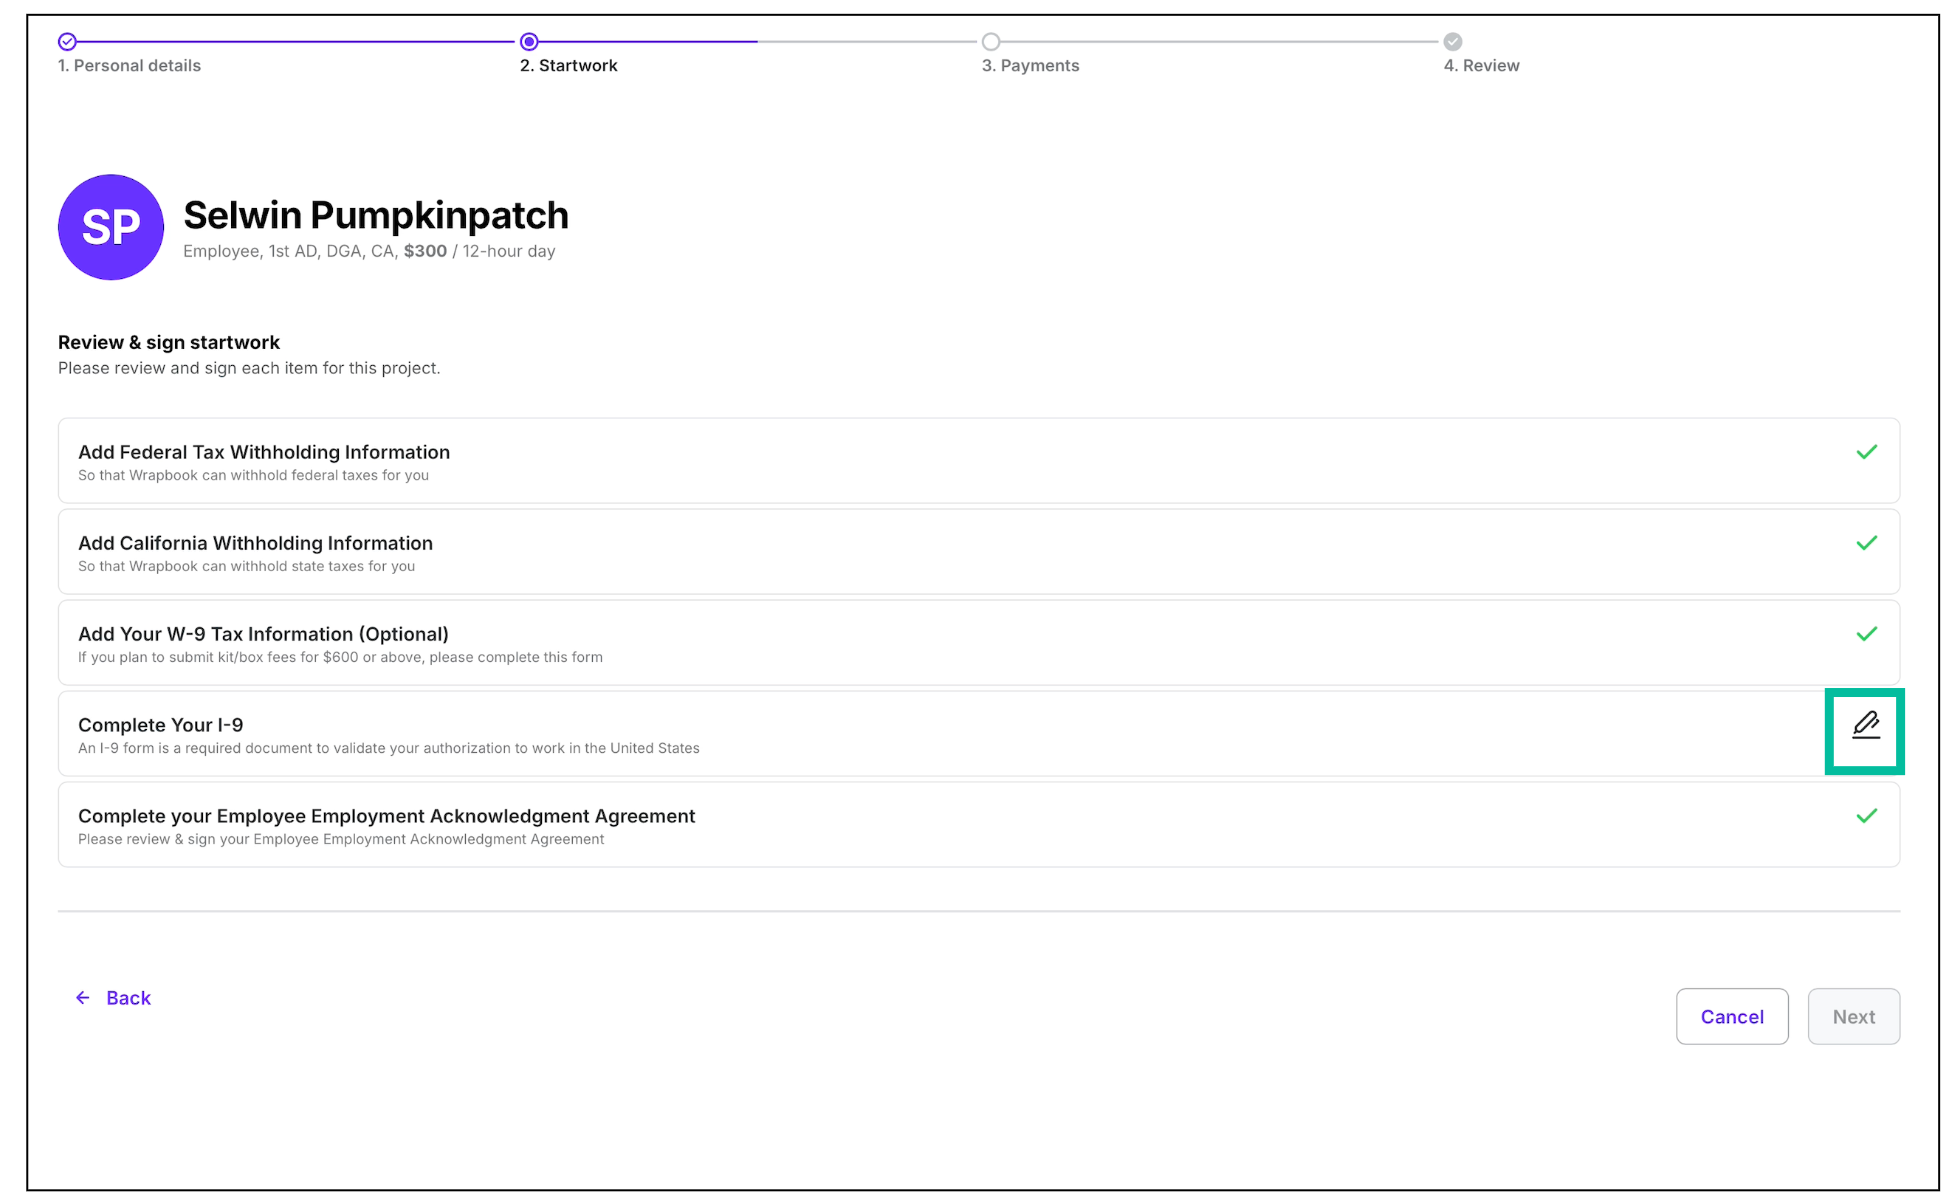
On the Review & sign startwork page, click Complete Your I-9
On the Complete your I-9 page, in Section 1. Employee information and attestation, review the prefilled information to verify it’s correct. If any of the prefilled information is incorrect, you can click on the field to update it.
Is your information not already prefilled in your Form I-9? Click the arrow to learn more.
To give production companies flexibility, Wrapbook offers both pre-fill and manual fill options for Forms I-9s. If you don’t see information already added to your Form I-9, click each required field within the document to add your information.
Under Citizenship or immigration status, click to choose your citizenship or immigration status. For information about the options listed, see USCIS, Employee Responsibilities for Section 1.
Click the Review and Sign button to open a preview of your Form I-9
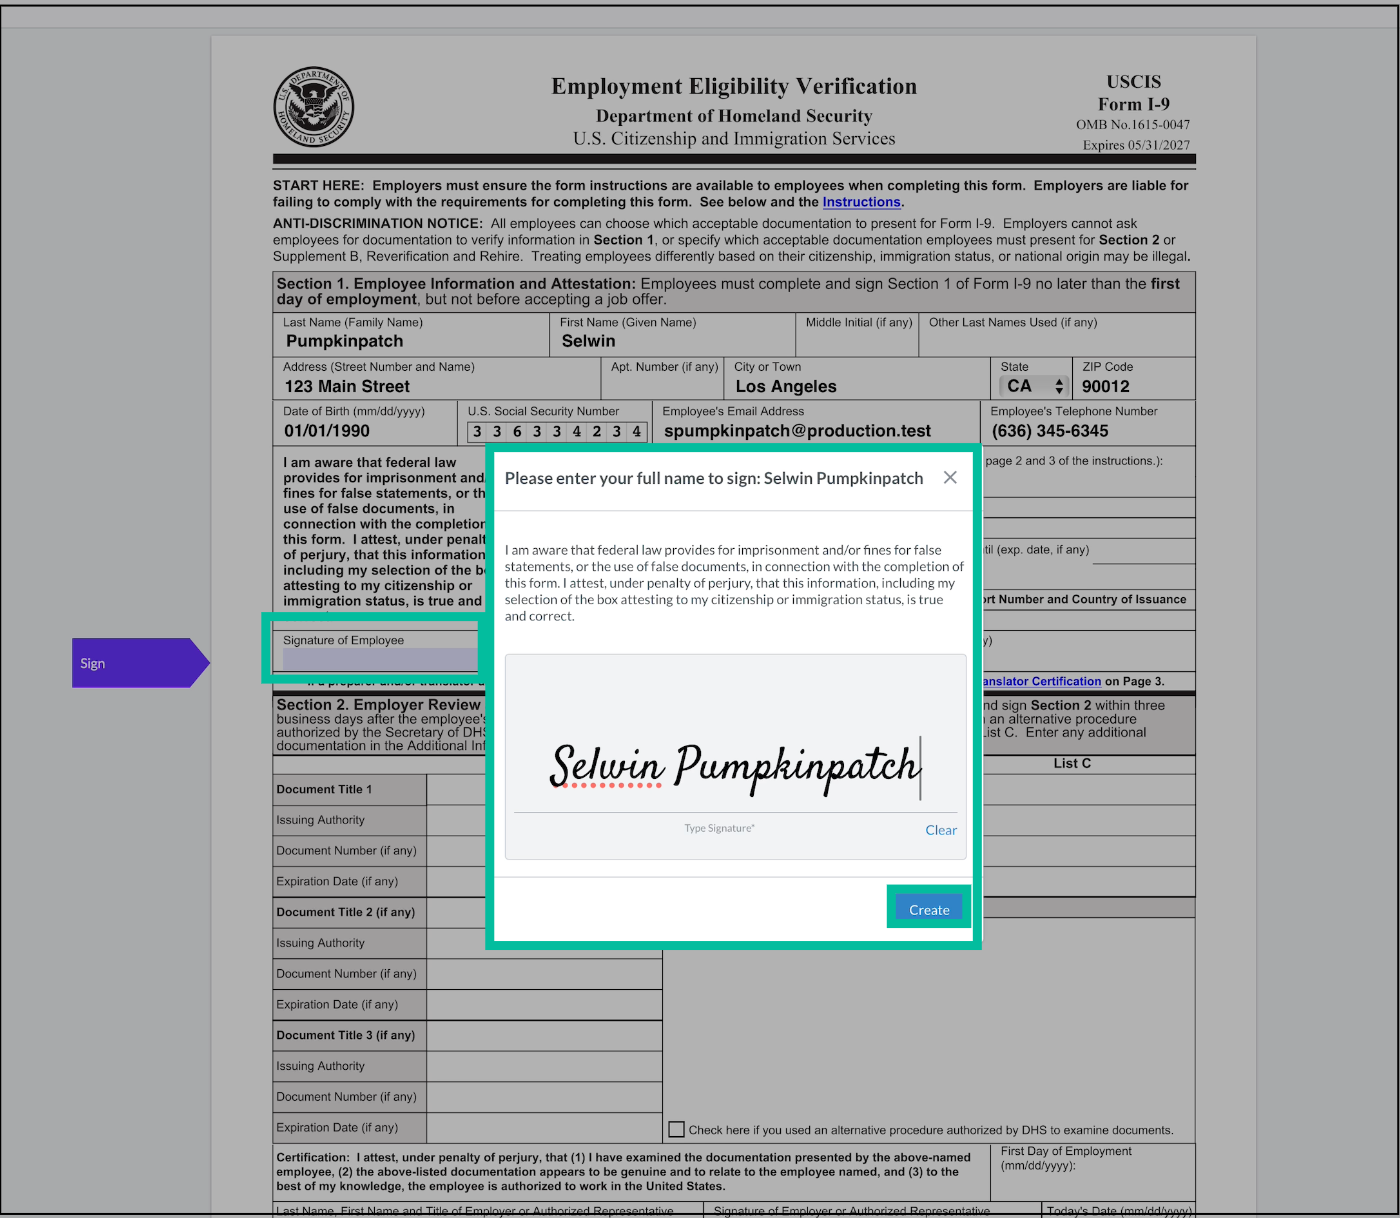
In the Form I-9 preview, click to sign the document
In the Enter your full name to sign popup, type your name to add your signature Note, the name entered for signature must exactly match the name as it appears in Section 1: First Name, Last Name
Click the Create button to add your signature and date to the form
Click the Submit button
Click the edit icon next to Complete Your I-9
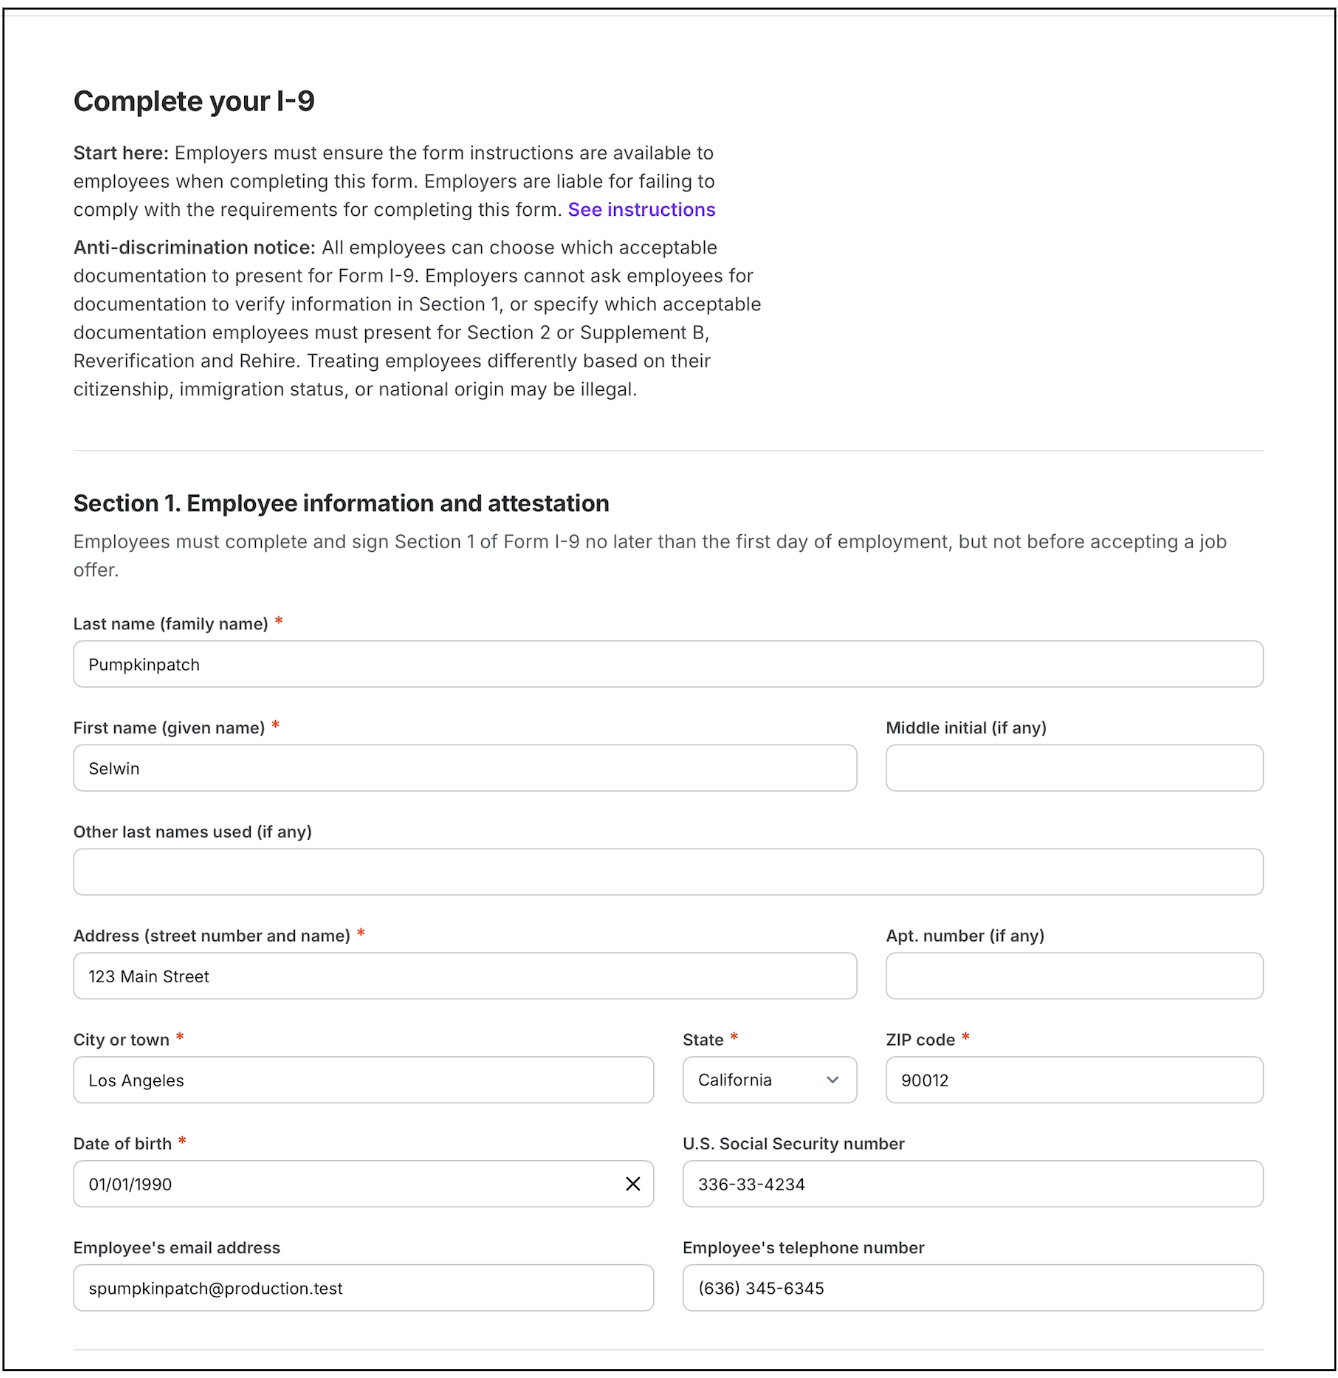
Review the prefilled information. If any of the information is incorrect, you can click on the field to update it.
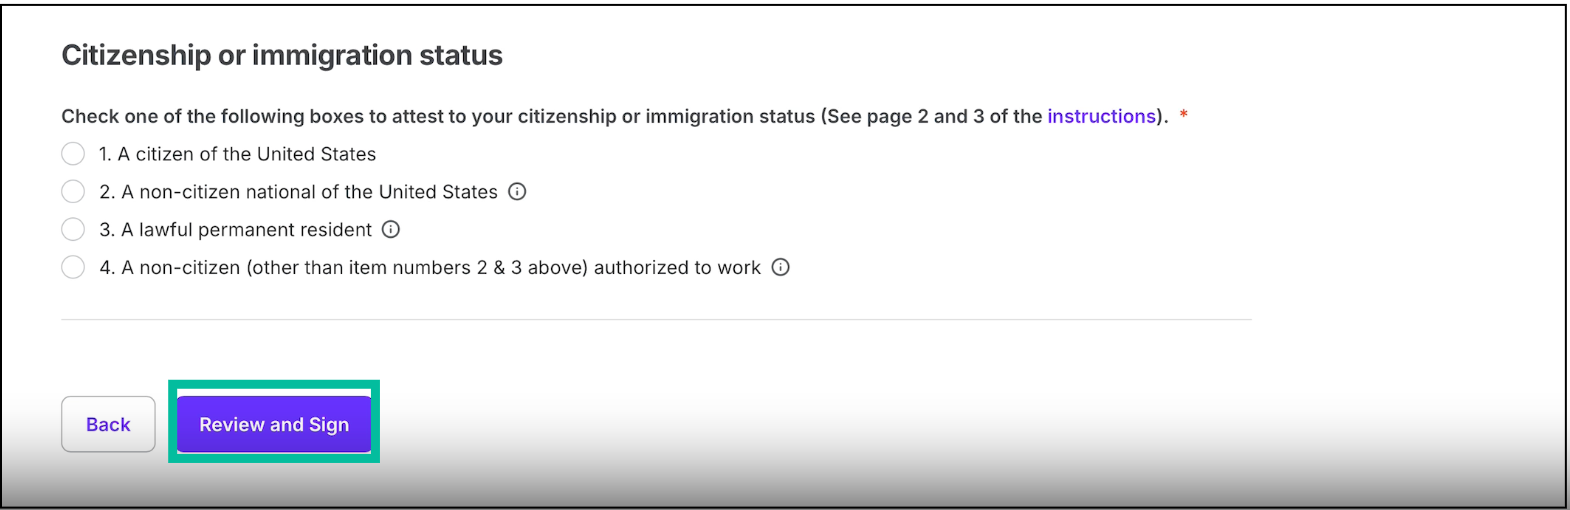
Click to choose your citizen or immigration status, then click the Review and Sign button
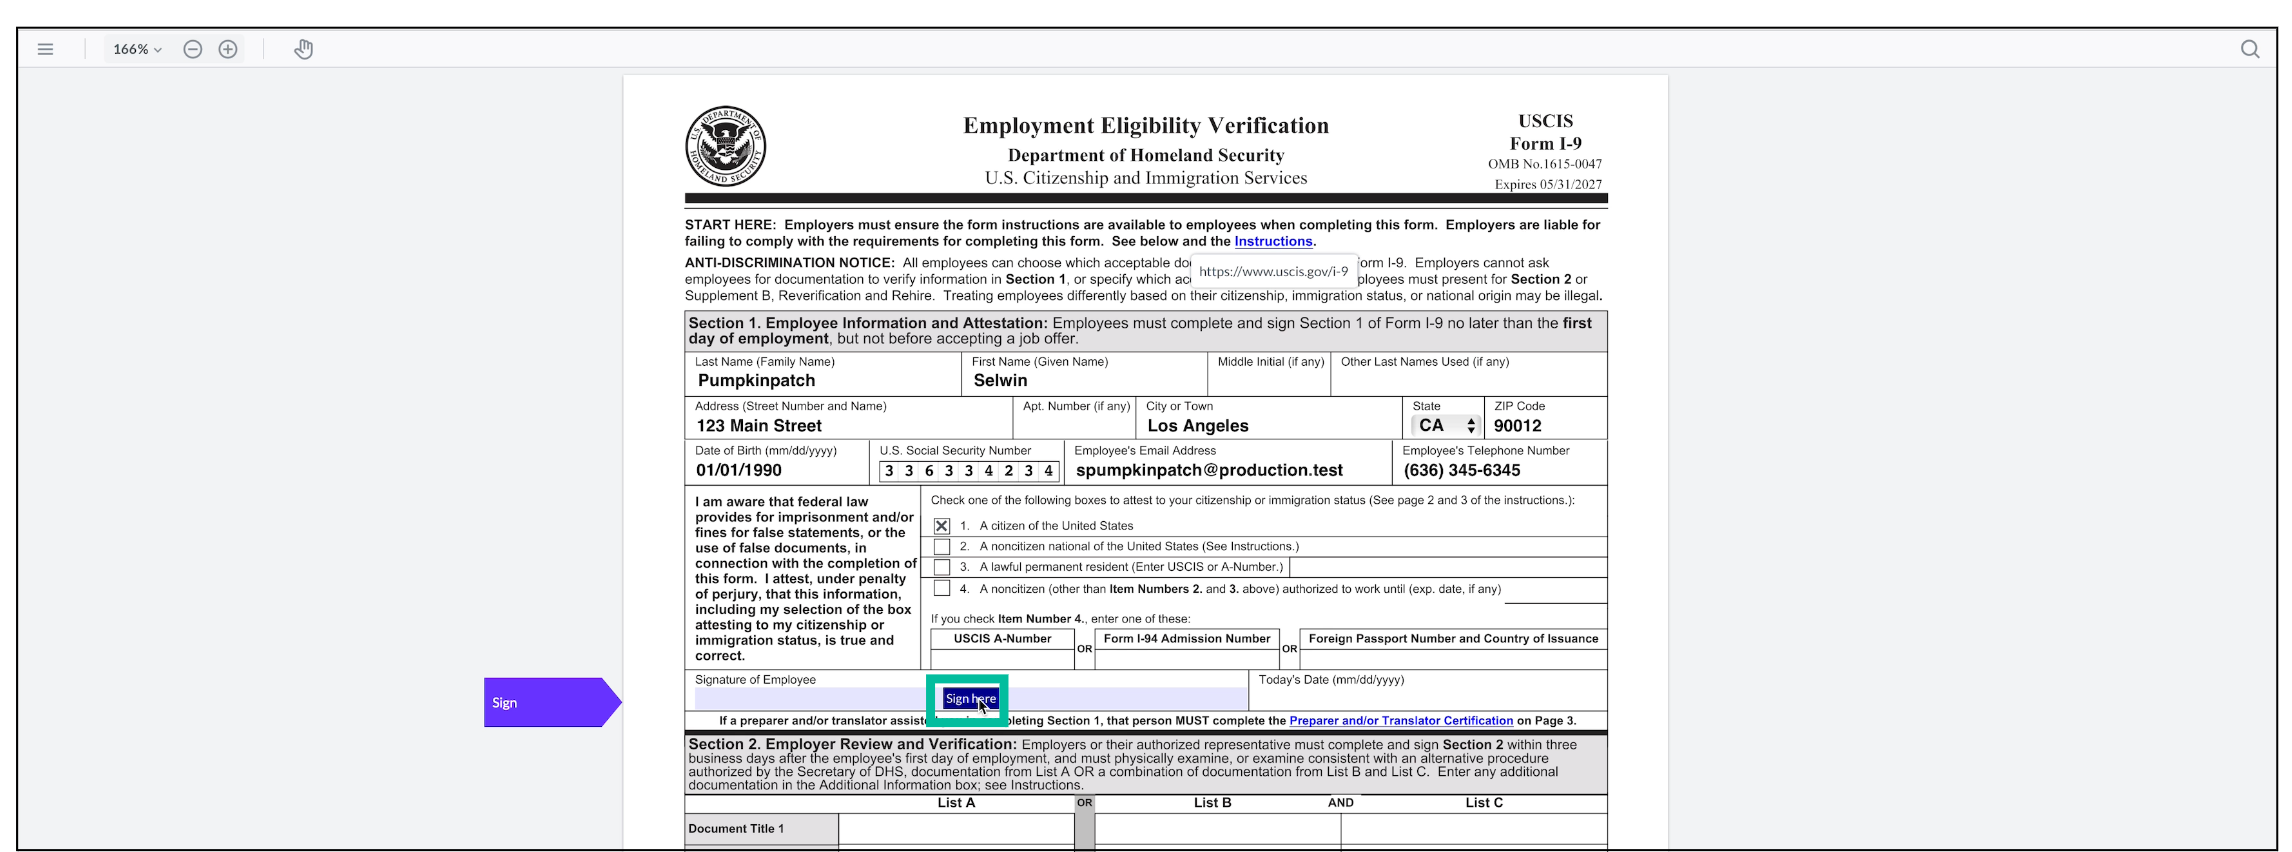
In the document preview, click the Sign here field
In the signature popup, enter your name exactly as it appears in the document, then click the Create button
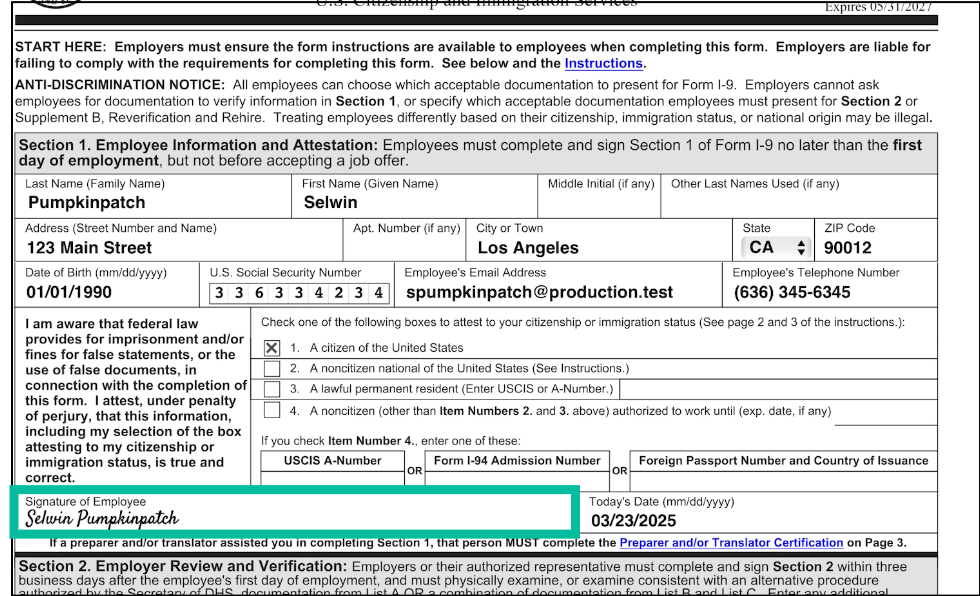
After you click the Create button, your signature will be added to the Form I-9
2. Upload your supporting documents
After you complete Section 1, you’ll be prompted to upload your supporting documents.
If you need to complete this step at a later time, you can click Back at the top of the page and you’ll be returned to Review & sign startwork page. When you’re ready to upload your supporting documents, click Complete Your I-9.
In order to upload supporting documents to Wrapbook, they must be saved to your computer first
If you receive an error message when uploading a supporting document, there may be an issue with the file type or size. The accepted formats for supporting document files are JPEG, PNG, TIFF, HEIC, and HEIF. The maximum file size accepted is 10 MB.
Uploading supporting documents is optional. To skip this step, click Back to return to the Review & sign startwork page to complete your remaining onboarding tasks.
Here’s how to upload your supporting documents:
On the Your I-9 page, under Next steps, click the Name dropdown menu to select the type of document you want to upload
Click the Select a file button to upload a supporting document that’s been saved to your computer
Once a document is successfully uploaded, it will be listed under Submitted documents
Based on the type of document you upload first, you may be prompted to upload a second document. To do so, repeat the steps above.
Once you’ve successfully submitted the required supporting documentation, you‘ll be returned to the Review & Sign Startwork page. A green check mark will indicate that you have successfully completed your Form I-9.
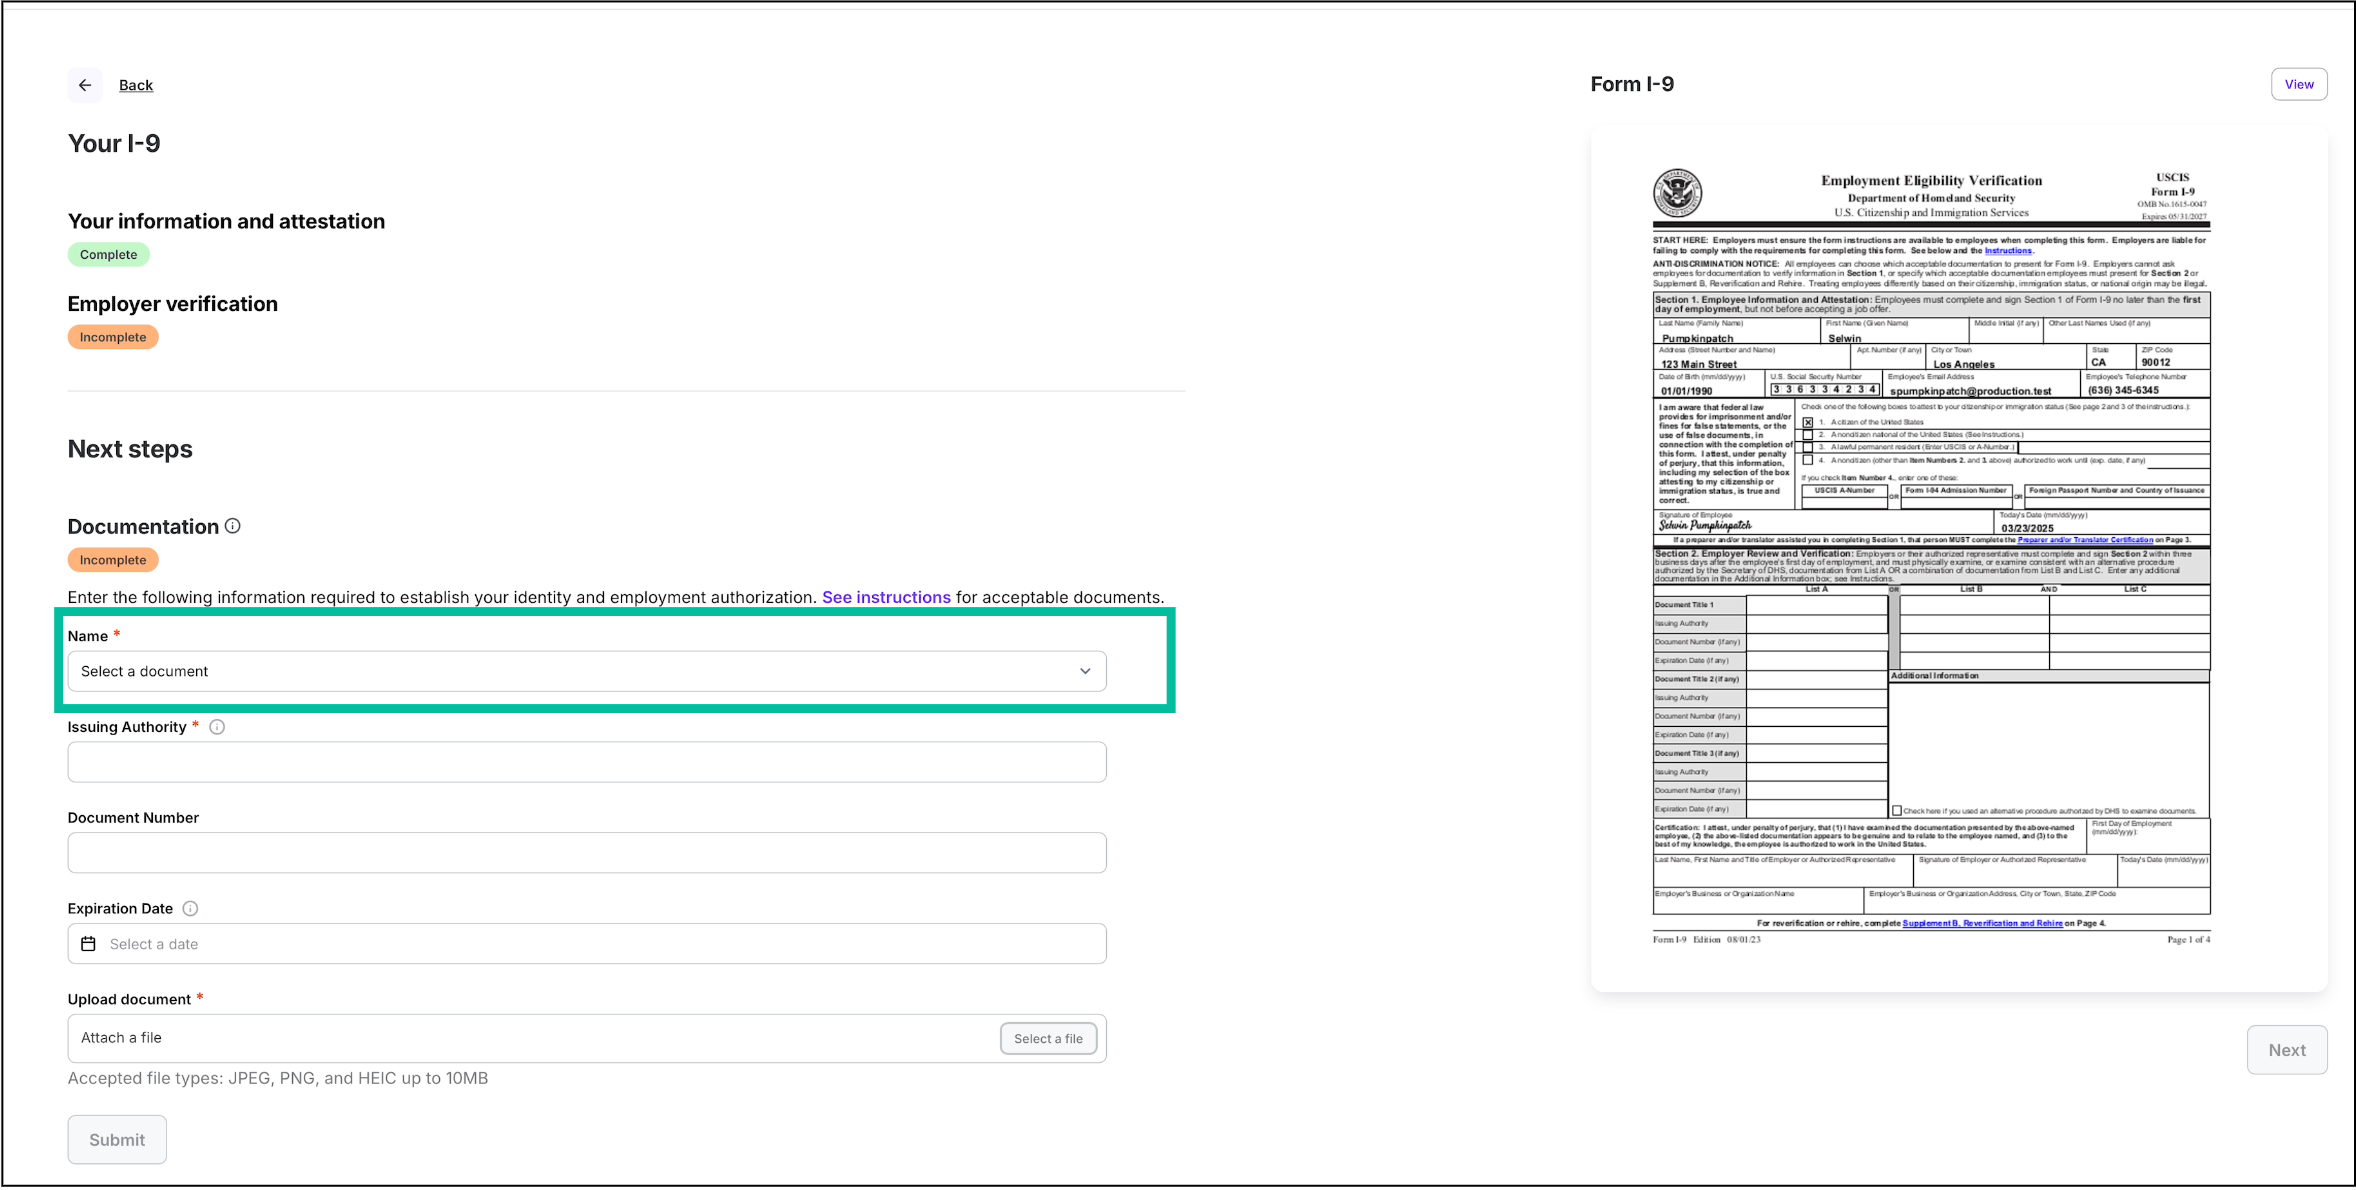
Click the Name dropdown menu and select the type of document you’re uploading. Then enter the required information.
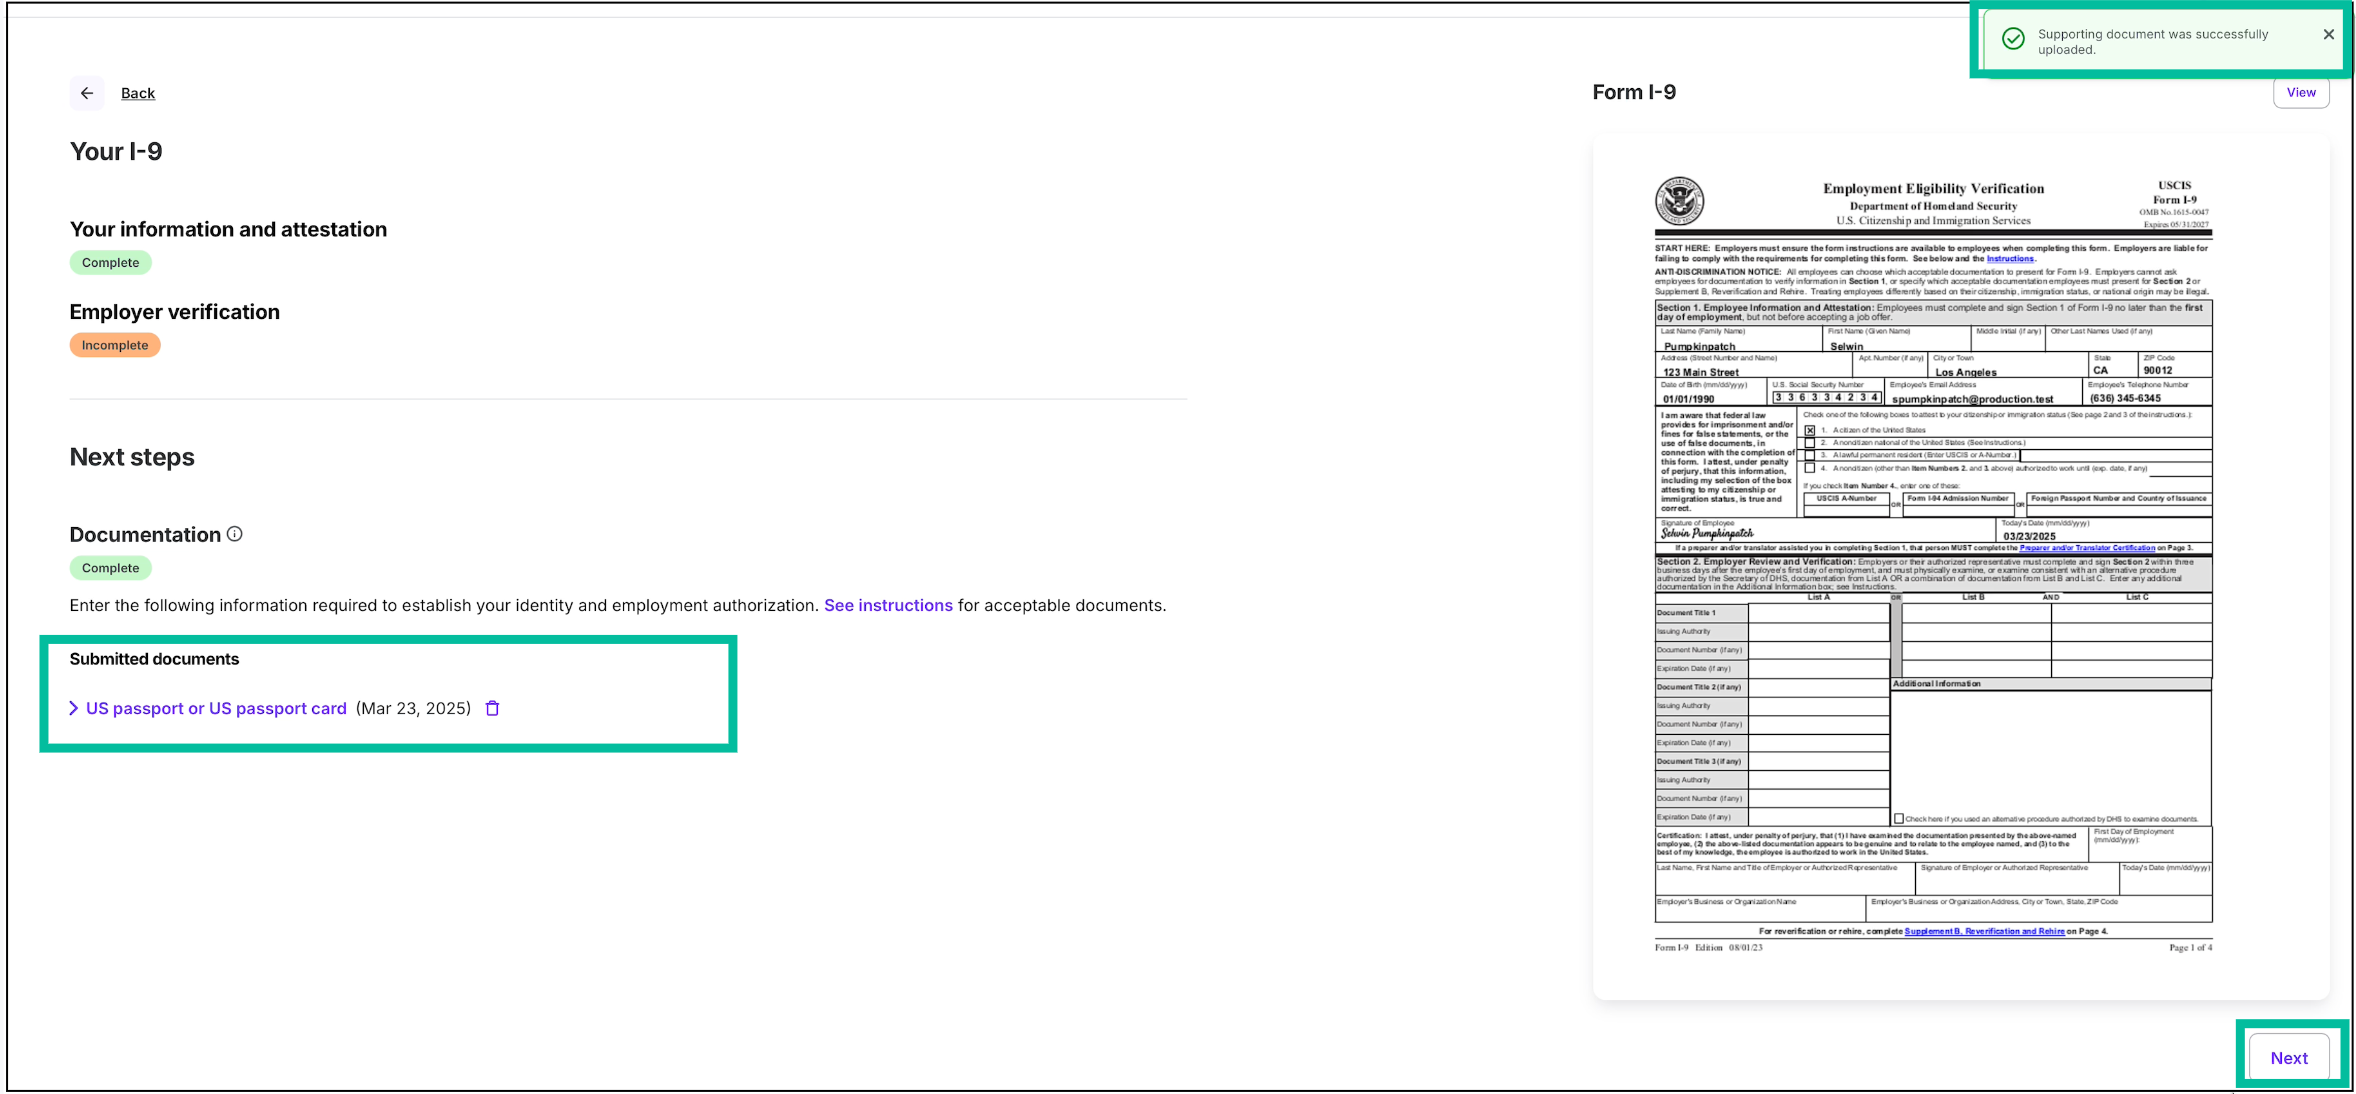
Once the required supporting documentation has been uploaded, click the Next button
Troubleshooting
Issues that may cause errors when completing your Form I-9 are typically the result of missing or incorrectly formatted information.
To address this, we recommend the following:
Confirm that dates entered use MM/DD/YYYY format
If there’s no expiration date or information to enter within a field, leave it blank, do not add “N/A” or a dash
Confirm that you have signed the form - If you correct any errors you will be prompted to re-sign the form again, to ensure you are attesting to the changed information
If you’re unable to sign the document on mobile or on the Wrapbook app, we recommend trying on a desktop computer
When signing, first click the Create button and then click the Submit button. The Create button will only appear blue/active once a name is entered. If you can’t click the Create button, click your signature line again to make sure you’ve typed your name in the signature field.
If you realize during signing that you’ve entered the wrong name, you can click Back, then click on the signature field to update it.