Overview
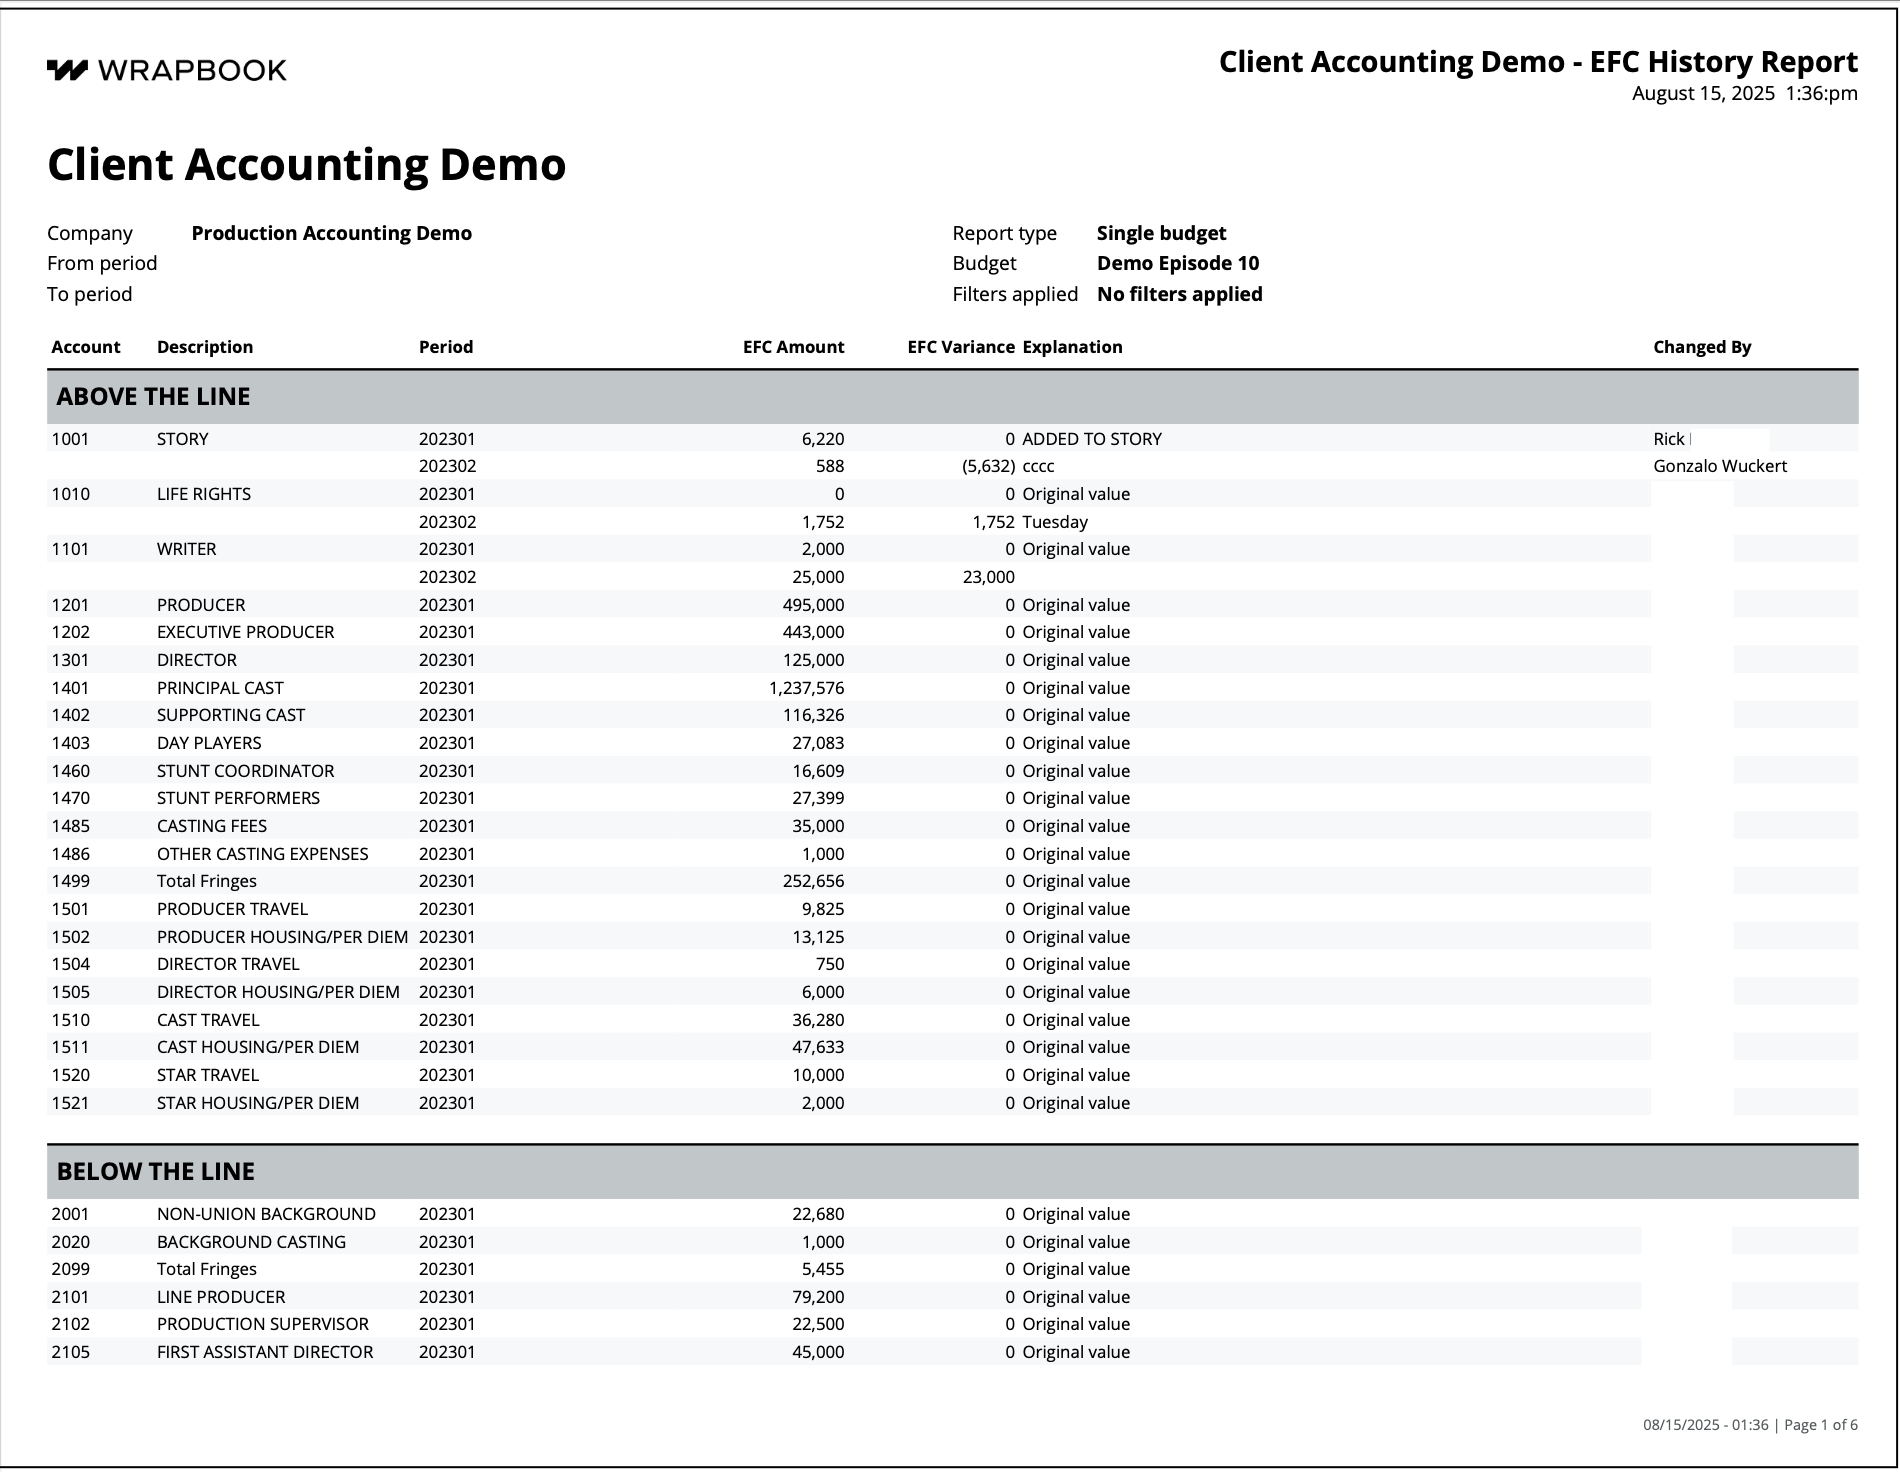
The EFC history report is an audit trail displaying all project estimated final cost changes, per period, for each account.
This comprehensive audit trail documents your production's financial journey, providing:
A complete historical record of every EFC change
The reasoning behind each adjustment for full accountability
Pattern analysis to improve estimation accuracy over time
Valuable insights to enhance budget planning for future productions
How to create an EFC history report
In order to create an EFC history report, Wrapbook’s Production Accounting Suite must be enabled.
Once PAS is enabled, you can begin creating your report by going to the Generate an EFC history report page:
In the left-side navigation, click the dropdown menu
In the dropdown menu, select the name of the project that you want to access the EFC history report for
In the left-side navigation, expand the ACCOUNTING menu, and click Accounting reports
On the Accounting reports dashboard, click the Create report button next to EFC history report
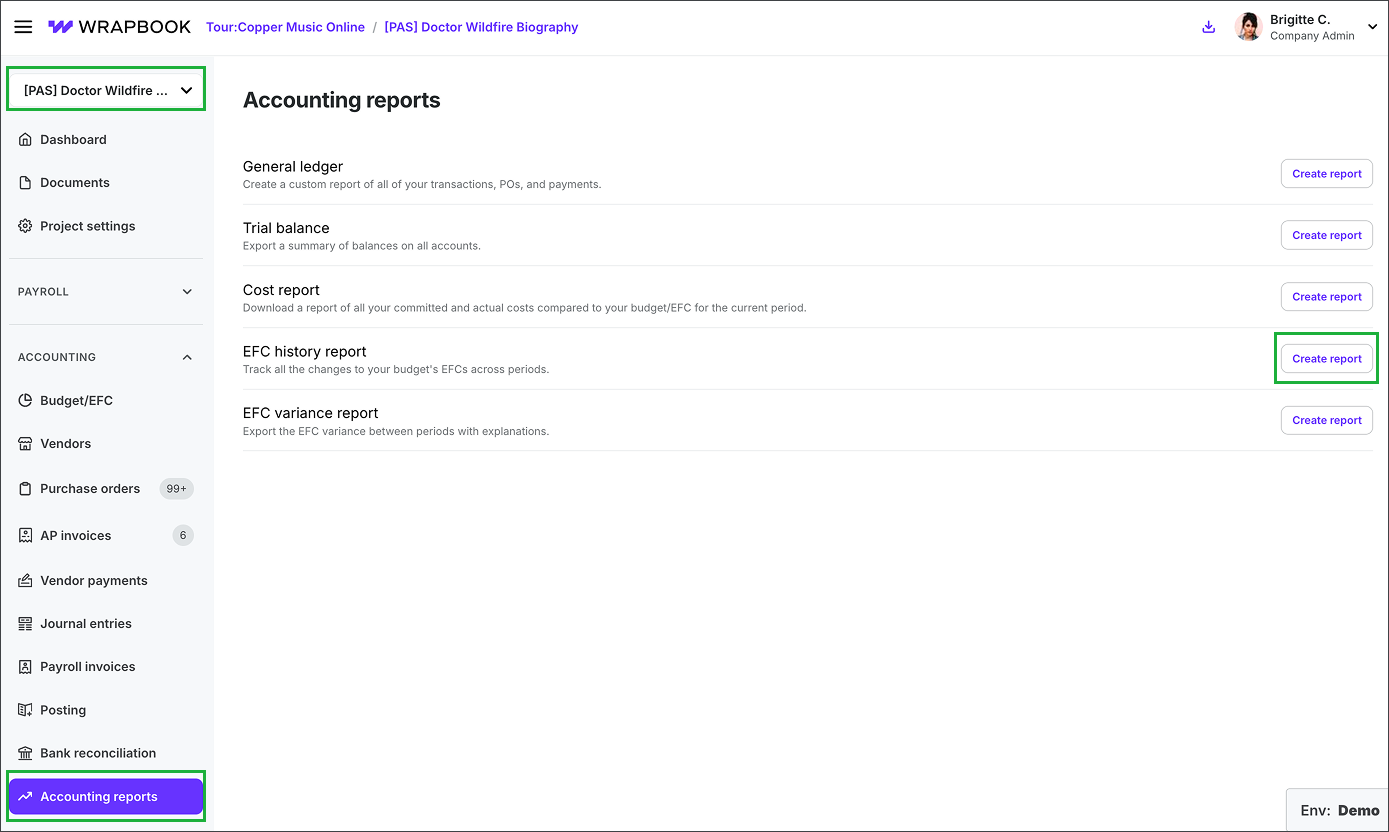
Select the project, click Accounting reports, then click the Create report button next to EFC history report
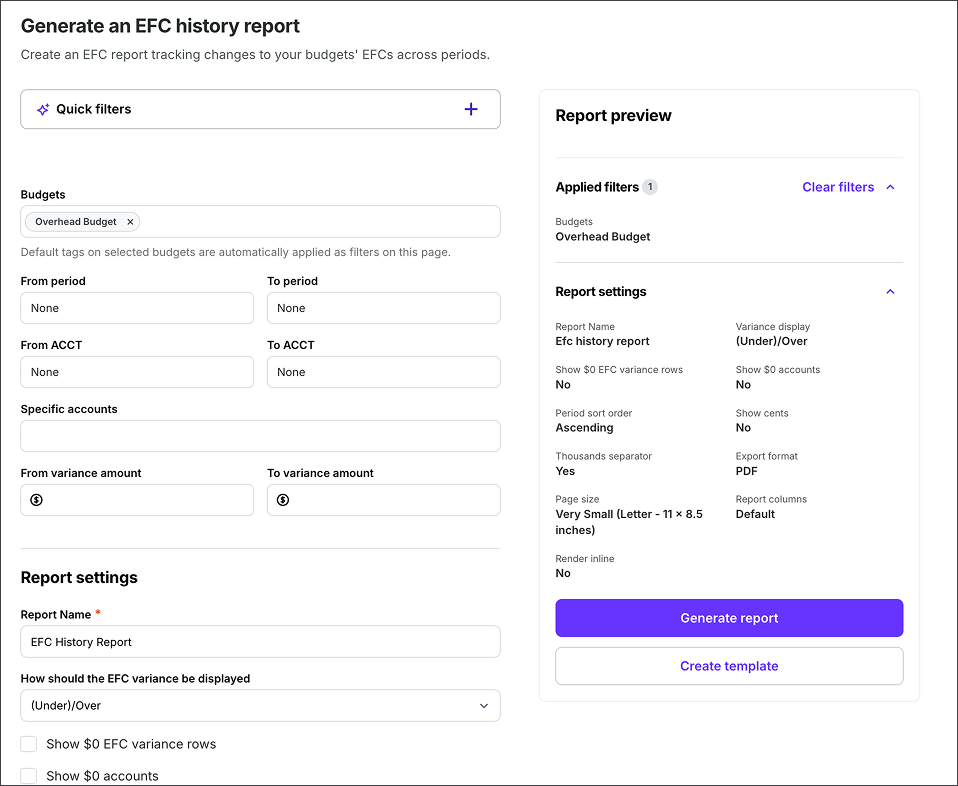
Example of the Generate an EFC history report page
EFC history report quick filters
On the Generate an EFC history report page, you can use the Quick filters section to pull and analyze your data using simple, conversational language.
Here’s how it works
In the Quick filters section, click the +
Under What kind of report do you need? type your request
Click the Update filters button
To provide feedback on prompt suggestions, click either of the thumbs up/thumbs down icons in the bottom corner of the Quick filters section.
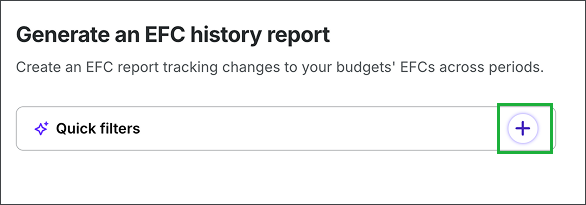
Click the + to use Quick filters
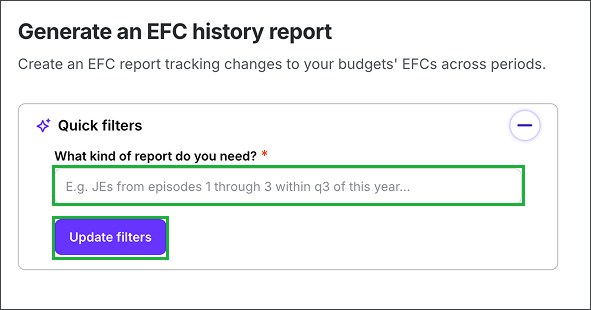
Enter a description of the EFC history information you want in the report, and then click the Update filters button
Quick filter tips
The Quick filters section can process most natural language queries that are based on the following filters:
Budget
Period
Account
Variance amount
The Quick filters feature works best when you’re specific about the information you're looking for. Be sure to include relevant dates, periods, or account codes in your query.
For example: Show me all construction accounts that had a variance during the project
EFC history report manual filters
If you don’t want to use the Quick filters, you can click on any of the filter fields listed to apply to the report.
Click the arrow to see the full list of manual filters available for EFC history reports
Filter | Description |
|---|---|
Budget | The budget that you want to run the report for |
Selected period | The timeframe for the report |
ACCT range | The range of ACCT #s from the COA to be included in the report |
Specific accounts | The specific accounts to be included in the report |
Variance amount range | The range in dollar amount that you want to see report data for |
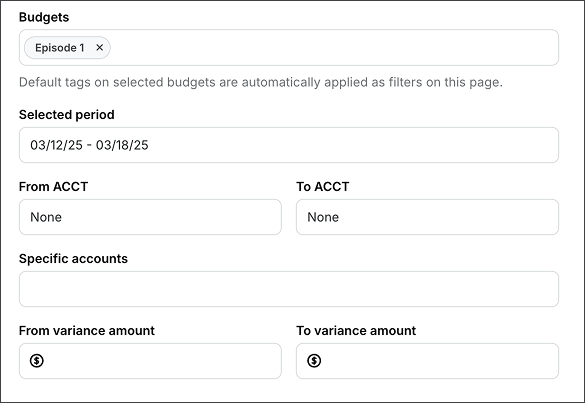
Screenshot of the manual filters available for the EFC history report page
EFC history report settings
In the Report settings section, you’ll have the option to configure the report in the following ways:
Report Name - Click the enter a name for the report
How should the EFC variance be displayed? - Your options are (Under)/Over or Under/(Over)
Show $0 EFC variance rows - Click the enable
Show $0 accounts - Click the enable
Period order within each account - Click the select Ascending or Descending
Show cents - If you want your report amounts to include cents, click to enable this option
Thousands separator - If you want to display a thousands separator on your report amounts, click to enable this option
Export format (PDF or CSV)
Page size (Letter, Legal, Ledger/RA3 or 2x Ledger/RA2)
Edit report columns
You can choose the columns that you want to show or hide in your EFC history report by doing the following:
In the Report settings, click the Edit report columns button at the bottom of the section
In the popup, click to select/de-select the checkboxes next to any of the column headers listed
Click the Save button
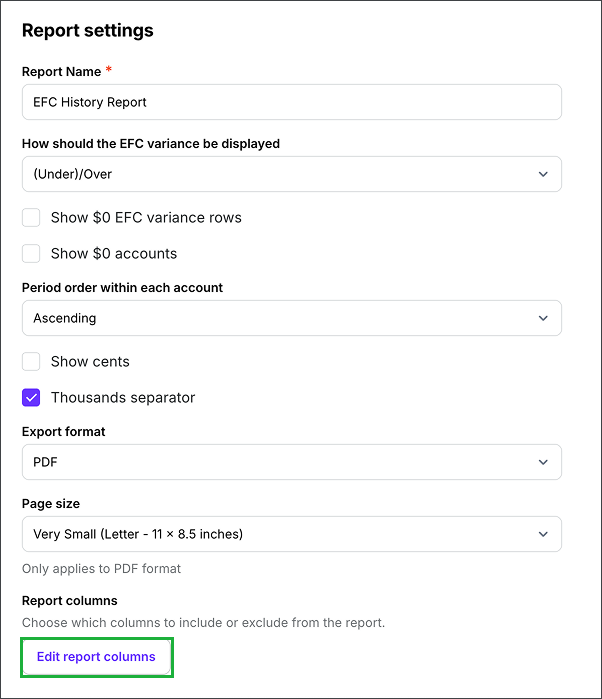
Click the Edit report columns button
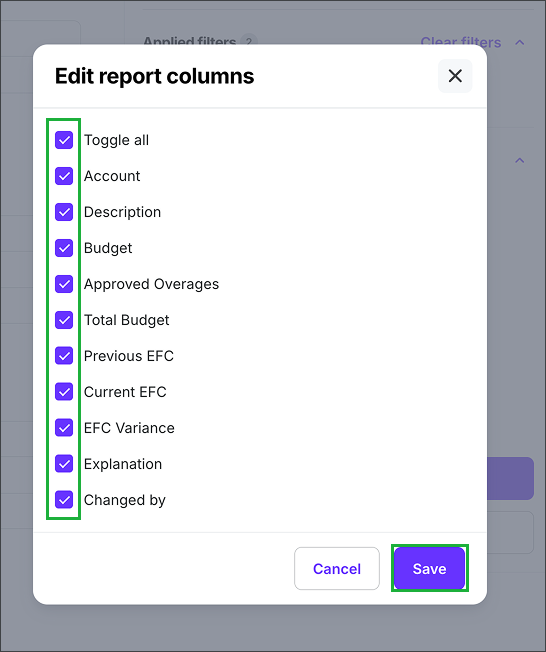
In the popup, click the checkboxes to select the columns that you want to show in the report. To hide a column, click to de-select its checkbox. When you’re ready, click the Save button.
Preview your EFC history report
In the Report preview, you can see the types of data that will appear in the report based on the filters and settings you’ve applied.
Generate your EFC history report
On the EFC history report page, click the Generate report button
After you click the button, your report will begin automatically downloading to your computer. You’ll receive an email once it’s ready.
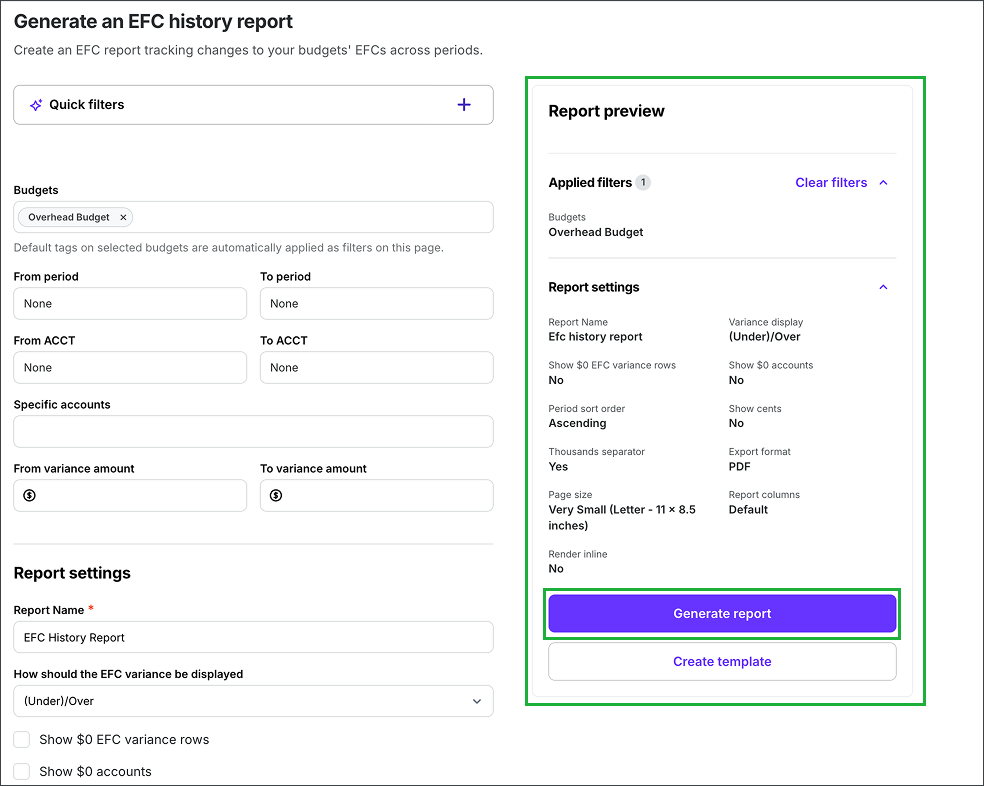
Example of a EFC history report preview. Click the Generate report button to begin your download.
Create an EFC history report template
Report templates allow you to save your preferred settings for your EFC history reports. Instead of adjusting settings every time you generate a report, you can create and save templates for quick access to your preferred views.
Create a template
In the left-side navigation, click the dropdown menu
In the dropdown menu, select the project that you want to create an EFC history report template for
In the left-side navigation, expand the ACCOUNTING menu and then click Accounting reports
On the Accounting reports dashboard, click the Create report button next to EFC history report
In the Apply filters section, add the filters that you want to use for your report template. Use the Report preview to see an overview of what will be included in the report.
Once you are satisfied with the way the report is configured, click the Create template button
In the Create template popup, enter a template Name. You can click the checkbox to Set as default (optional).
Click the Save button
The template that you’ve just created will now appear as an option in the Custom template dropdown menu when you return to the Generate report page. If you set the template to be the default, it will automatically be selected in the dropdown menu.
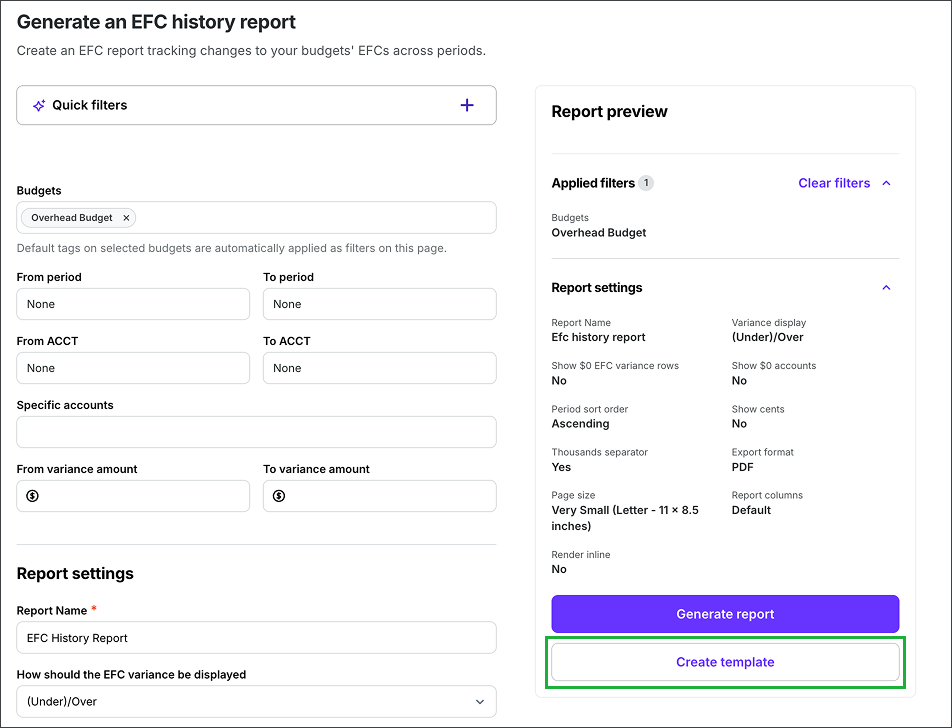
Click the Create template button
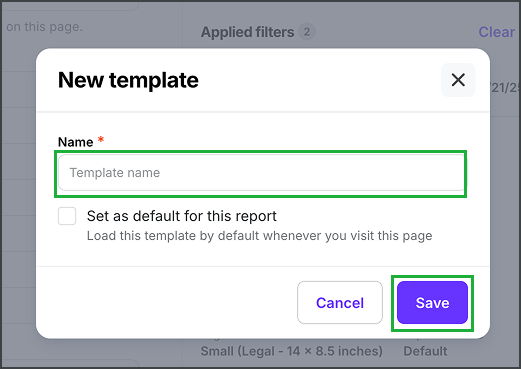
Enter a Name, click to Set as default for this report (optional), and then click the Save button
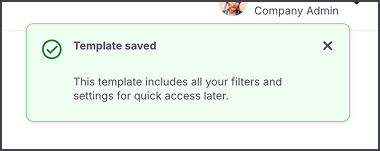
A notification will appear confirming that your template has been saved
Set as default, rename, duplicate, or delete an existing template
Once a template has been created, you can set it as the default, update its name, duplicate it, or delete it using the following steps:
In the left-side navigation, click the dropdown menu
In the dropdown menu, select the project that you want to update an EFC history report template for
In the left-side navigation, expand the ACCOUNTING menu and then click Accounting reports
On the Accounting reports dashboard, click the Create report button next to EFC variance report
On the Generate an EFC history report page, under Templates, click the dropdown menu to select the template that you want to update
Click the gear icon, and then select an option: Set as default, Rename, Duplicate, or Delete

Select the project, click Accounting reports, then click the Create report button next to EFC history report
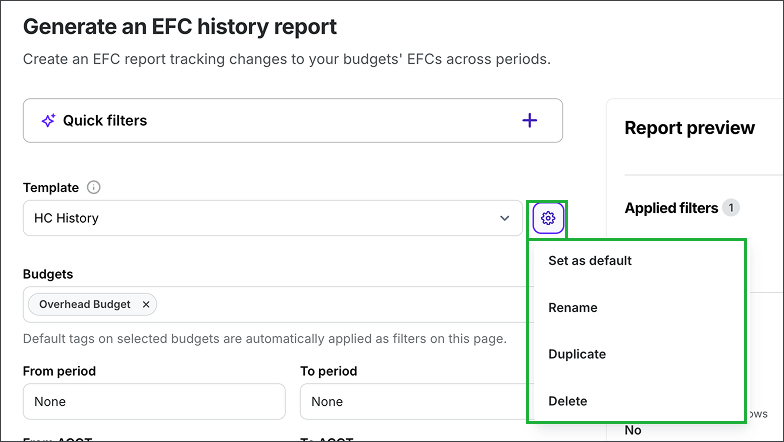
Select the template, click the gear icon, and then make your selection
Updating a template
If you make changes to a template, a Save changes button will appear next to the template’s name
To preserve the changes be sure to click the Save changes button before running a report or leaving the page

Click the Save changes button to update the template