This help article is related to Cost tracking
In Wrapbook, production accountants and administrators can manage POs using either Cost tracking or the Production Accounting Suite. Click here to see how POs work with PAS.
Purchase orders (POs) are permission based
To access POs in Wrapbook, your account must have one of the following roles enabled:
Role: Company Admin, Company Manager, Project Coordinator
Custom role with: Purchase orders - Full access, Manage
To add an invoice to a PO:
From the left-side navigation, click the dropdown menu
Select the name of the project that you want to see purchase orders for
In the project dashboard’s Purchase orders overview, click View POs
On the Purchase Orders page, click the PO# of the PO that you want to add an invoice to
Scroll down to the Items section of the PO page and on the left side, click View all
In the Manage invoices & payments panel, make sure you are on the Invoices tab
Click the Add Invoice button
Enter the required information for the invoice
Click Select a file to upload a copy of the invoice
Select an invoice file that’s been saved to your computer to add it
When you’re done, click the Save button
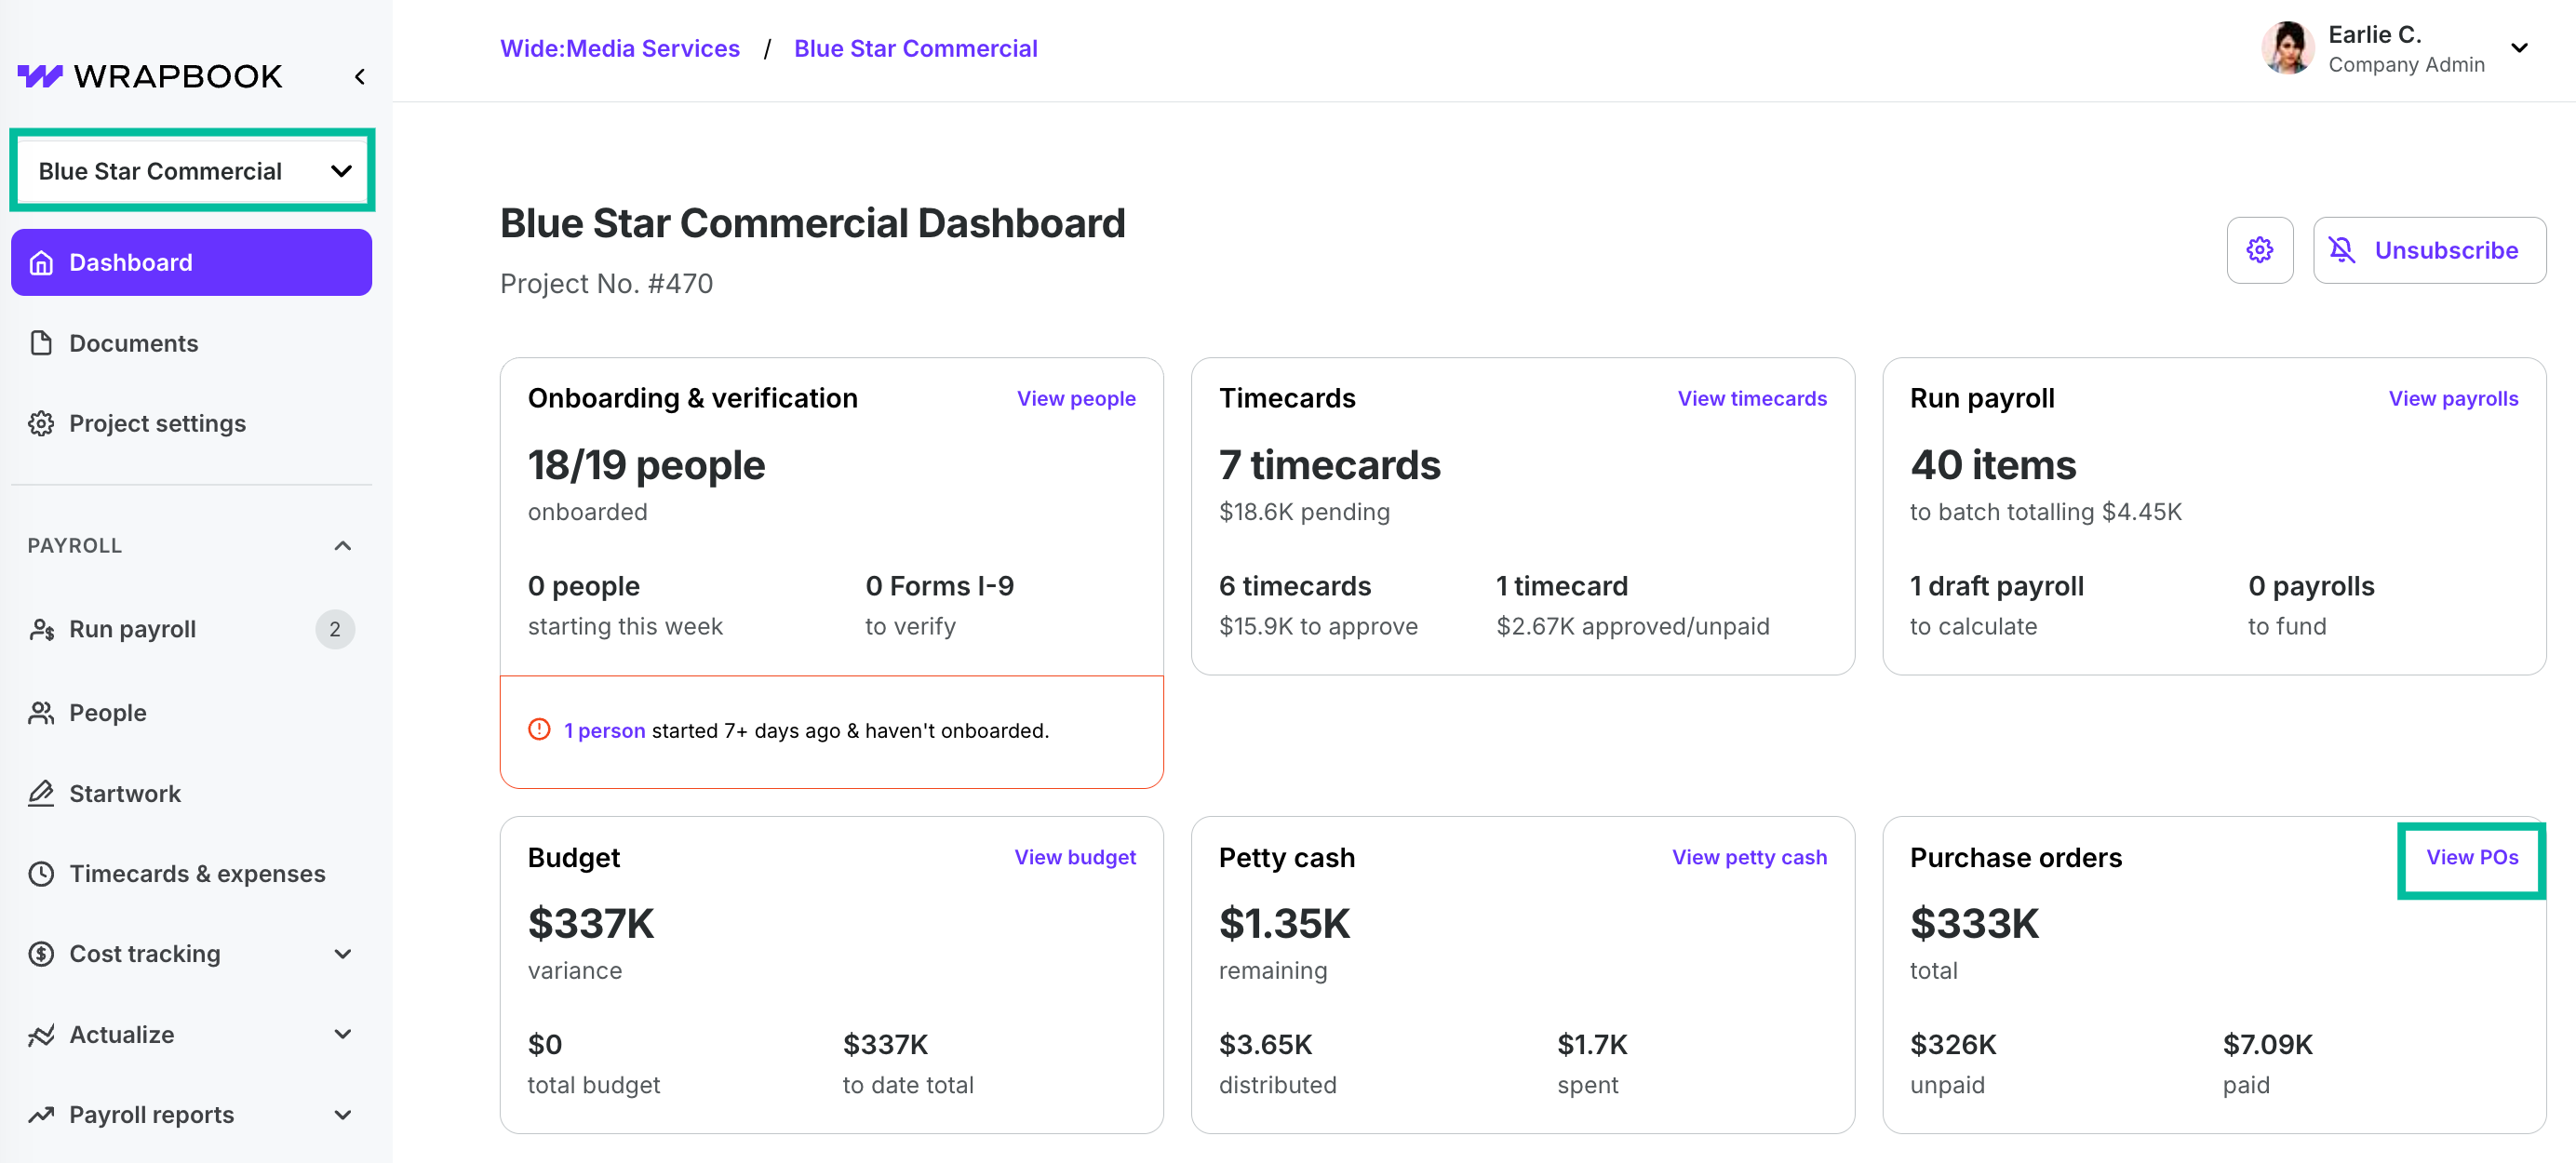
Select a project, then click View POs.
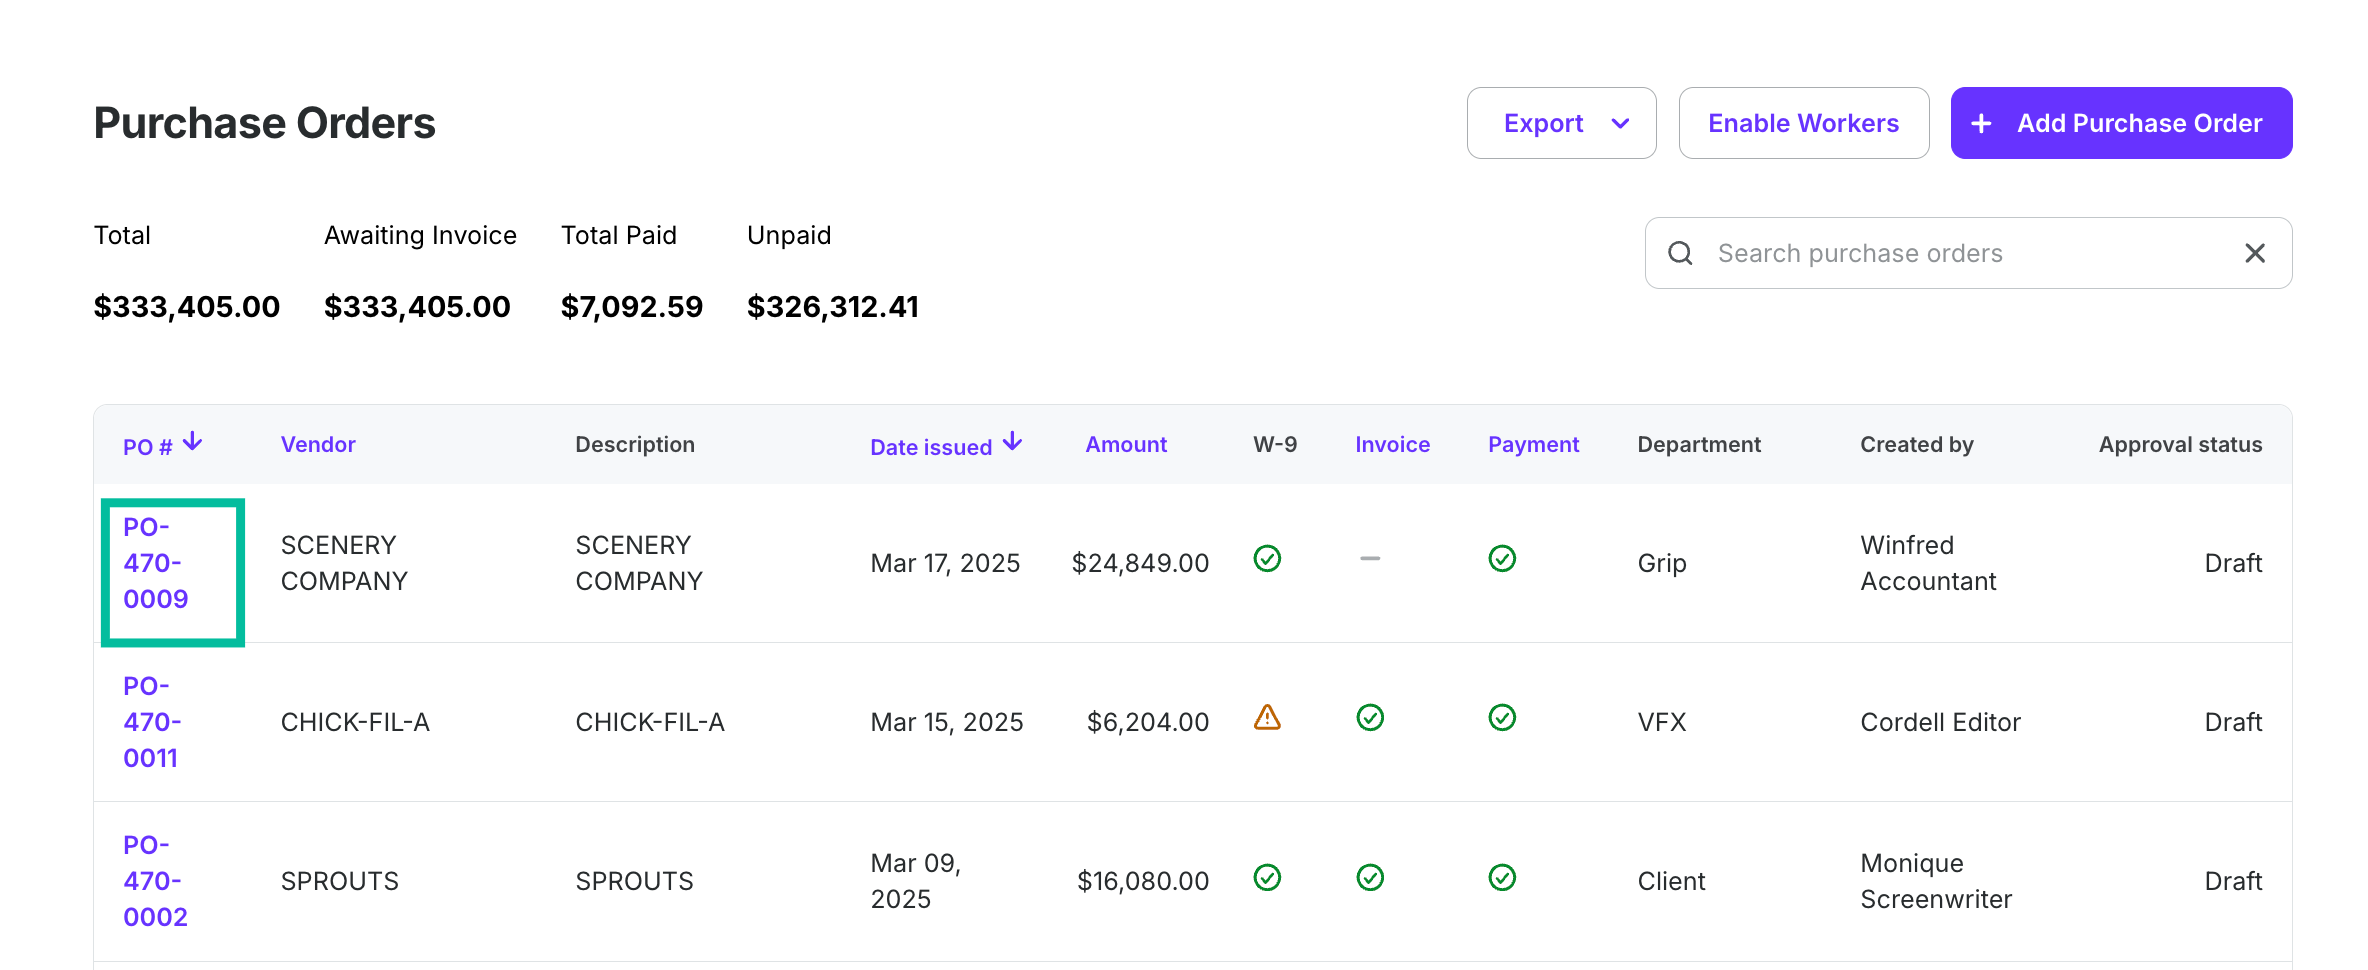
Click on a PO#
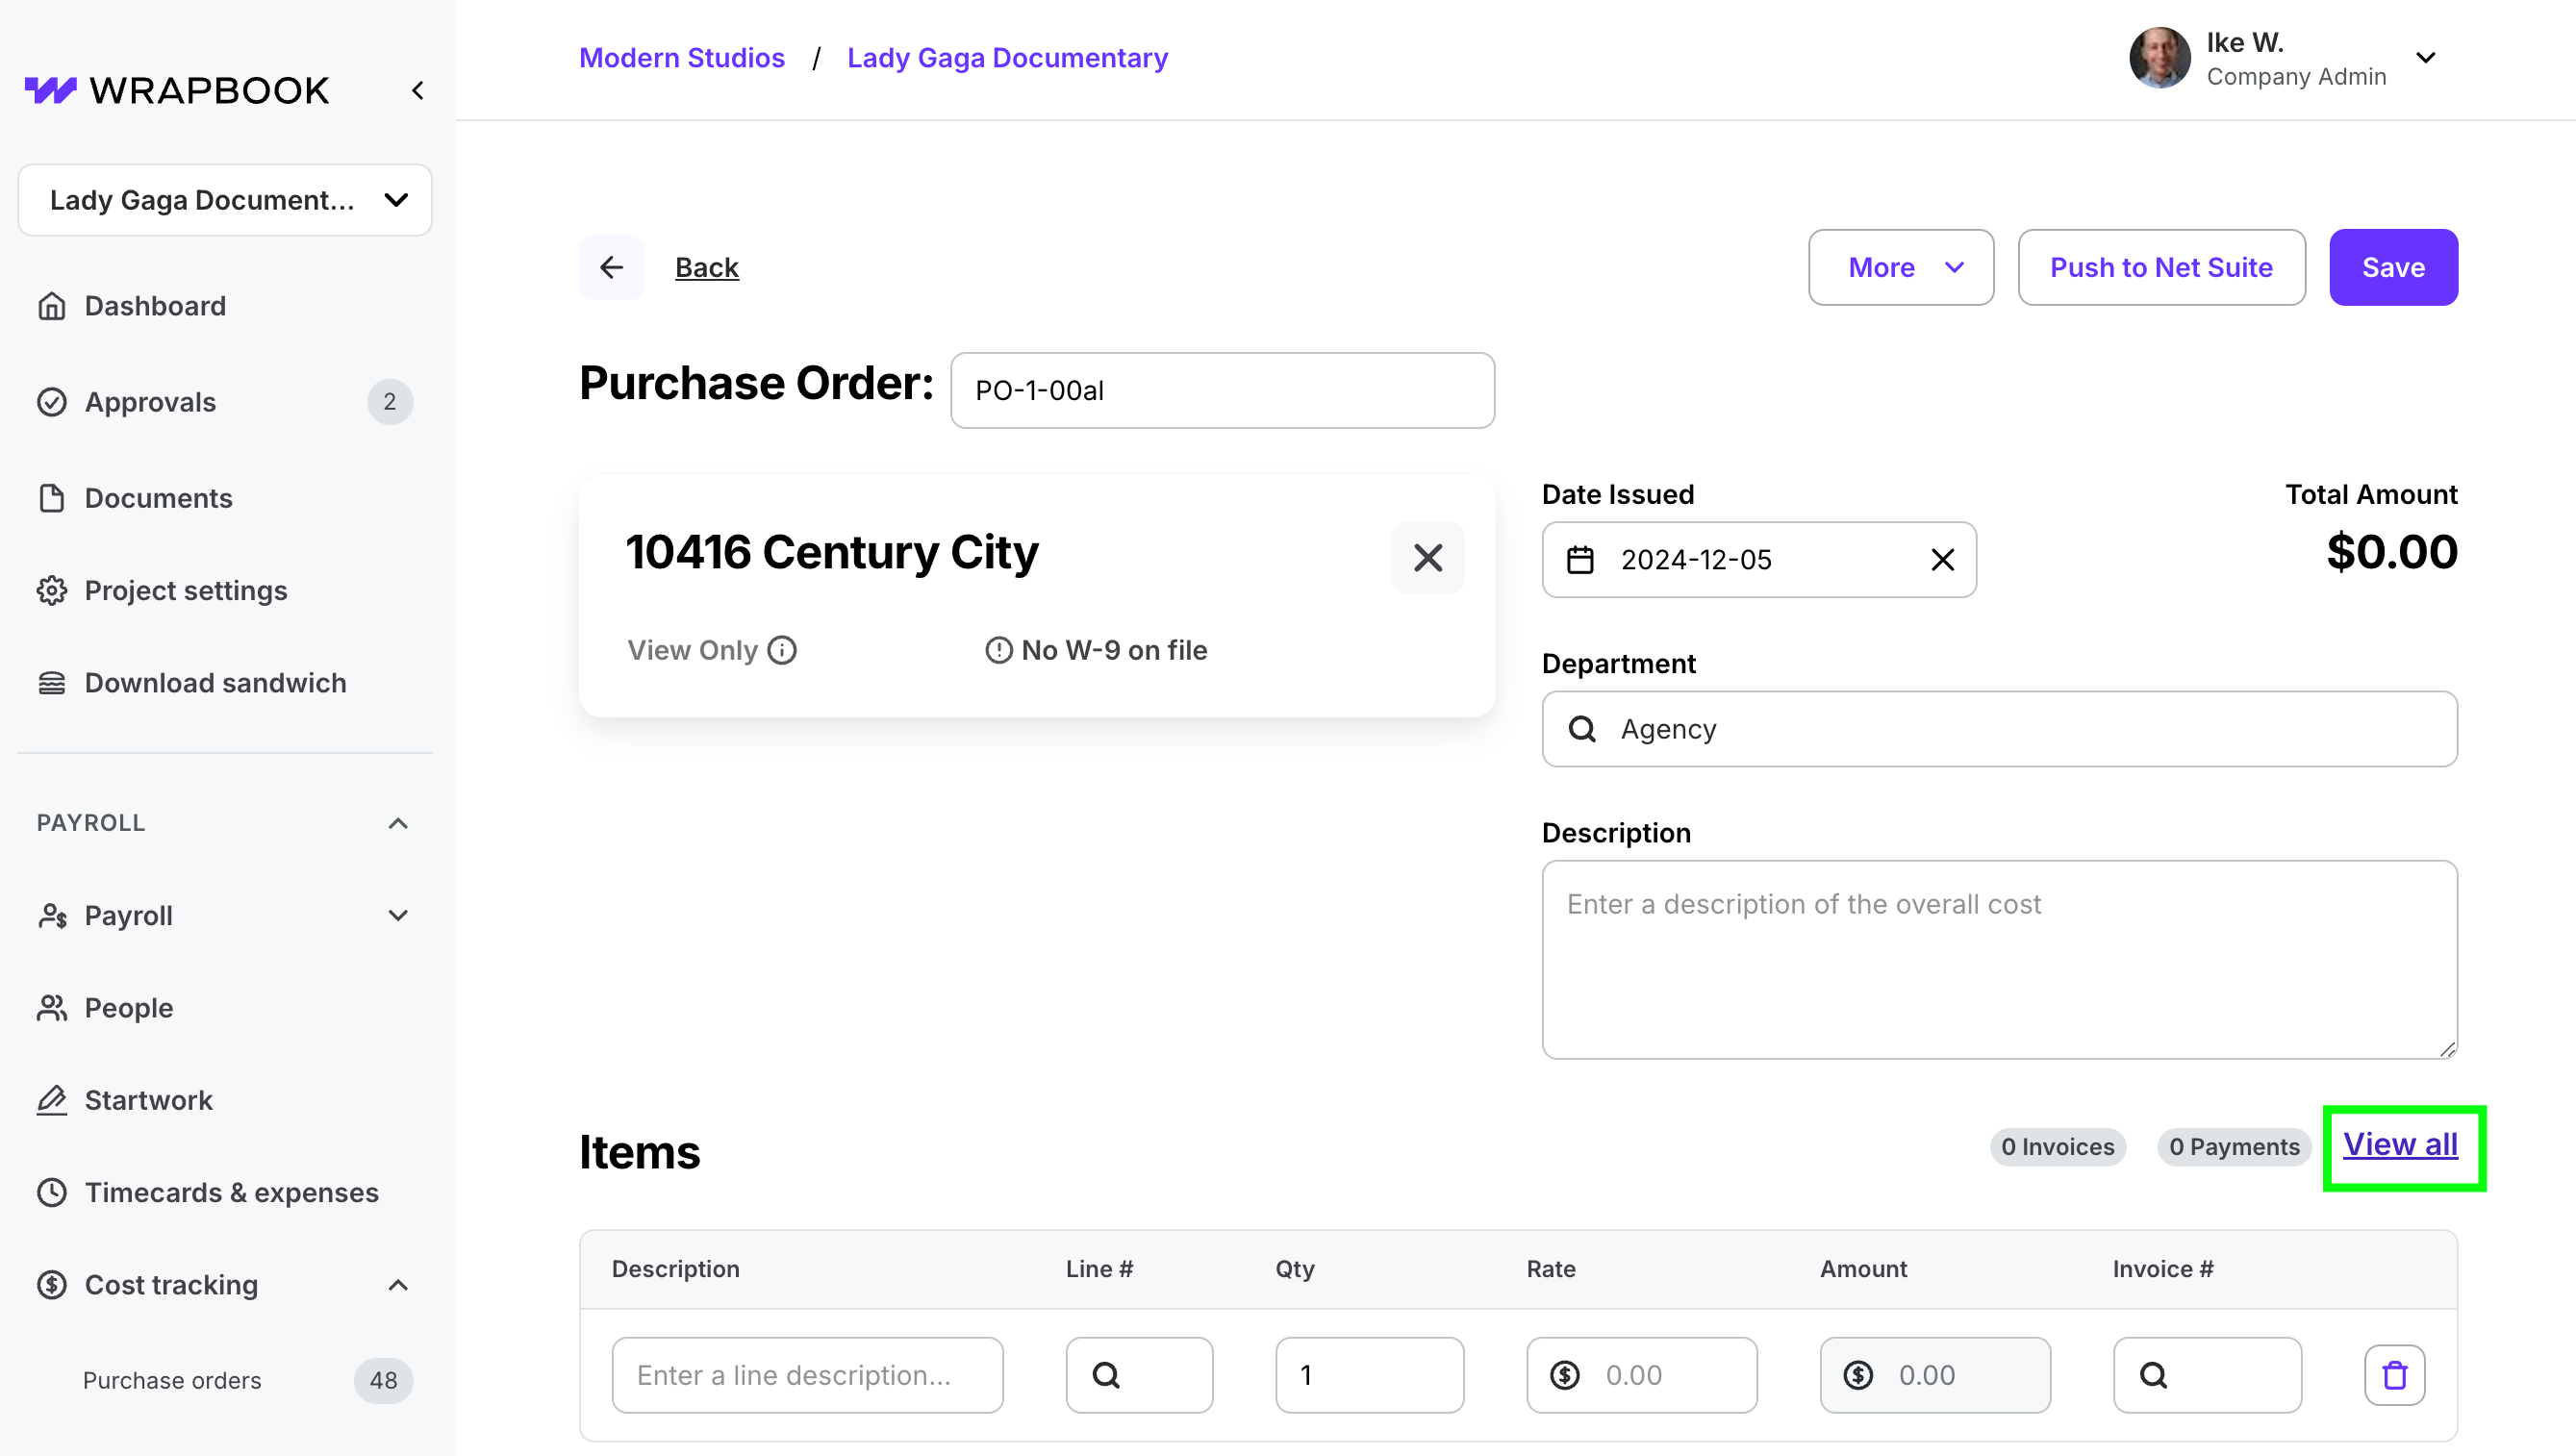
Click View all
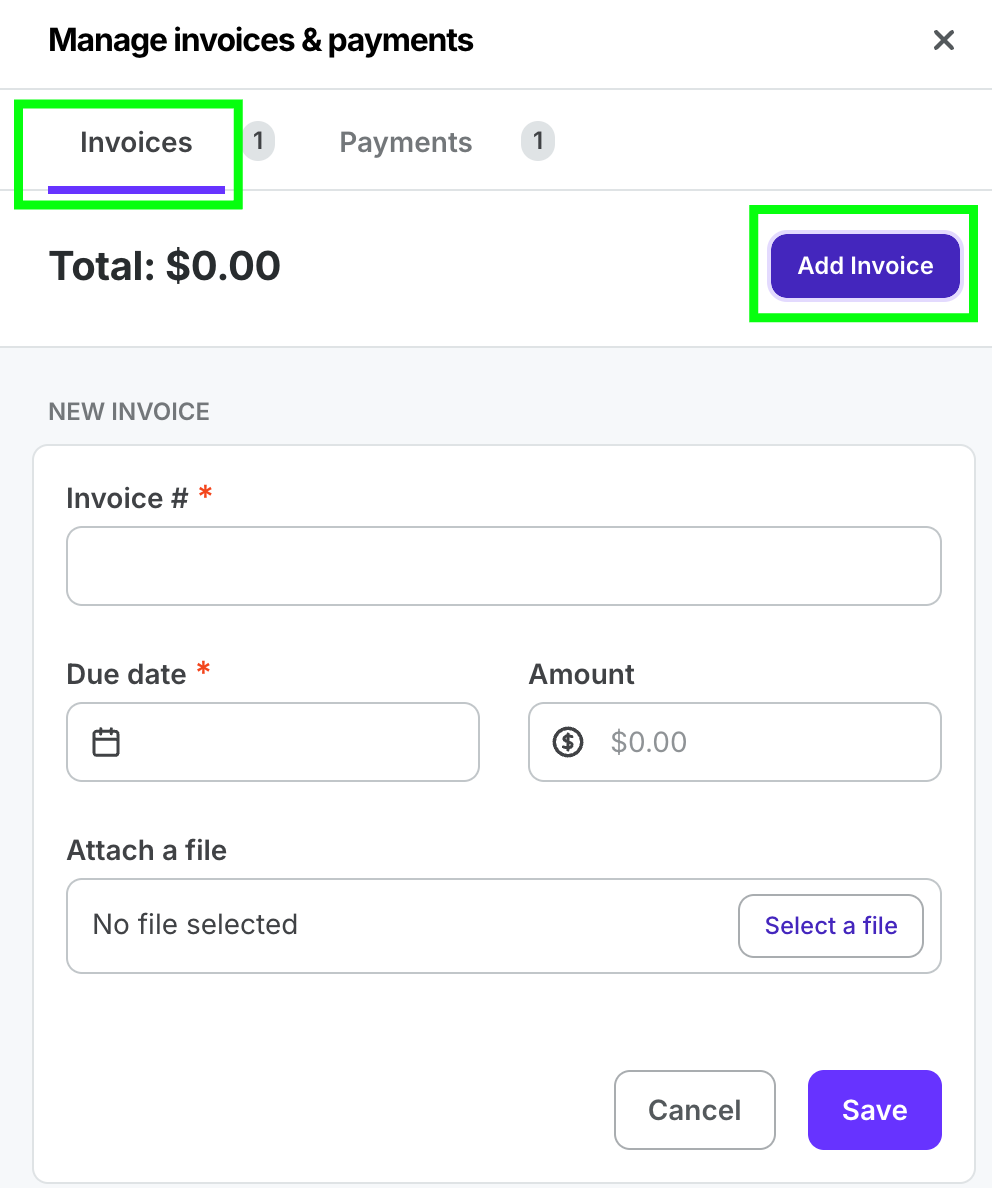
On the Invoices tab, Click Add Invoice
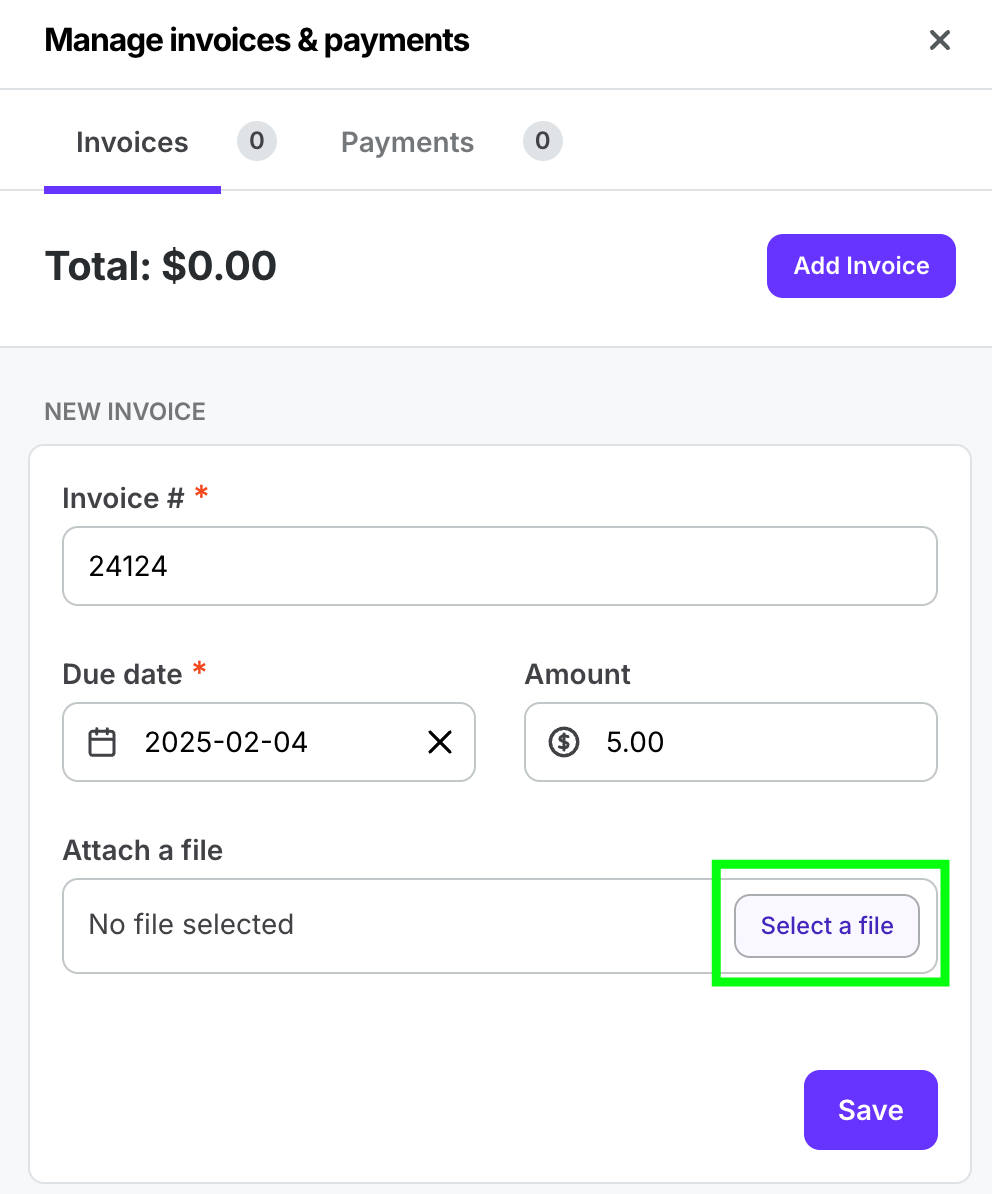
Click Select a file