The documentation in this section applies to the Legacy Timecards Experience in Wrapbook.
Wrapbook currently supports two versions of Timecards: Legacy and New
Looking for the new experience? See Timecards (New Experience).
Overview
When adding an allowance to worker timecards you have two options:
How to add allowances to project worker timecards
Adding allowances is permission based
To add allowances, your account must have one of the following roles enabled:
Role: Company Admin, Company Manager, Project Coordinator
Custom role with: Expenses - Full access, Create and manage
You can add allowances to one or more project worker timecards from the project’s Timecards & Expenses dashboard as follows:
In the left-side navigation, click the dropdown menu
In the dropdown menu, select the project that you want to access timecards and expenses for
In the left-side navigation Payroll menu, click Timecards & expenses
On the Timecards & Expenses dashboard click the Add expense/allowance box and select the type of allowance you want to add
In the popup, click the checkboxes to select the worker(s) whose timecards you want to add the expense/allowance to. To find specific workers quickly, use the Search by name or title…. box. Once you’ve selected the worker(s) click the Continue button.
In the popup, enter the required information. The information that you’re required to enter is based on the type of allowance you’ve selected.
Click the Date field to open a calendar and select the day for the allowance
Click the Amount field to enter the dollar amount of the allowance
Enter additional information about the expense/allowance
Click the Select a file button to upload supporting documentation from your computer
If Cost tracking is enabled for the project, click the search icon in the Code box to assign a code from your accounting chart to the expense/allowance
Click the Review button to confirm the details that you’ve entered for the expense/allowance
Once you’ve confirmed the details, click the Submit button
After you’ve submitted the allowance, it will appear in the Submissions list on the Timecards & Expenses dashboard for each worker you selected.
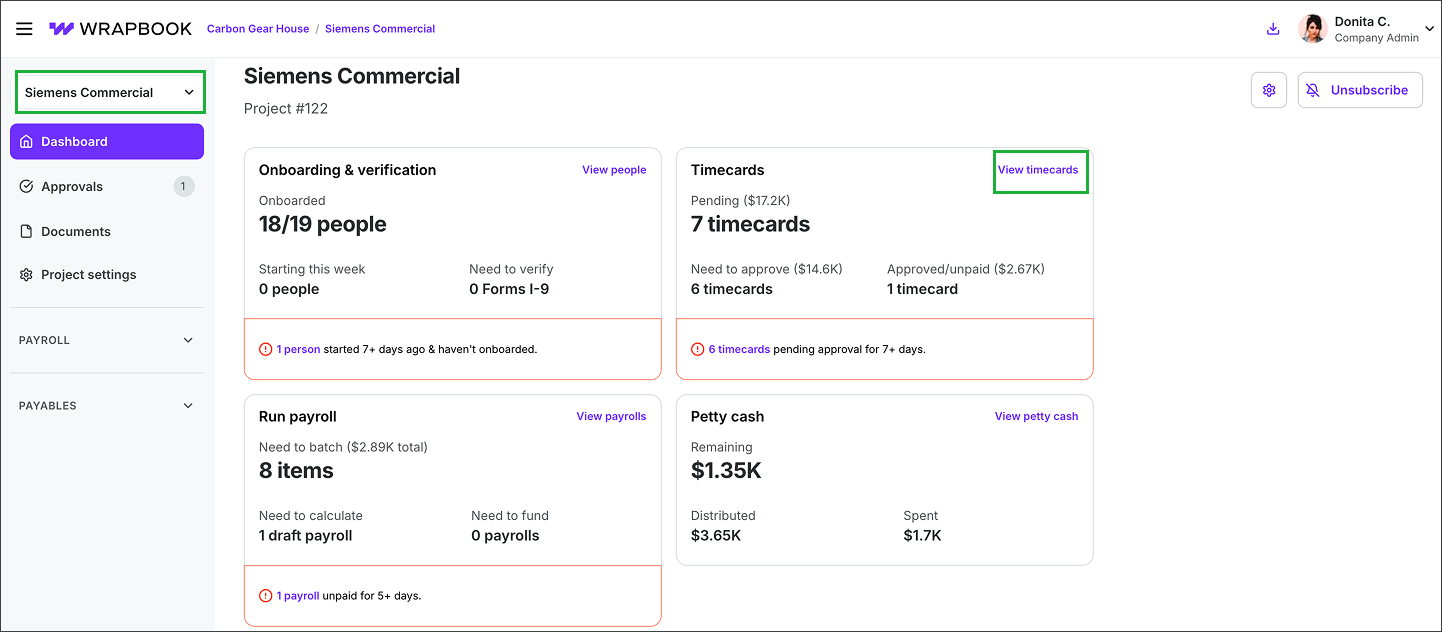
Select the project, and then click View timecards
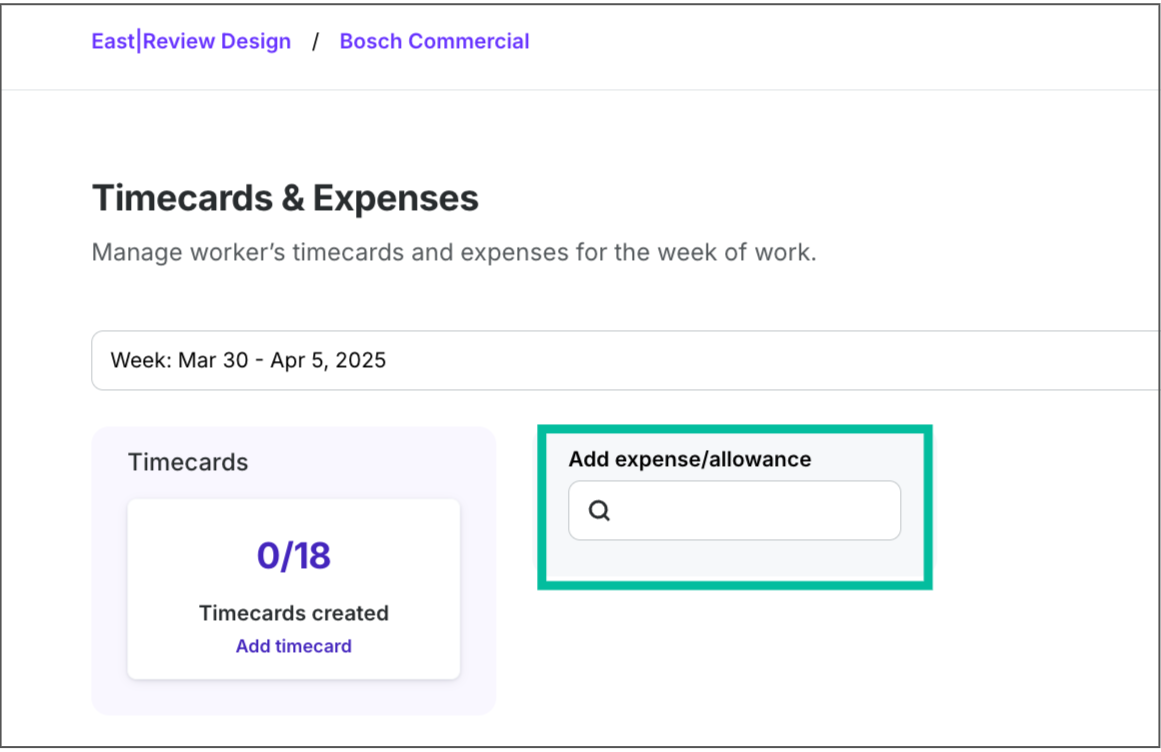
Click the search icon in the Add expense/allowance field

Click the search icon under Add expense/allowance, and then make your selection
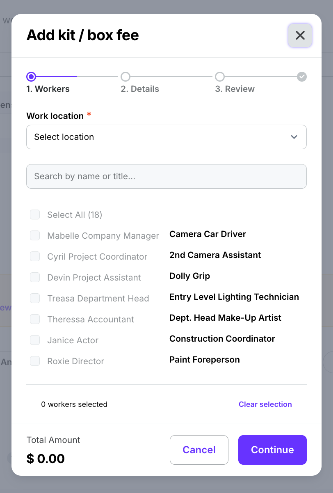
Select the Work location, click to select the workers, then click Continue
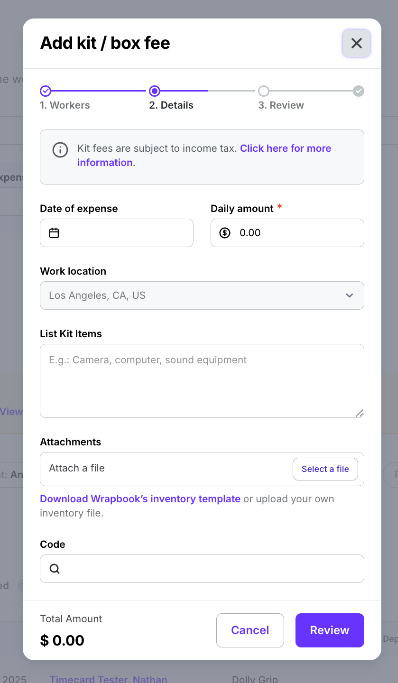
Click to enter the Dates of expense and the Daily amount. Enter additional information, click Select a file to upload documentation, and then click the Review button.
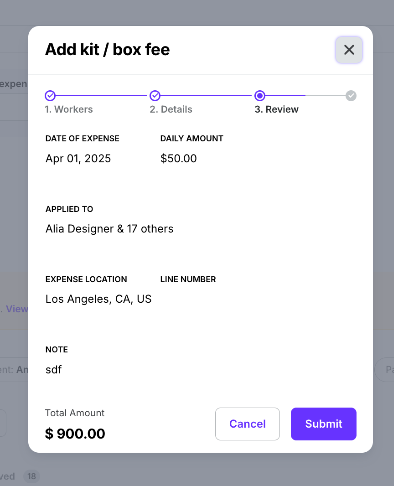
Review the details you entered, and then click the Submit button
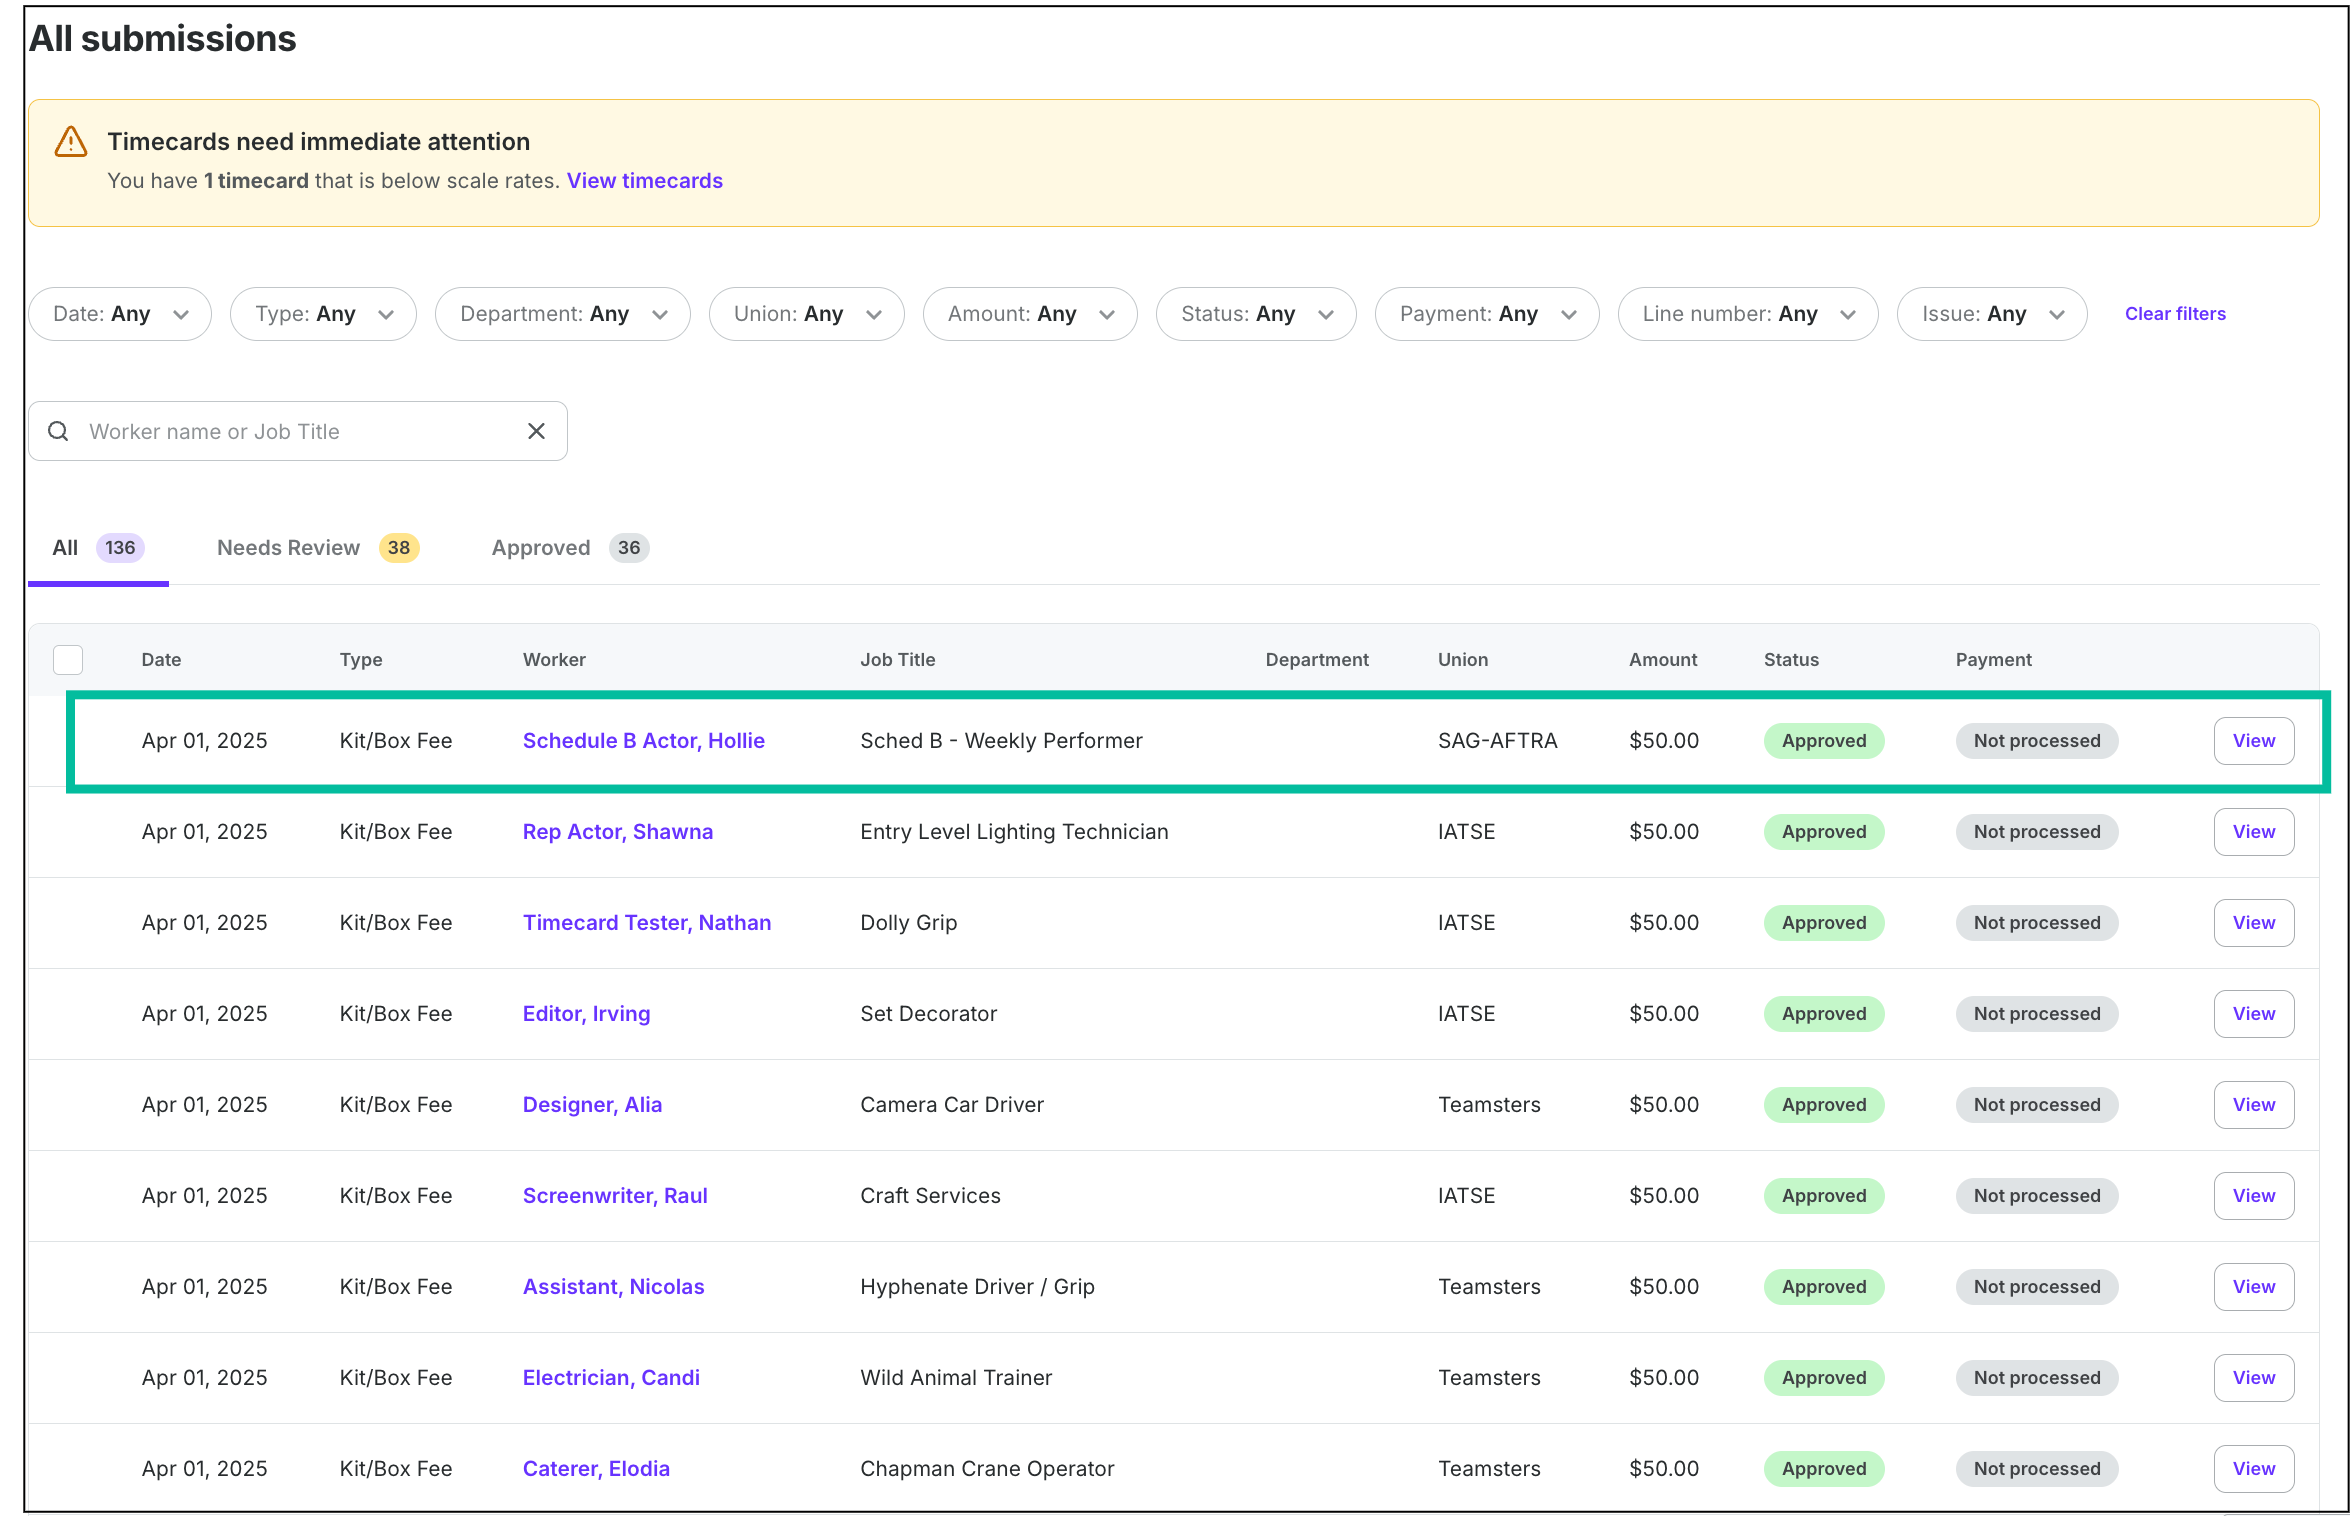
The allowance(s) will now appear in the All submissions list on the project's Timecards & Expenses dashboard
How to add the same allowance to multiple workdays for an individual worker
You can add an allowance to multiple days for the same worker by going to the Worker timecards & expenses page as follows:
In the left-side navigation, click the dropdown menu
In the dropdown menu, select the project that the worker is part of
In the left-side navigation, click People
On the project’s People dashboard, click the View button next to the worker whose timecard you want to add the allowance to
On the worker’s profile, click the Manage worker timecard(s) button
On the Worker timecards & expenses page, in the Expenses section, click Add expense/allowance and select the type of allowance you want to add
In the popup, enter the required information. The information that you’re required to enter is based on the type of allowance you’ve selected.
Click the Date field to open a calendar where you can add the allowance to one or more days within the workweek. Selecting multiple dates will generate identical payables for each selected day.
Click the Daily Amount field to enter the daily dollar amount of the allowance
Enter additional information about the expense/allowance
Click the Select a file button to upload supporting documentation from your computer
If Cost tracking is enabled for the project, click the search icon in the Code box to assign a code from your accounting chart to the expense/allowance
Click the Review button to confirm the details that you’ve entered for the expense/allowance
Once you’ve confirmed the details, click the Submit button
After you’ve submitted the allowance, it will appear in the Submissions list on the Worker timecards & expenses page.

On the project worker’s profile, click the Manage worker timecard(s) button
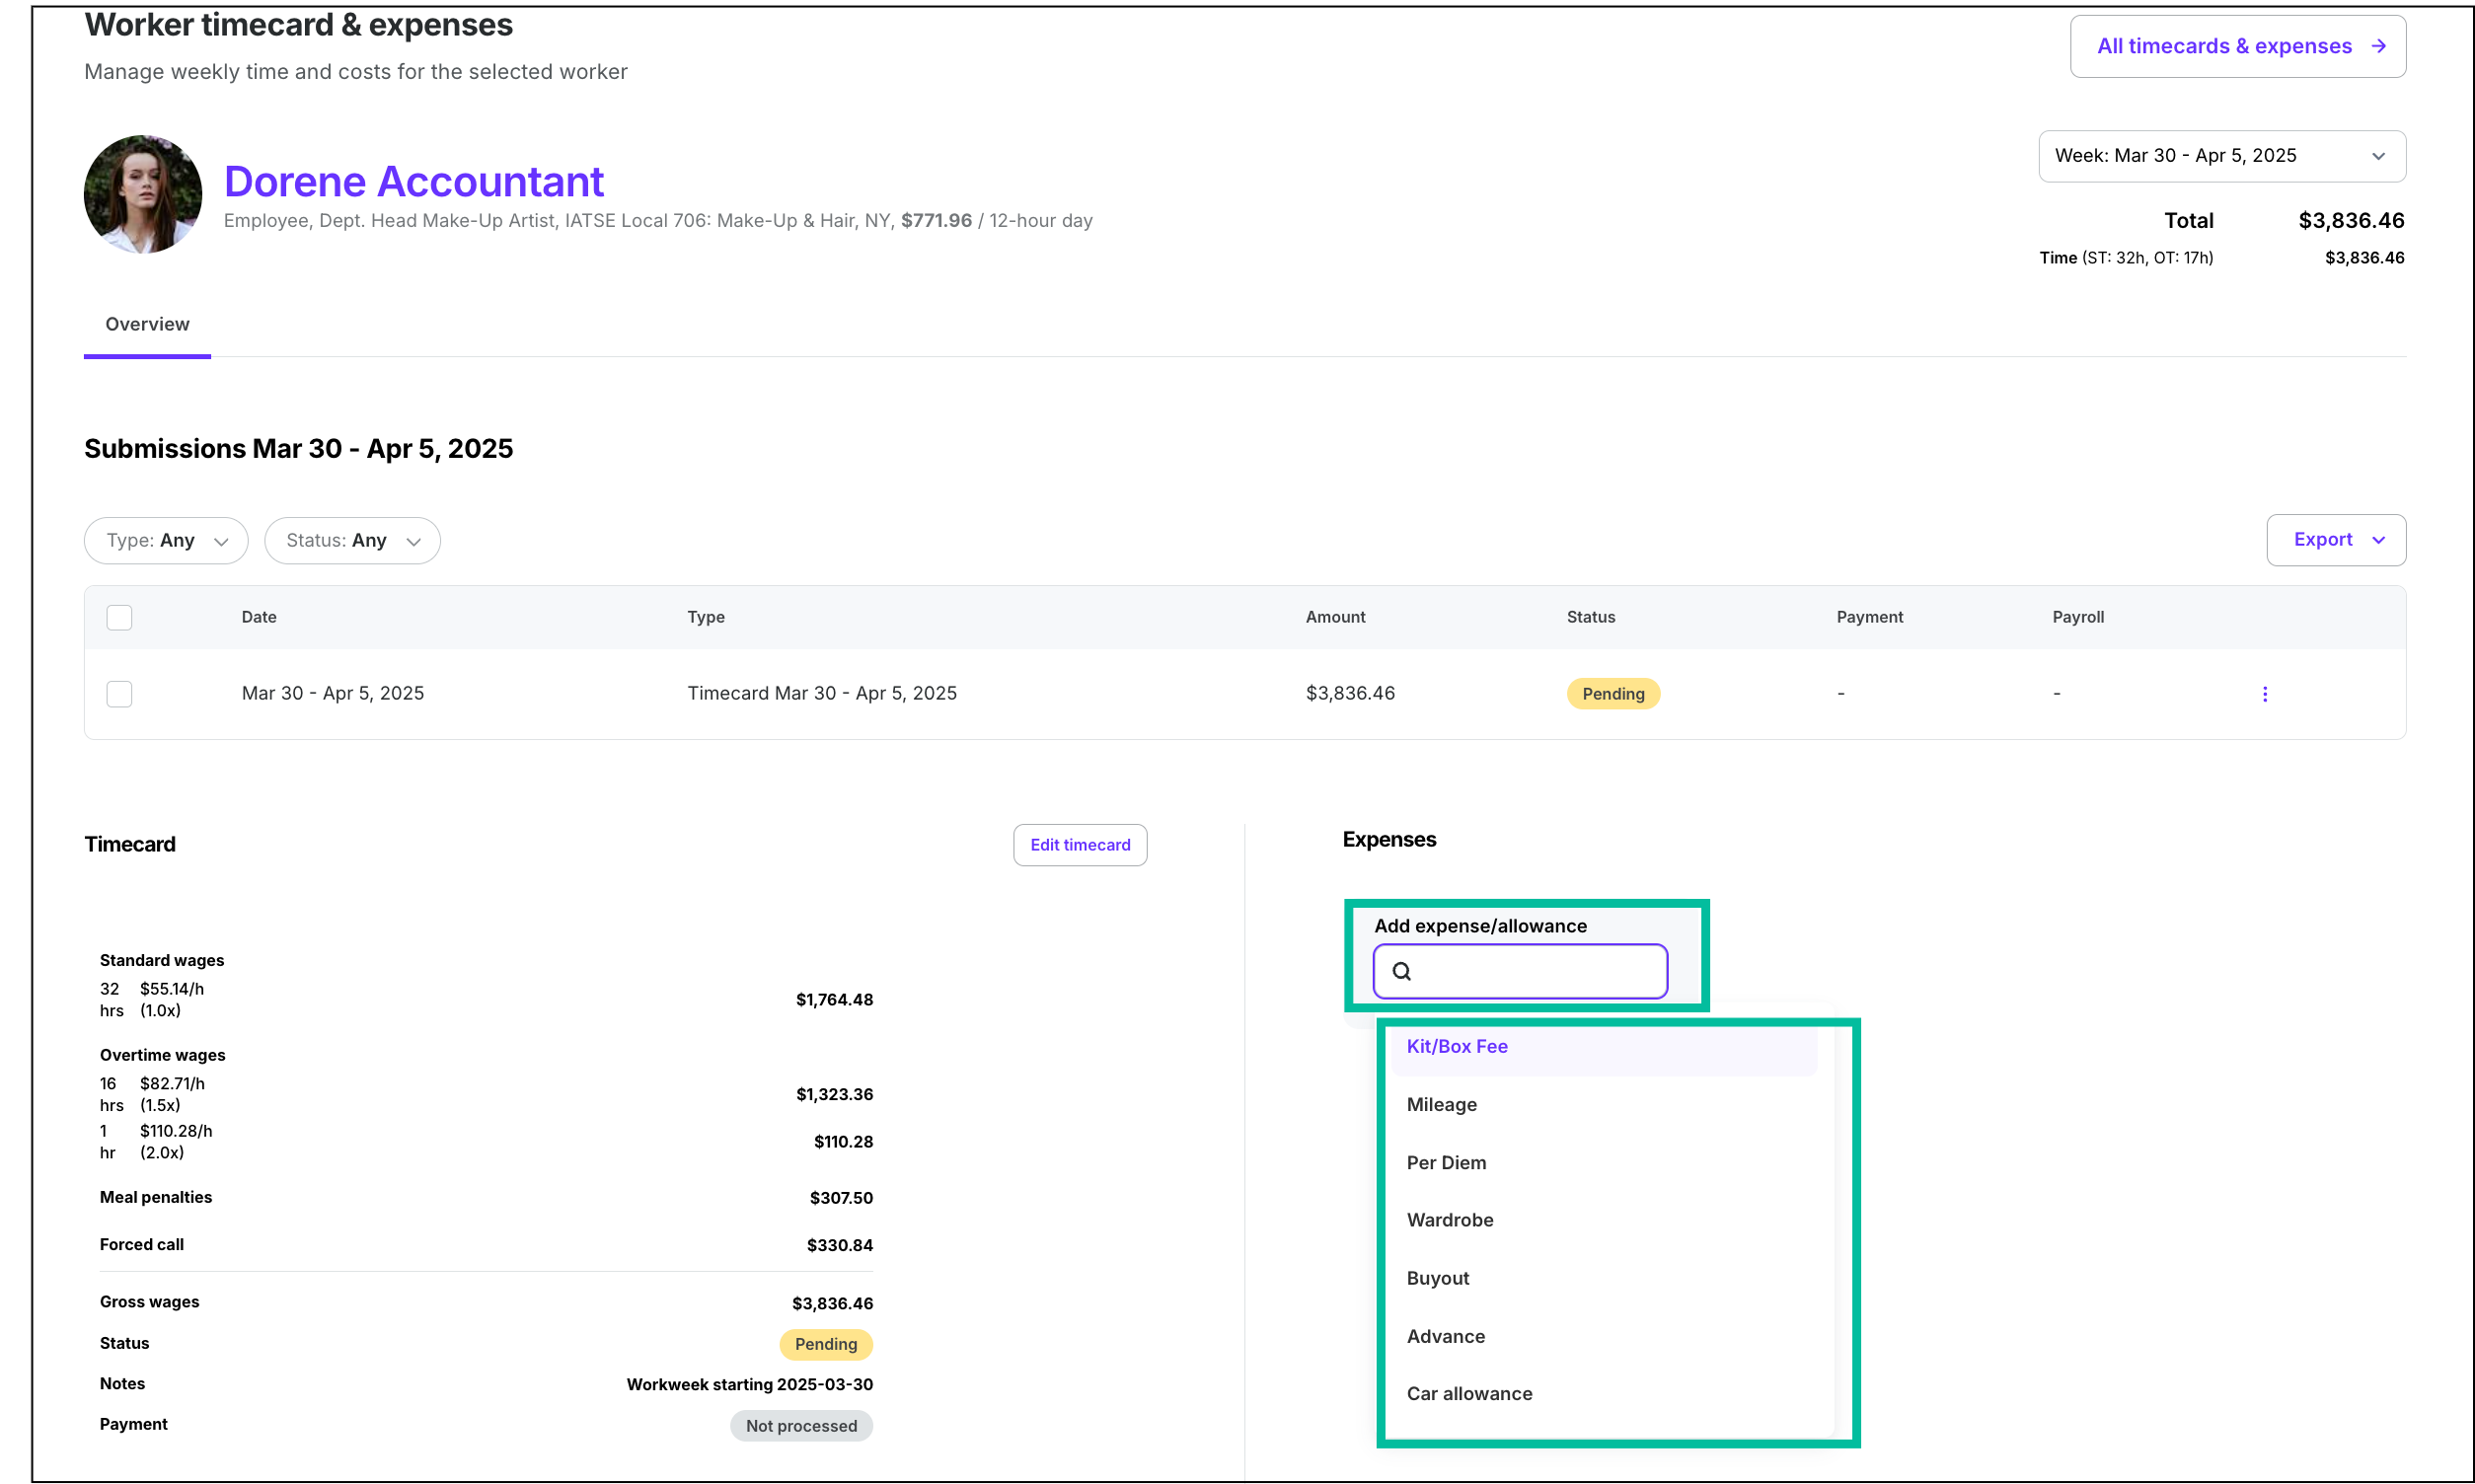
Click Add expense/allowance and make your selection
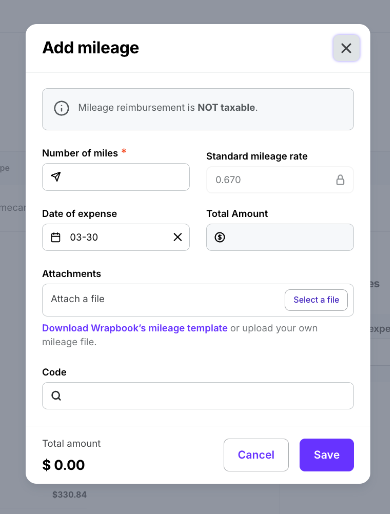
Enter the required information, select one or more days to add the allowance to, enter the Amount, and then click Select a file to upload documentation. When you're done, click the Save button.
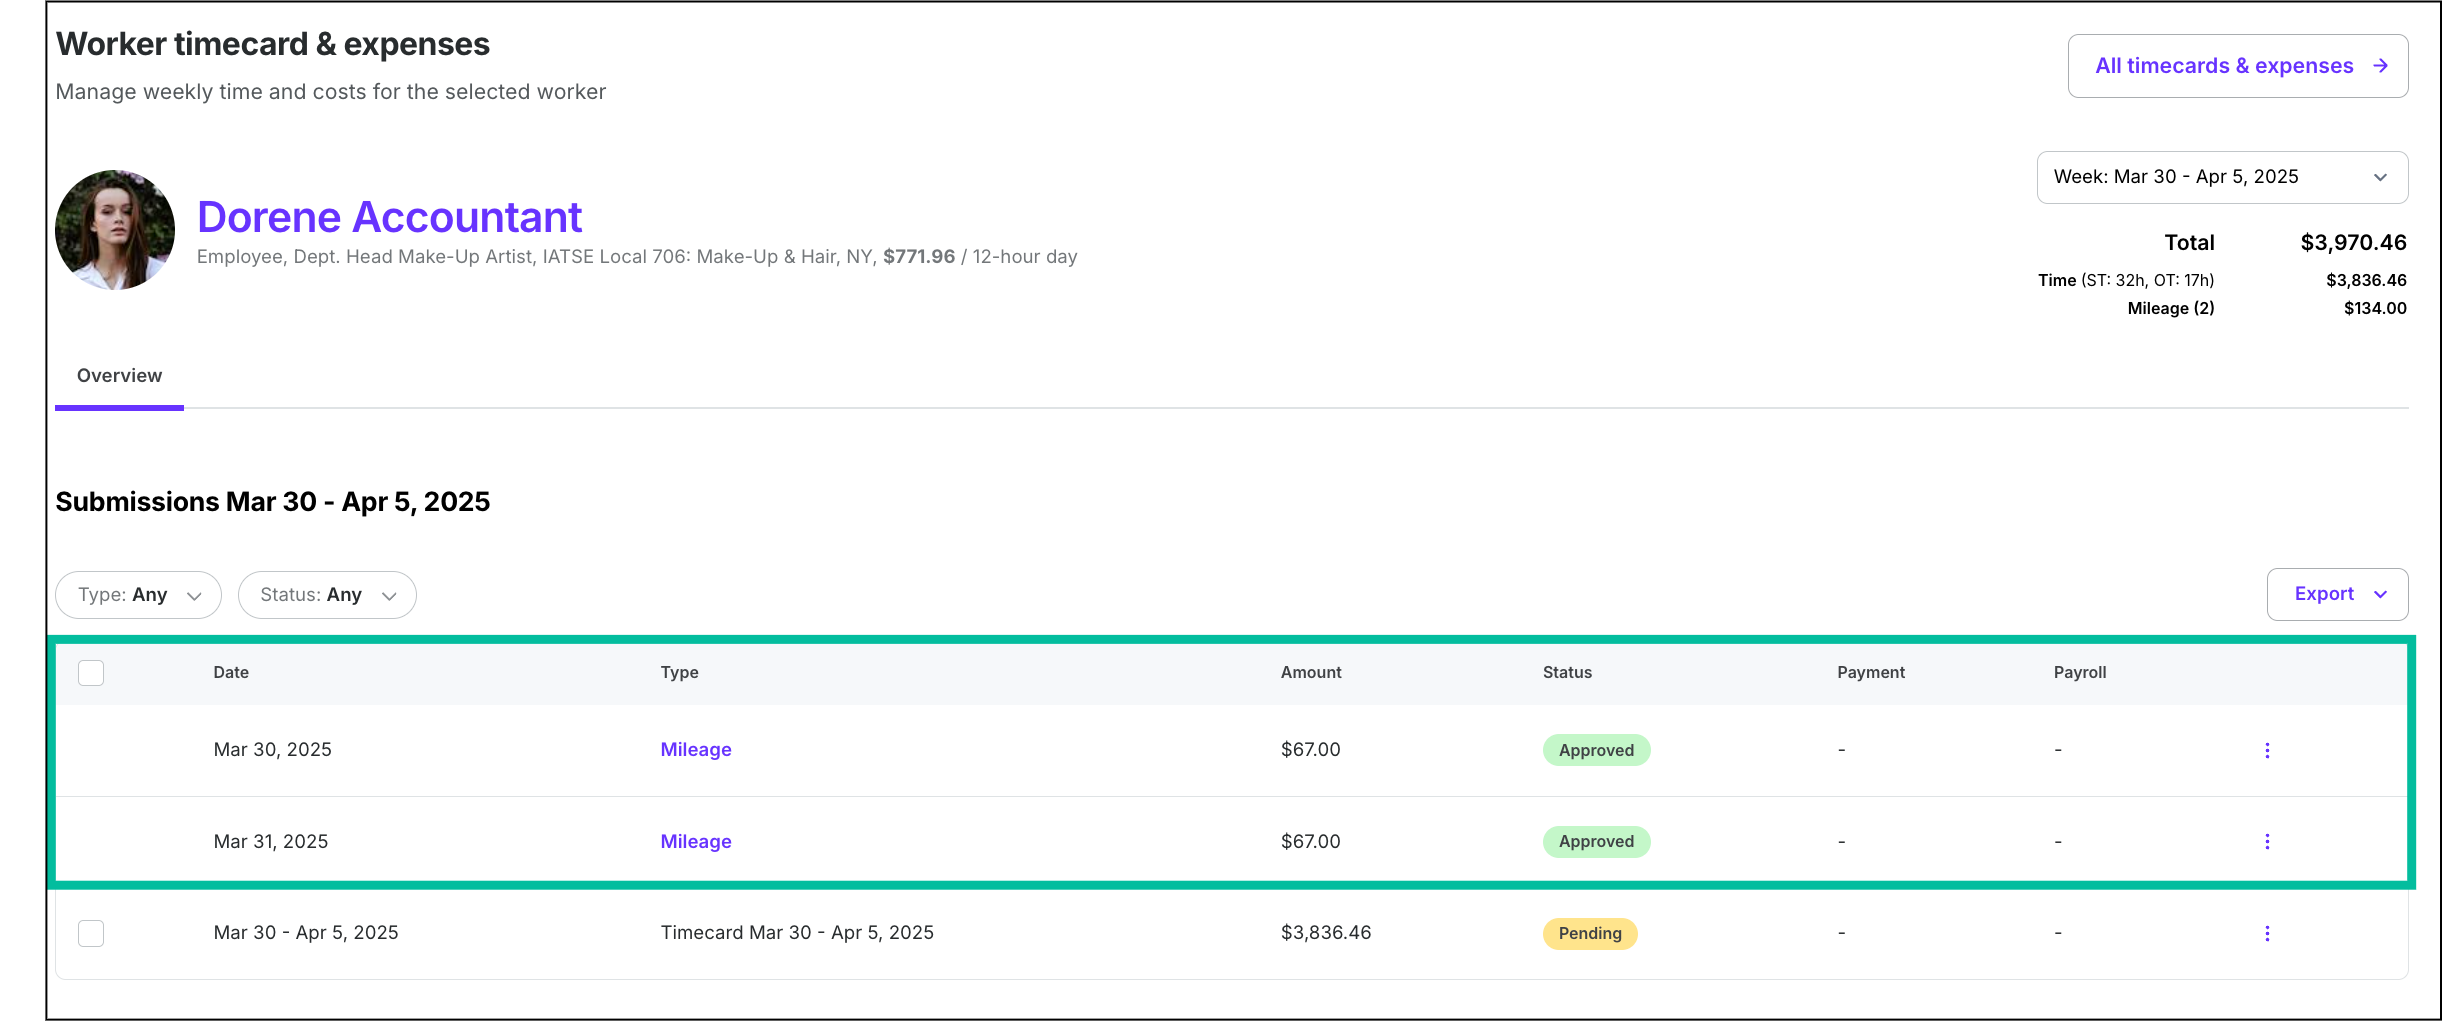
Once allowances are submitted, they'll appear in the Submissions section of the Worker timecard & expenses page