Add allowances and expenses
In the left-side navigation, click All projects
On your All projects dashboard, click the View Project button next to the project that you want to add an allowances or expense to
In the left-side navigation, click Timecard
On the Timecards & Allowances page, scroll to the Expenses & Reimbursements section
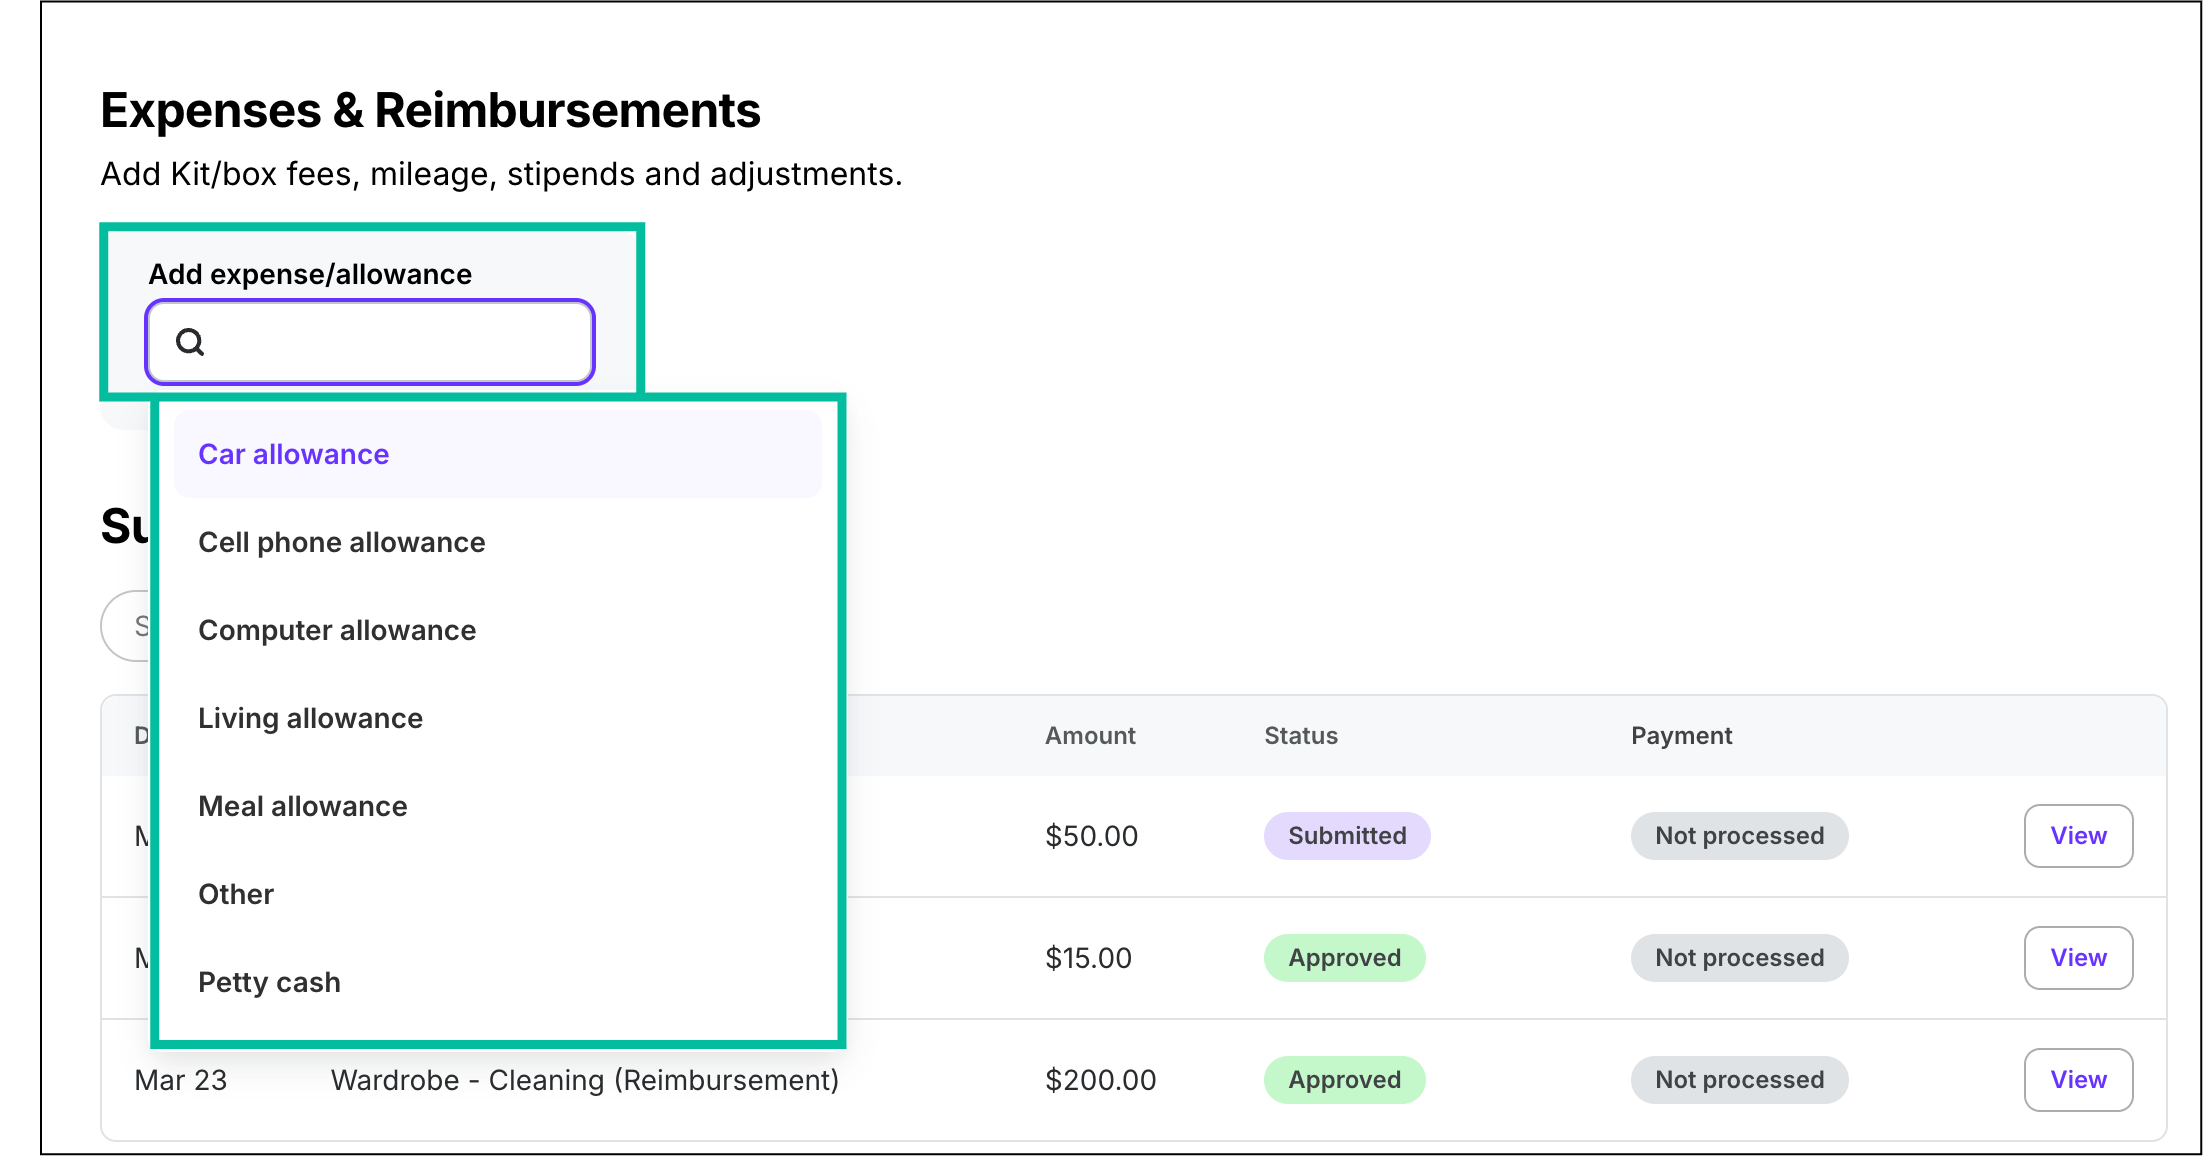
Click the search icon in the Add expense/allowance box, and then select the type of expense/allowance you want to submit
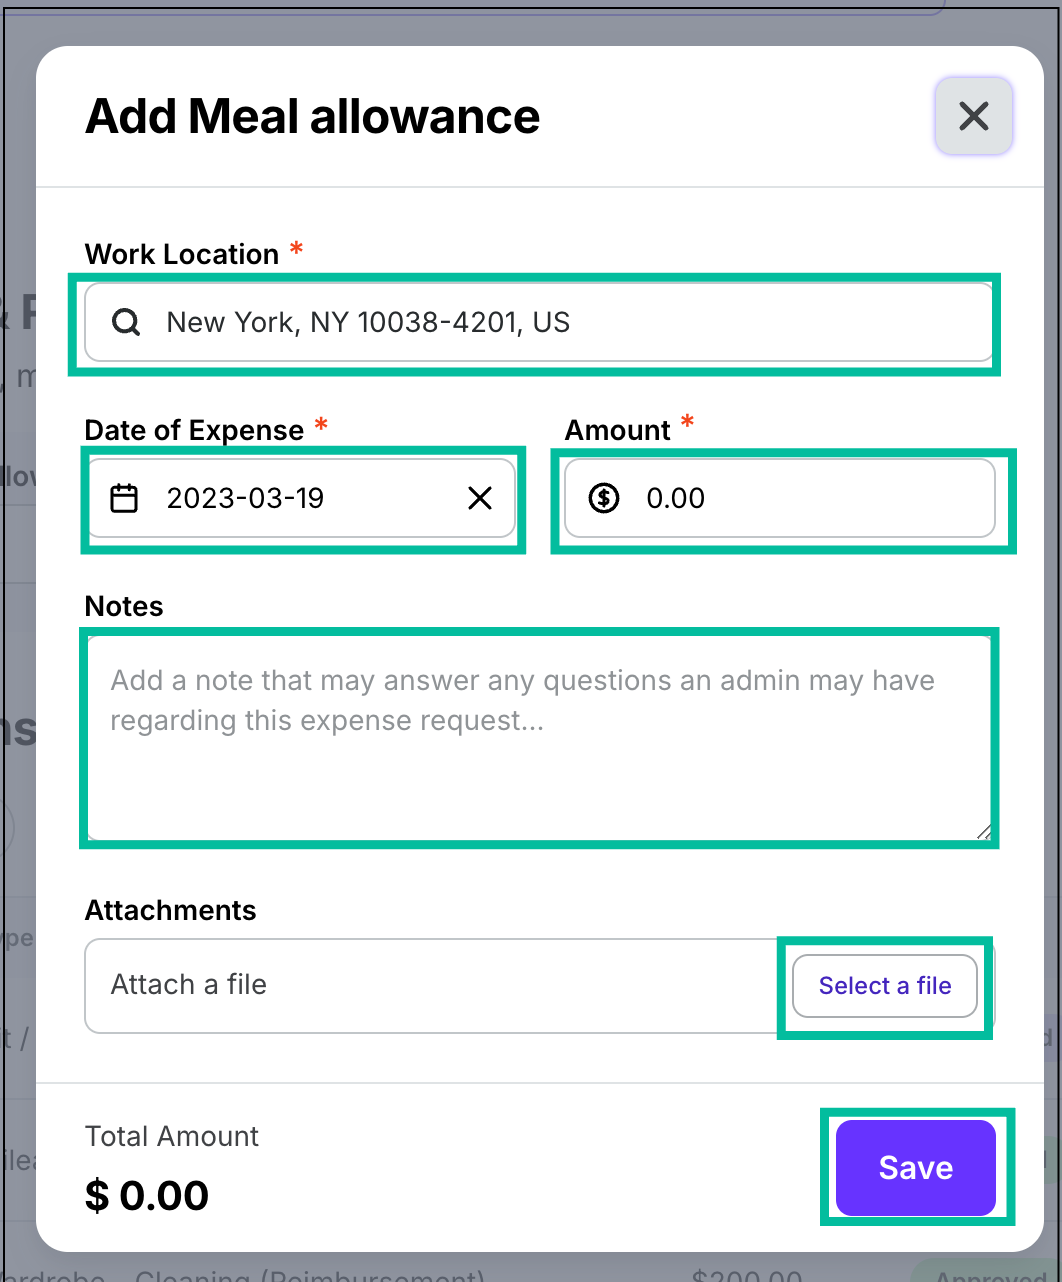
In the popup, enter the required information in. The information that you’re required to enter is based on the expense/allowance type that you select.
Click to add Notes if there’s additional information about the expense that you want your production administrators to see
Under Attachments, click the Select a file button to upload supporting documentation from your computer or device
Click the Save button
What happens next
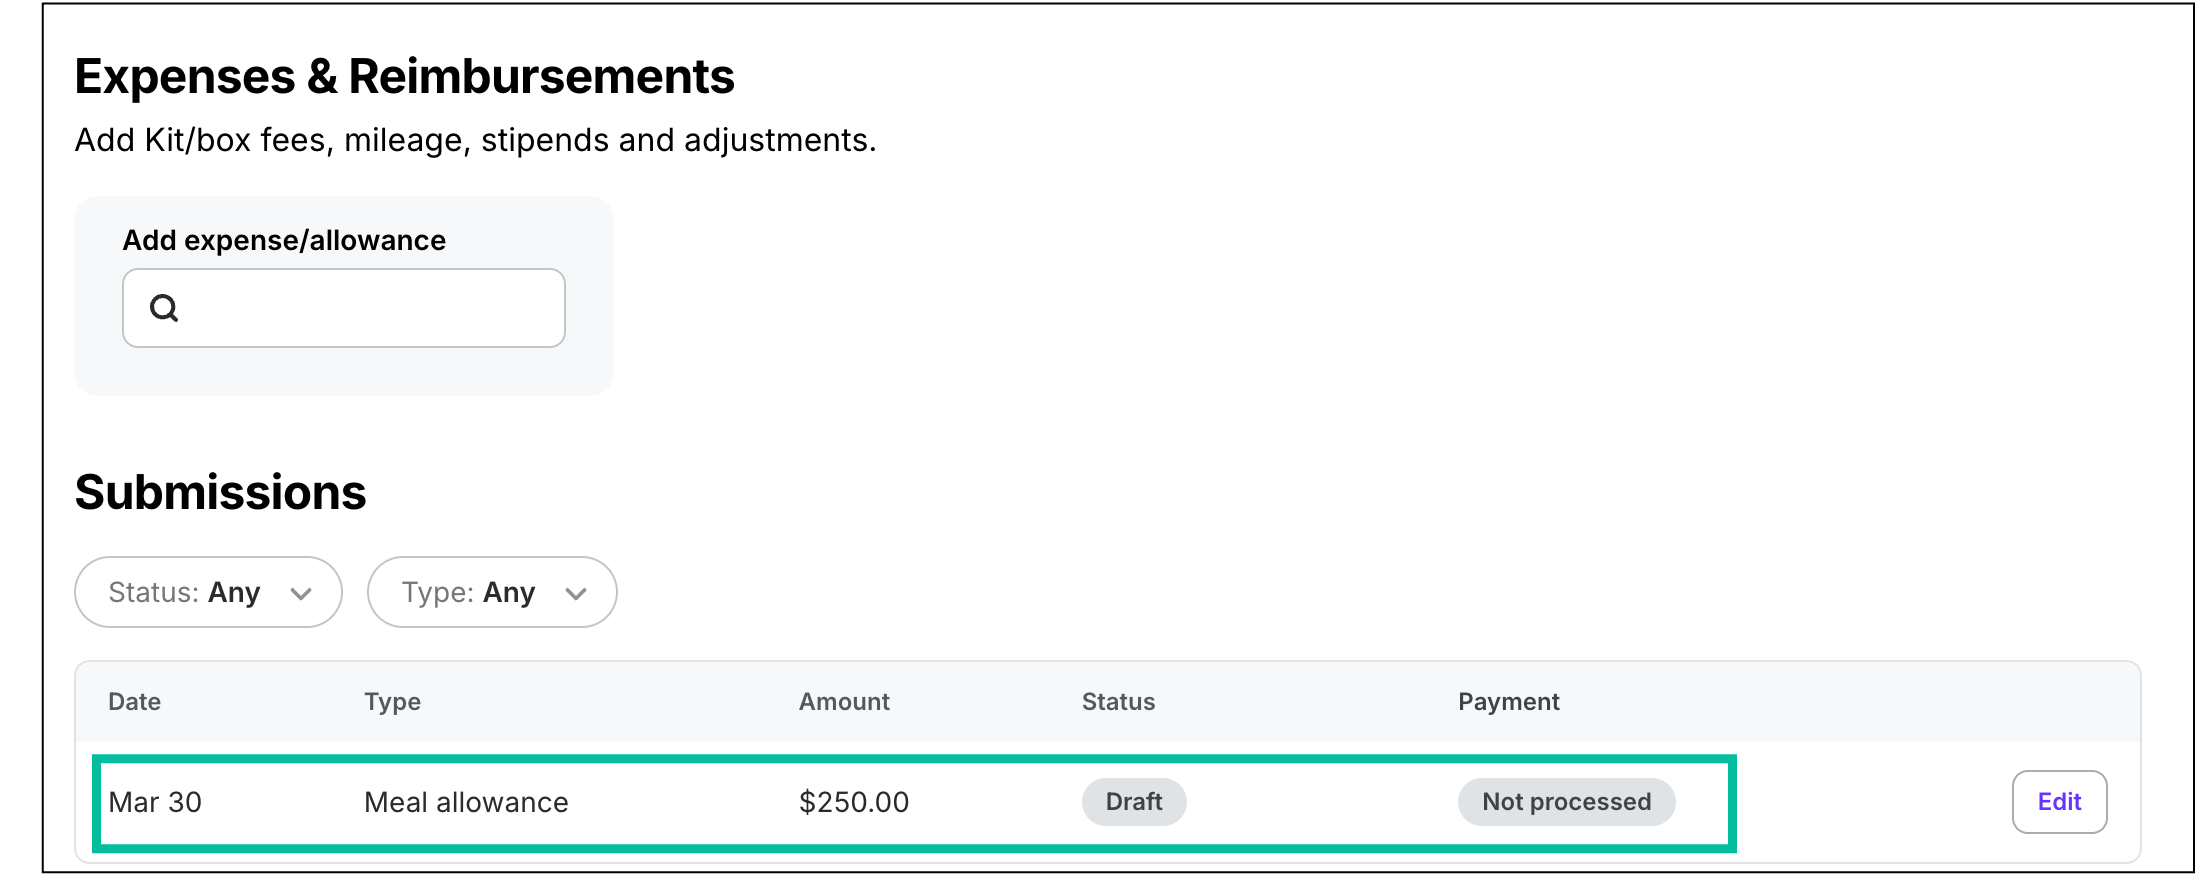
After you click the Save button, the expense/allowance will be automatically submitted to the production company for review and approval. You can verify this by reviewing the Submission list on your Timecard dashboard.
Reimbursements for allowances and expenses that you submit are processed along with your regular pay after approval.
The payment timeline depends on:
Production's approval of your submission
Production's payroll schedule
The payment method selected for your account. To learn more, see How to set up your payment method.

Click the search icon and then select the type of expense

Enter the required information, add Notes, click Select a file to upload supporting documentation, then click the Save button

Expenses submitted are show in the Submissions list