Creating JEs in PAS is permission based
To create JEs, your account must have one of the following roles enabled:
Role: Company Admin, Accountant
Custom role with: Journal entries - Full access, Create and manage
With Wrapbook’s Production Accounting Suite (PAS) enabled, you can use the Journal entries dashboard (JE) to record or adjust transactions, ensuring a complete audit trail alongside Wrapbook‑generated entries.
Create a JE
Here’s how to manually create a JE in Wrapbook:
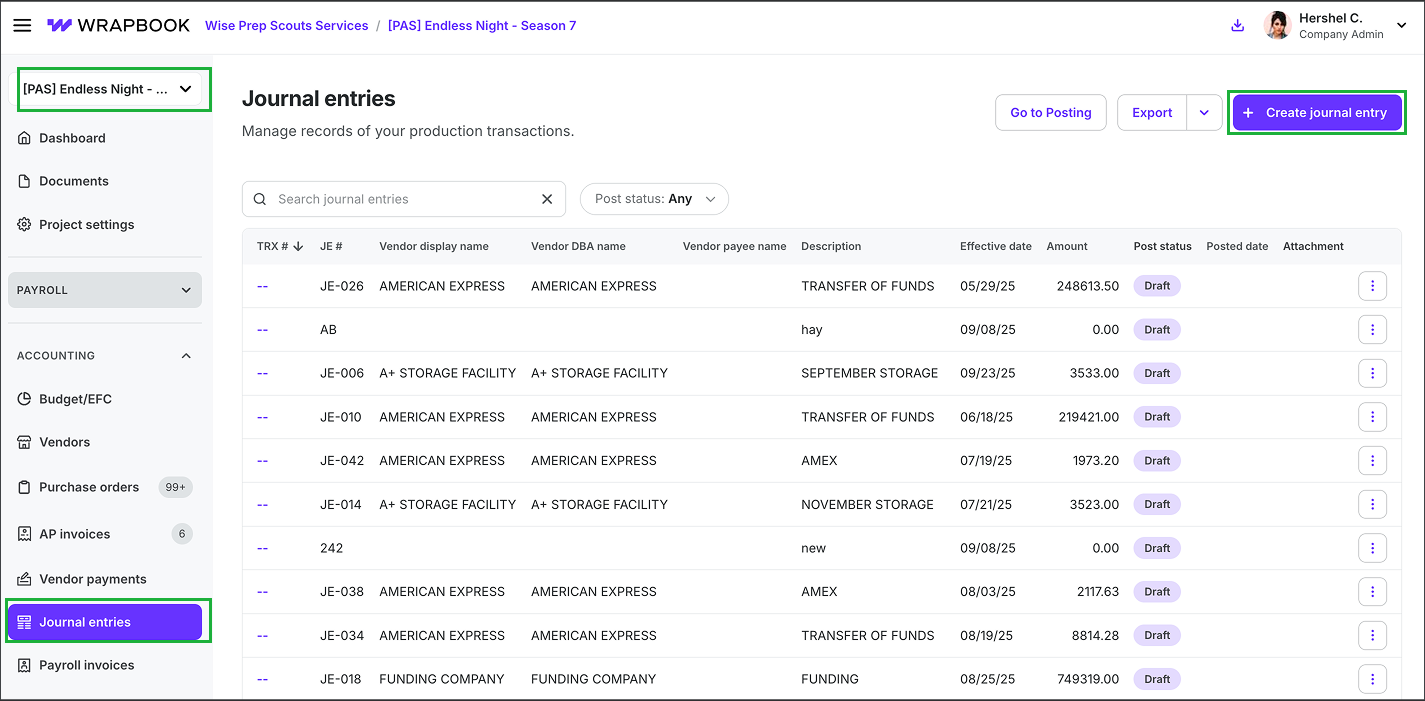
In the left-side navigation, click the dropdown menu
In the dropdown menu, select the name of the project that you want to create a JE for
In the left-side navigation, expand the ACCOUNTING menu, click Journal entries
On the Journal entries dashboard, click the + Create journal entry button
On the JE transaction # page, enter the JE details. Once the required fields are complete, you’ll be able to update the transaction details.
Click the Attach files button to upload documentation from your computer
When you’re finished, click the Save button
Select the project, expand the ACCOUNTING menu and click Journal entries. Then, click the + Create journal entry button.
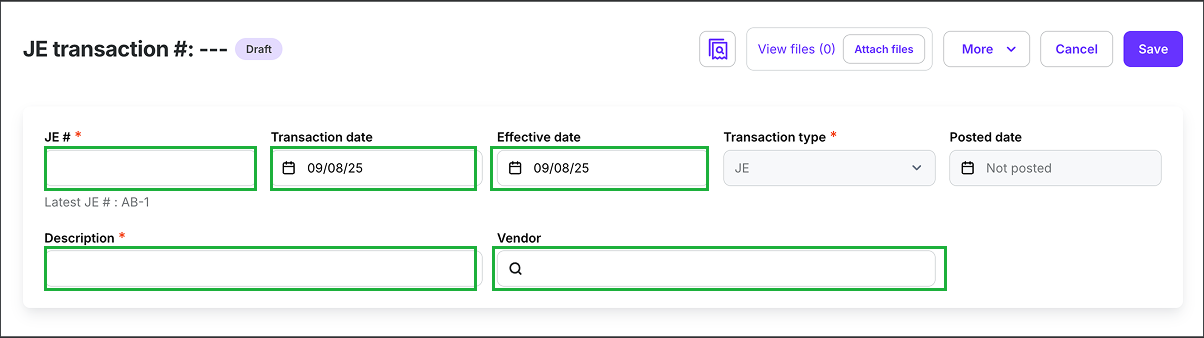
Click on each field to enter the details for the JE
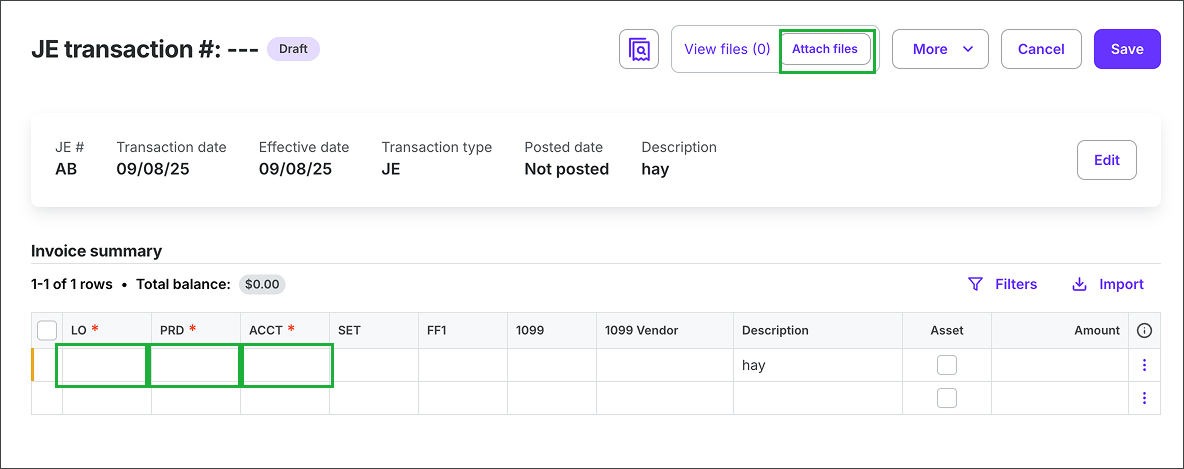
Once the Description is added, the JE will autosave and open the Invoice summary, where you can click on the fields to key in the account codes and details. To add a receipt or invoice, click the Attach files button. When you’re finished, click the Save button.
Import JEs
With Wrapbook PAS, you have the option to import data from an existing spreadsheet when creating a JE by either:
Copying transaction cells from your existing spreadsheet and pasting them directly in Wrapbook, or
Uploading an Excel or CSV file that’s saved to your computer
Here’s how:
On the Journal entries dashboard, click the + Create journal entry button
On the JE transaction # page, begin entering the details for the JE. Once you enter a Description, the JE will autosave and open the Invoice summary transaction lines.
In the Invoice summary section click Import
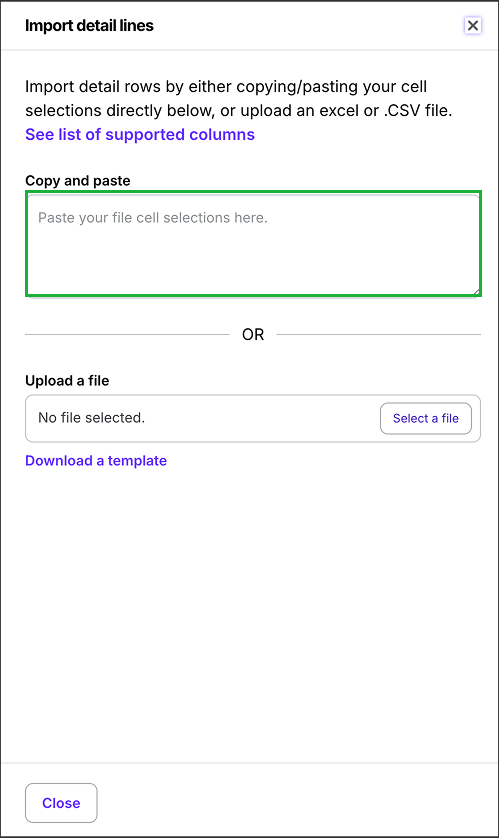
In the Import detail lines drawer you can import detail rows by either copying and pasting your cell selections directly into the Copy and paste field, or by clicking the Select a file button to upload an Excel or CSV file saved to your computer.
If you choose to upload a file, you’ll need to make sure the spreadsheet’s headers match the Wrapbook format for JEs. You can see the format of the table headers by clicking Download a template in the Import detail lines drawer.
Select the project, expand the ACCOUNTING menu and click Journal entries. Then, click the + Create journal entry button.
Click on each field to enter the details for the JE
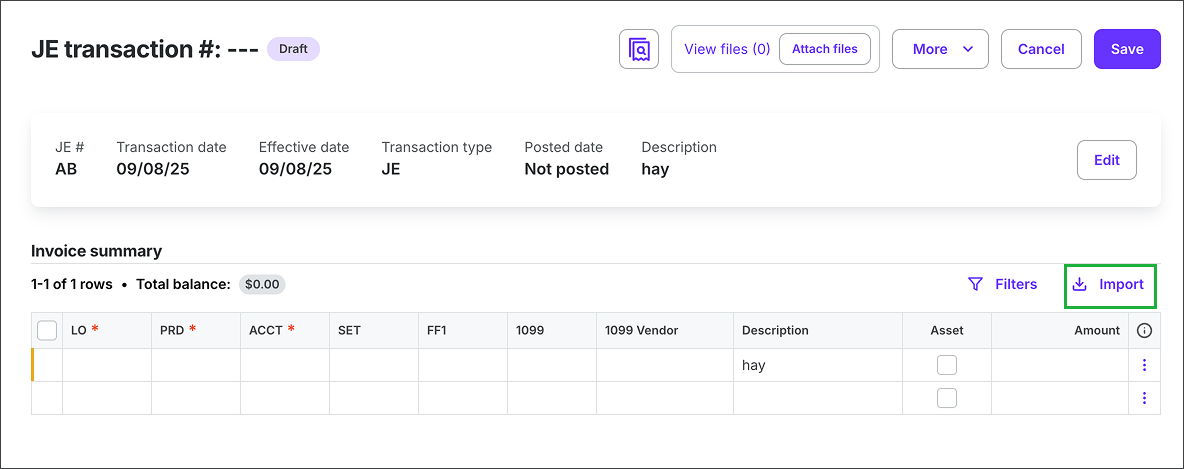
Click Import to open the Import detail lines drawer
You can copy and paste cells data from your spreadsheet into the Copy and paste field.
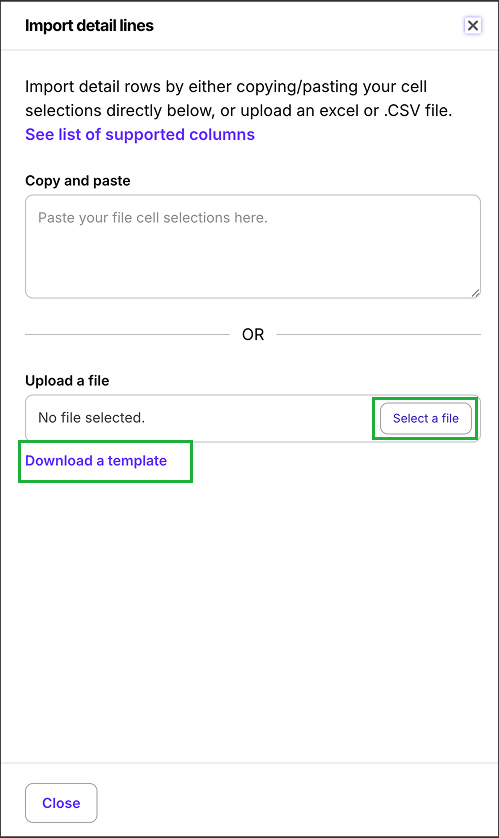
Or, you can click the Select a file button to upload a spreadsheet containing transaction data. To see the format for spreadsheet imports, click Download a template.