Startwork is permission based
To update, your account must have one of the following roles enabled:
Role: Company Admin, Company Manager, Project Coordinator
Custom role with: Worker hiring and startwork - Full access, Project access only
Smart fields are placeholders for information within documents that change based on details associated with the worker, company, and/or project that it’s assigned to. When smart fields are added to startwork documents, you won’t need to create individual documents for each worker that’s hired.
An example of a smart field is [worker name]. When you assign a document that has a [worker name] smart field, the field will be automatically replaced with the actual name of the worker when it’s assigned.
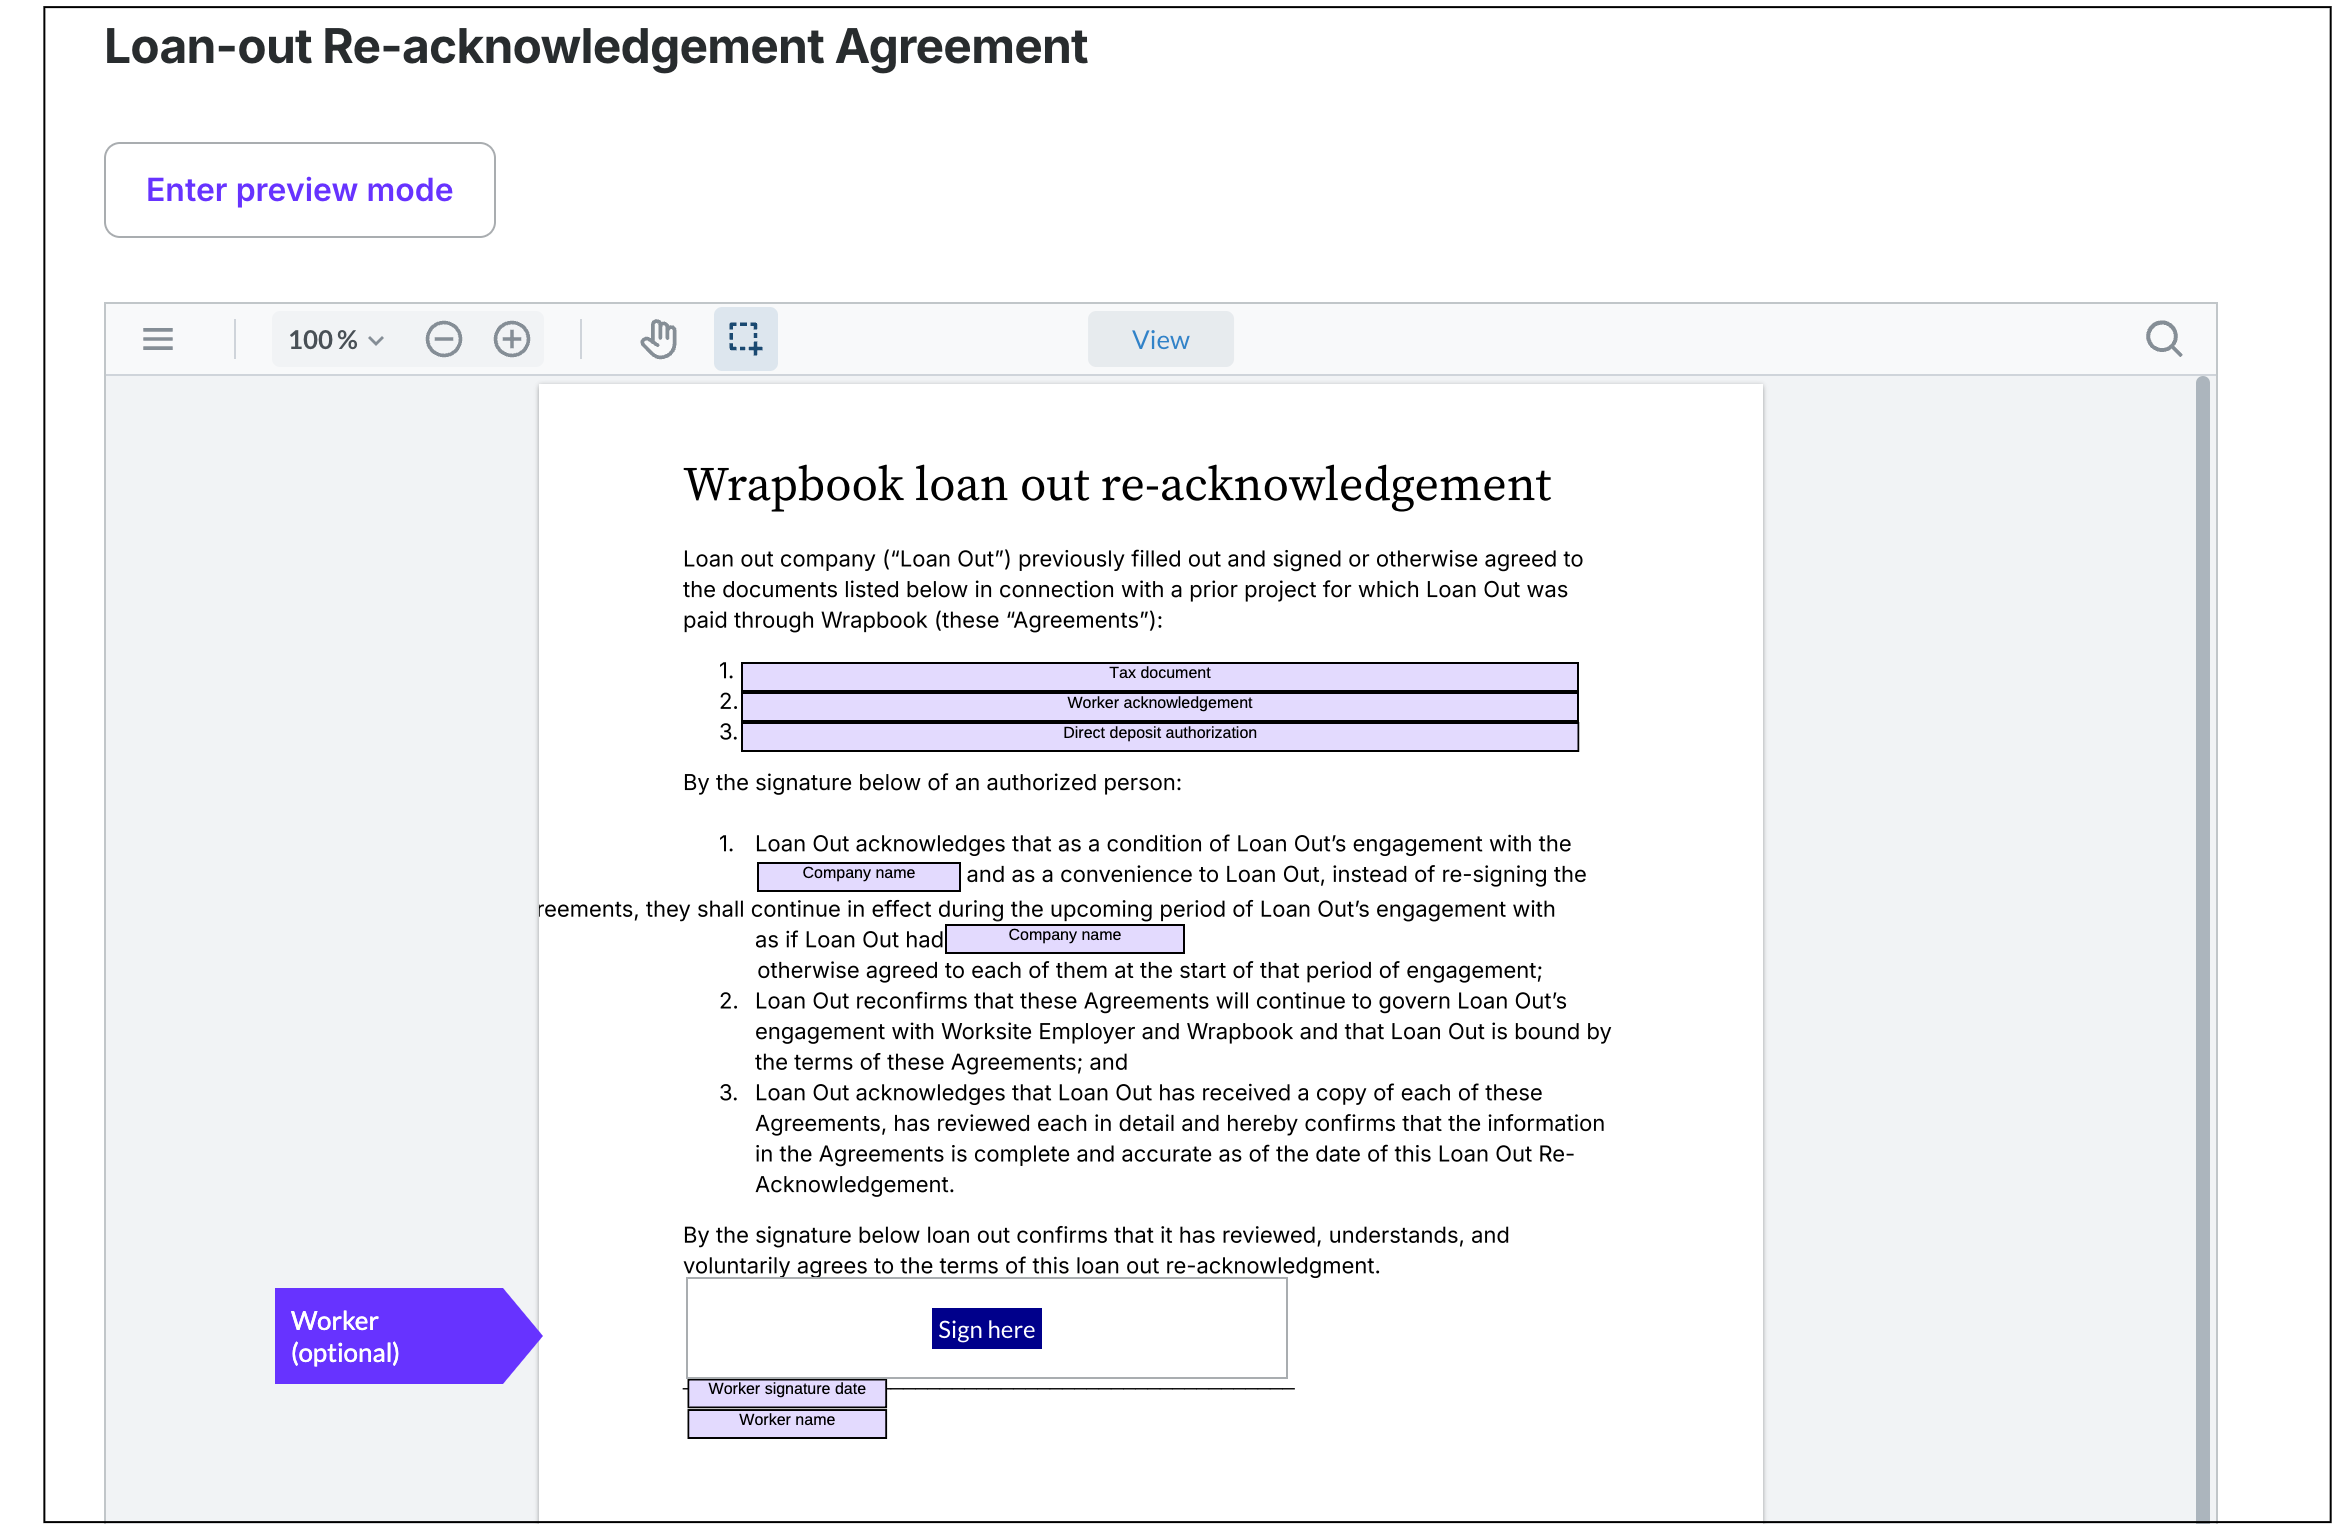
Example of a startwork document with smart fields in the editor
See all smart fields
Wrapbook provides a variety of smart fields that you can add to your startwork documents.
Click the arrow to see the full list
Use the list below to understand:
What smart fields are available in the startwork editor
How different types of smart fields work
How to update the smart field’s data source
Explanations for some smart fields in parentheses
Approver fields
Smart fields based on your approval workflows:
Approver - click to select the approver’s name or Any company member
Approver name
Approver position
Approver signature date
To update the details that these smart fields are pulling from:
From the left side navigation, confirm that the name of the project displayed in the dropdown menu matches the project that you’re creating startwork for
In the left side navigation, click Project settings
In Project settings, under ADDITIONAL SETTINGS, click Approval workflows
On the Approval workflow management page, click on the workflows that you want to update
Be sure to click the Save button when you are finished
Worker fields
Smart fields based on the details entered when the worker was invited to the project:
Worker name
Worker preferred name
Worker address
Worker street address
Worker unit address
Worker street, unit address
Worker city address
Worker state address
Worker zip code address
Worker city, state, zip code, address
Worker country address
Worker email
Worker phone
Worker job title
Worker pay rates
Worker daily pay rates
Worker hourly pay rates
Worker overtime pay rates
Worker 1.5x pay rate
Worker 2x pay rate
Worker weekly pay rates
Worker pay rate guaranteed hours
Worker SSN
Worker start date
Worker end date
Worker date of birth
Worker deal notes
Worker acknowledgement
Worker allowances - all assigned
Worker allowances - kit rental
Worker allowances - mileage
Worker allowances - per diem
Worker allowances - wardrobe
Worker allowances - buyout
Worker allowances - car allowance
Worker allowances - cell phone allowance
Worker allowances - computer allowance
Worker allowances - living allowance
Worker allowances - meal allowance
Worker allowances - DGA production fee
Worker allowances - other
Worker department
Worker emergency contact name
Worker emergency contact phone
Worker agent email
Worker agent fee
Union or guild affiliation
Loan out company name
Loan out EIN
Guardian name
Tax document
Direct deposit authorization
Worker signature date (date when the worker signs the document)
To update the details that these smart fields are pulling from:
From the left side navigation, confirm that the name of the project displayed in the dropdown menu matches the project that you’re creating startwork for
In the left side navigation, expand the Payroll menu, and click People
Click on the name of a worker to update their details
Click Edit next to the details you want to update
Click the Save button when you are finished
Note: The worker’s name, SSN, DOB, and EIN fields cannot be changed by production administrators once it has been added to Wrapbook. If any of this information needs to be updated in a worker’s profile, please contact the Support Team for assistance.
Project fields
Smart fields based on the details in Project settings:
Project name
Project logo (The project logo can be added on the Startwork dashboard)
Project address
Project start date
Project end date
Project state
Project regular pay period
Project regular payday
Project shoot dates
Paid sick leave policy description
To update the details that these smart fields are pulling from:
From the left side navigation, confirm that the name of the project displayed in the dropdown menu matches the project that you’re creating startwork for
In the left side navigation, click Project settings
Company fields
Smart fields based on the details in Company settings:
Company name
Company address
Company street address
Company subpremise address
Company street, unit address
Company city address
Company state address
Company zip code address
Company city, state, zip code address
Company country address
Company phone
Company logo
Production entity name
Production entity address
Production entity street address
Productiosubpremiseubpremise address
Production entity street, unit address
Production entity city address
Production entity state address
Production entity zip code address
Production entity city, state, zip code address
Production entity country address
To update the company-level details that these smart fields are pulling from:
At the top of the left side navigation, click the dropdown menu
Select All projects
In the left side navigation, click Company settings
In the Name row, click the Edit button
To update the production-entity level details that these smart fields are pulling from:
At the top of the left side navigation, click the dropdown menu
Select All projects
In the left side navigation, click Company settings
On the Company settings page, click the Manage button next to Production entities
Smart field actions
Below is a list of actions that you can take at the company level.
Click the arrow next to each smart field action to learn more.
Add smart fields
Smart fields can be added to startwork documents that you’ve saved to the Startwork dashboard at the company and project level. To learn how to access the dashboard at the company or project level see About Startwork.
Before you can add smart fields, the document file must be in PDF format. If the file format is DOCX, open the document in the editor, make any changes needed, and then click Save Changes and Continue. This will convert the file format from DOCX to PDF.
To add smart fields:
In the left-side navigation, click the dropdown menu
In the dropdown menu, select All Projects
In the left-side navigation, click Startwork
On the Startwork dashboard, click on the name of the document that you want to edit
In the editor toolbar, click Insert Fields
Beneath Insert Fields, click the lightning icon to see your smart field options. A panel will open on the right-side of the editor containing your smart field options.
Click the smart field option that you want to add to the document
Then click anywhere in the document to add the field
When you’re done adding smart fields and making any other changes to the document, be sure to click the Publish button. Once you publish the document, you’ll be able to assign it to workers.
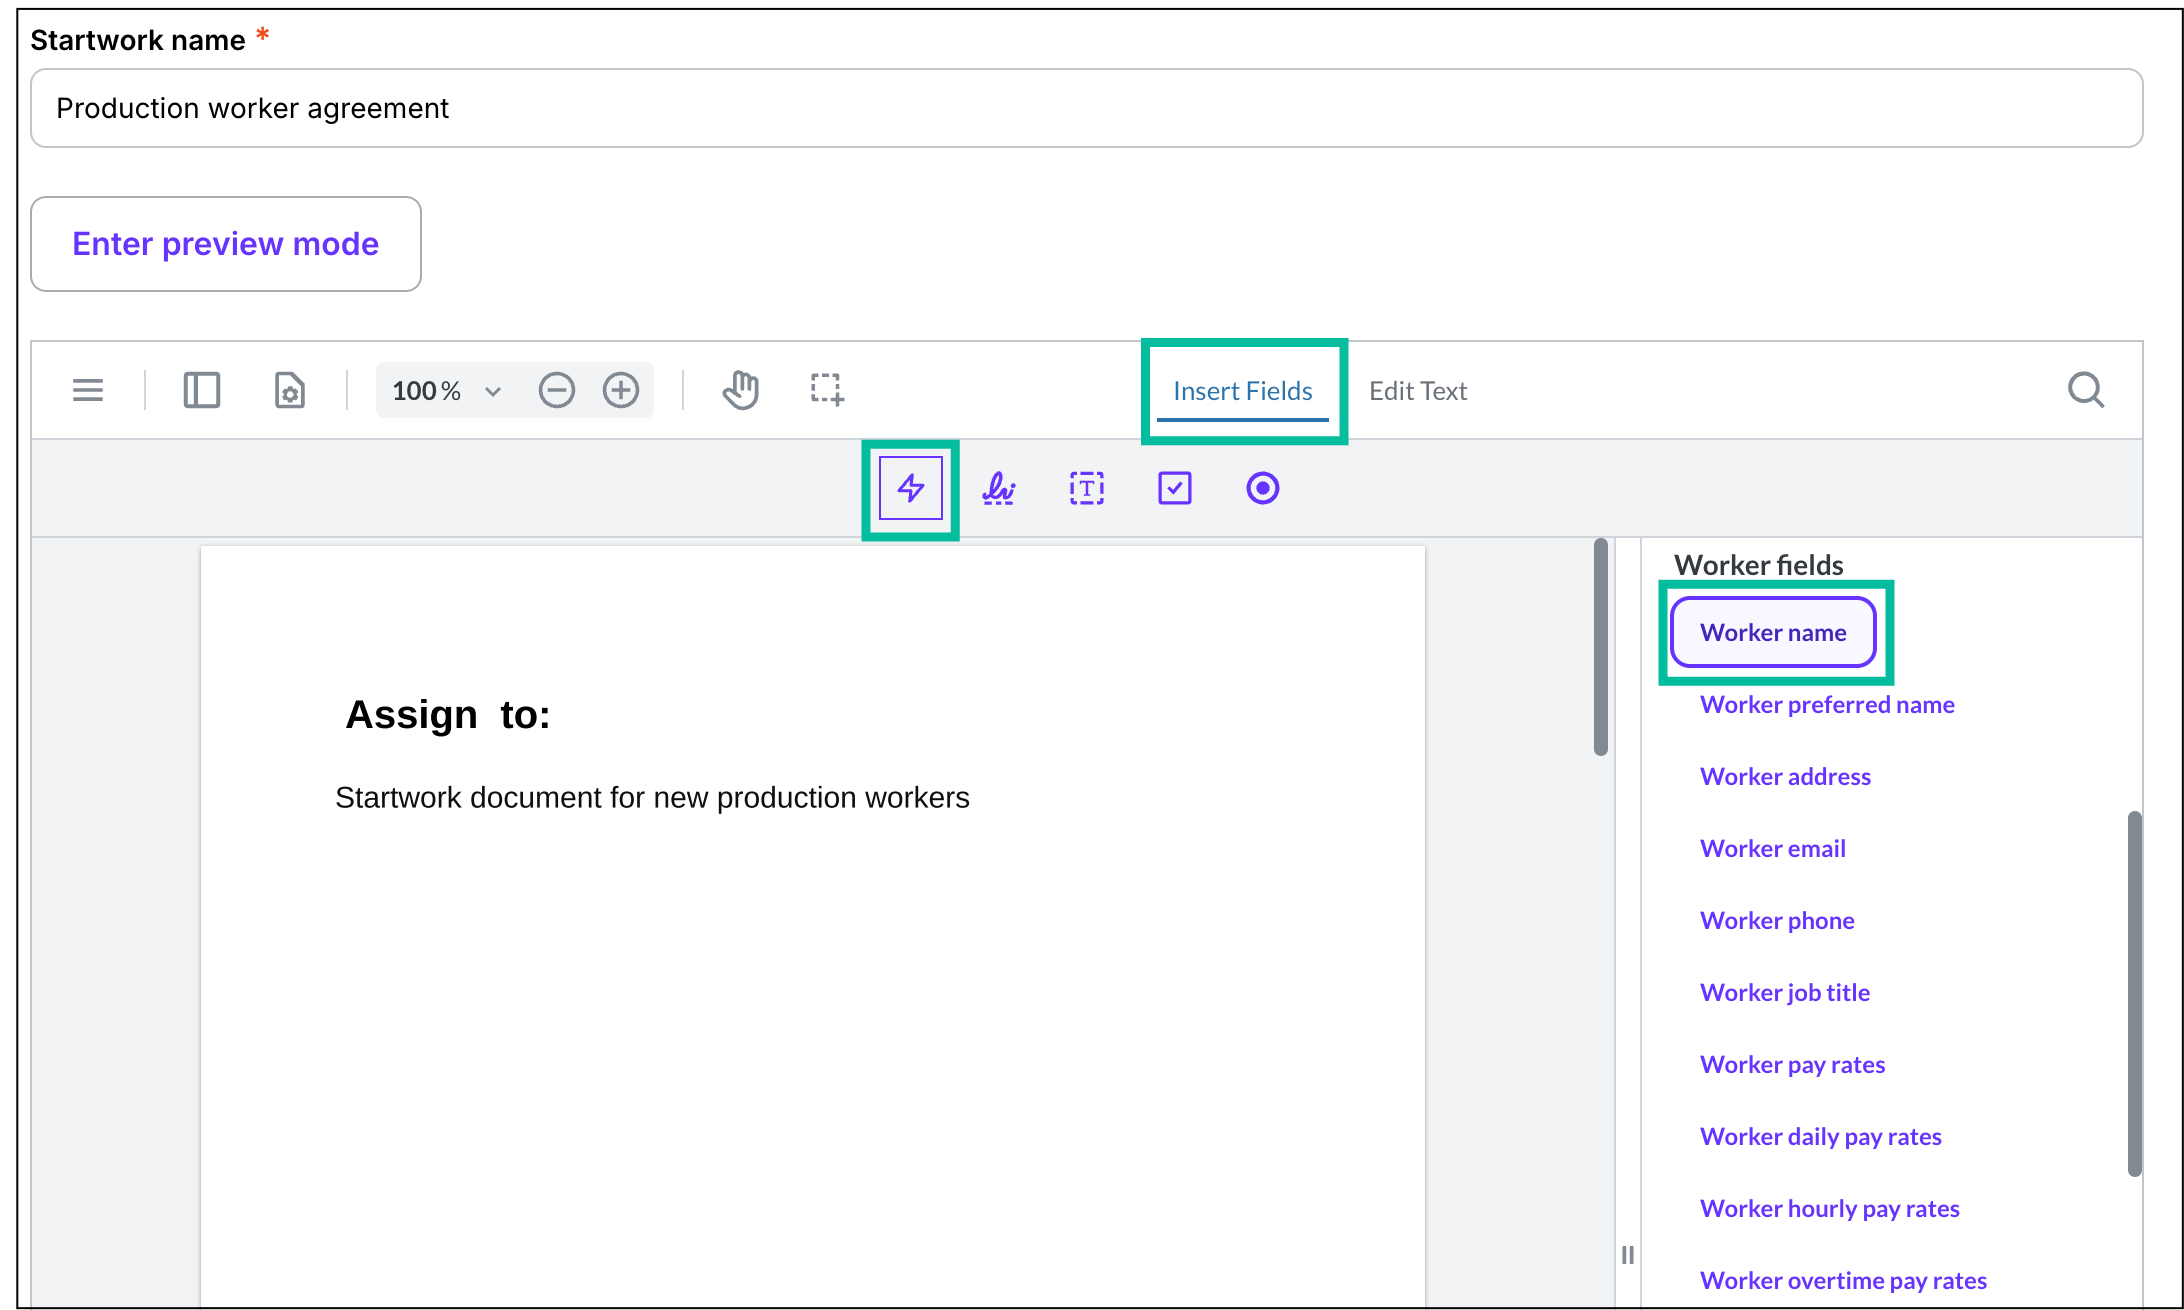
Click Insert Fields, then click the lightning icon. In the smart field panel, click on a smart field.
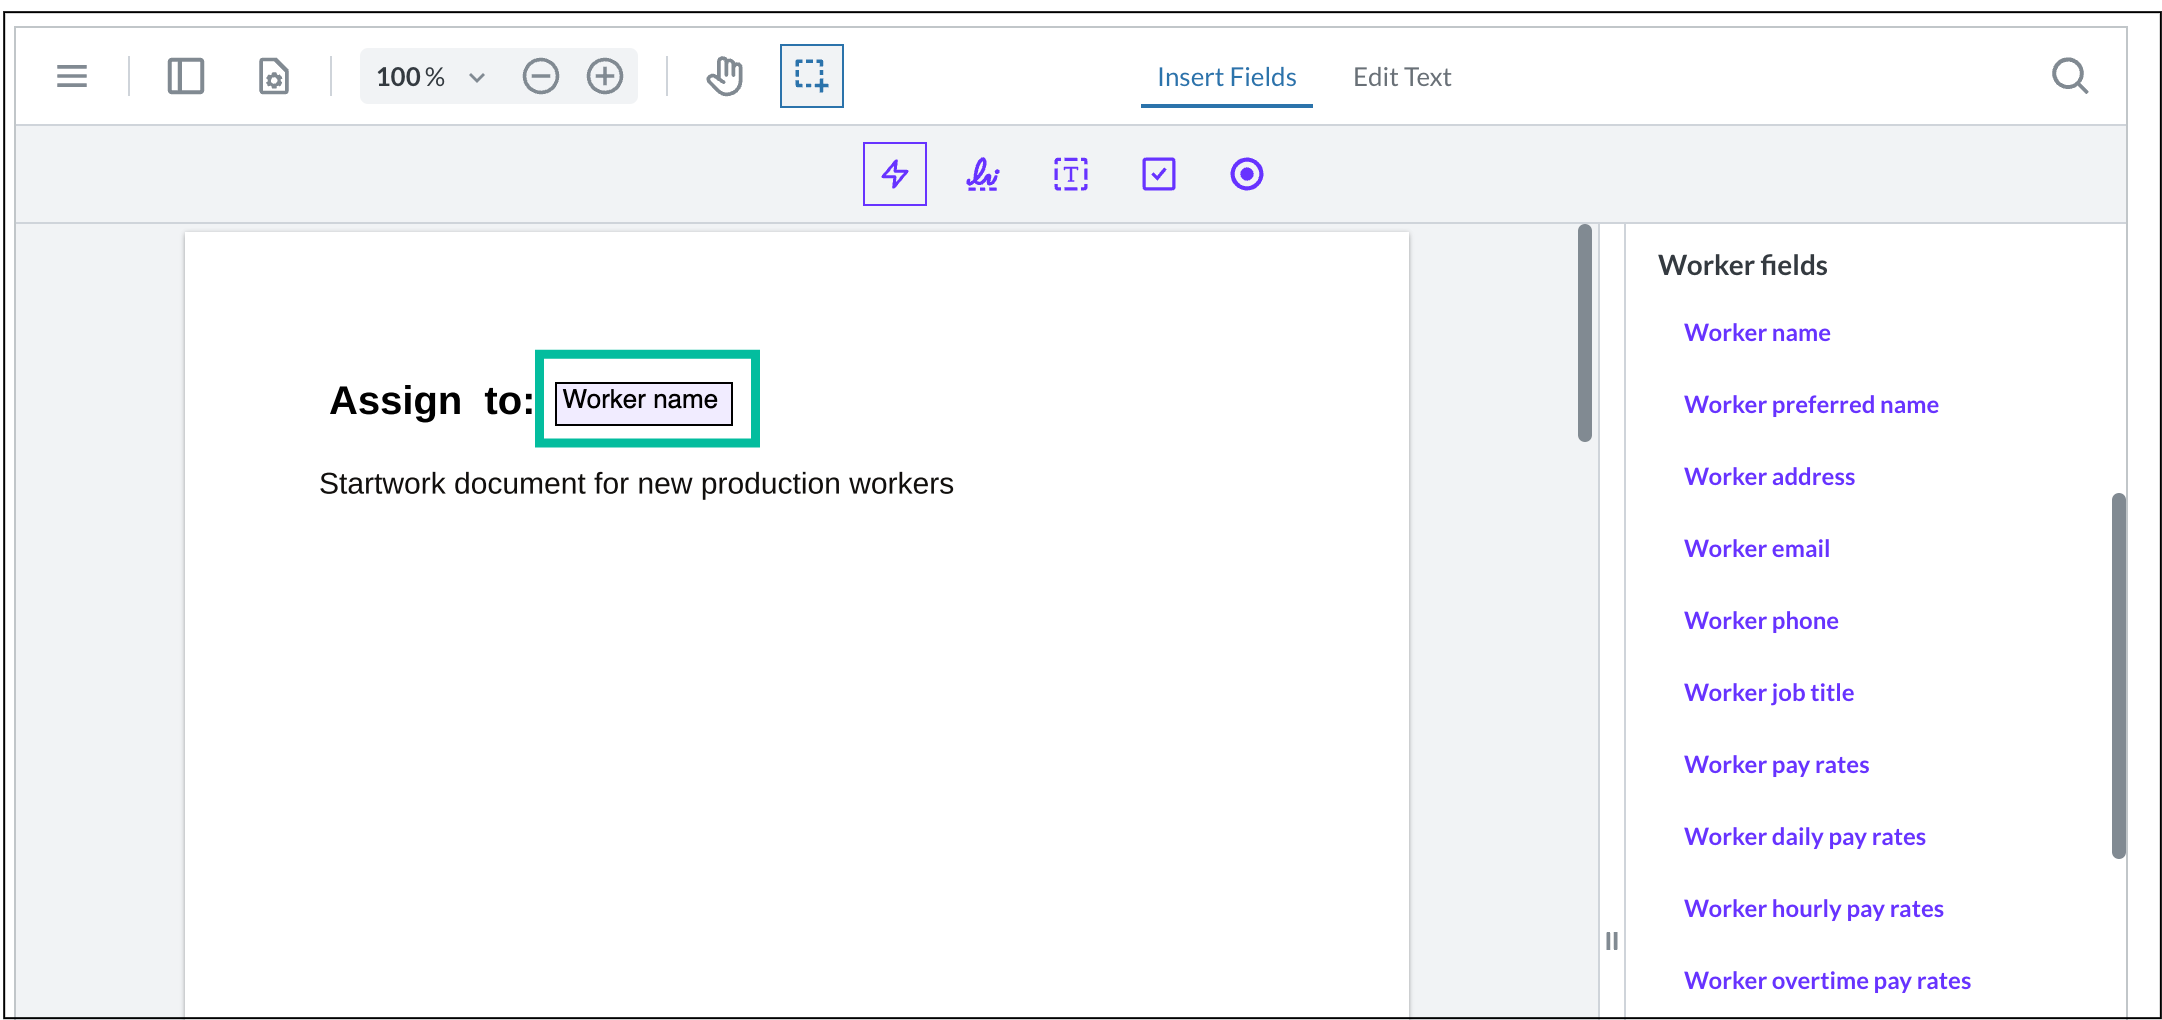
Double click on the document to add the smart field. In this example, the field has been added.
Edit smart fields
Smart fields in a startwork document can be edited during these stages:
When creating or editing the document before publishing - companies can add and edit smart fields that will pull in worker and company details
Once a document is signed, smart fields cannot be edited - they remain locked to maintain compliance and reflect the information at the time of signing
To edit the smart fields:
In the left-side navigation, click the dropdown menu
In the dropdown menu, select All Projects
In the left-side navigation, click Startwork
On the Startwork dashboard, click on the name of the document draft that you want to edit
In the editor click Insert Fields
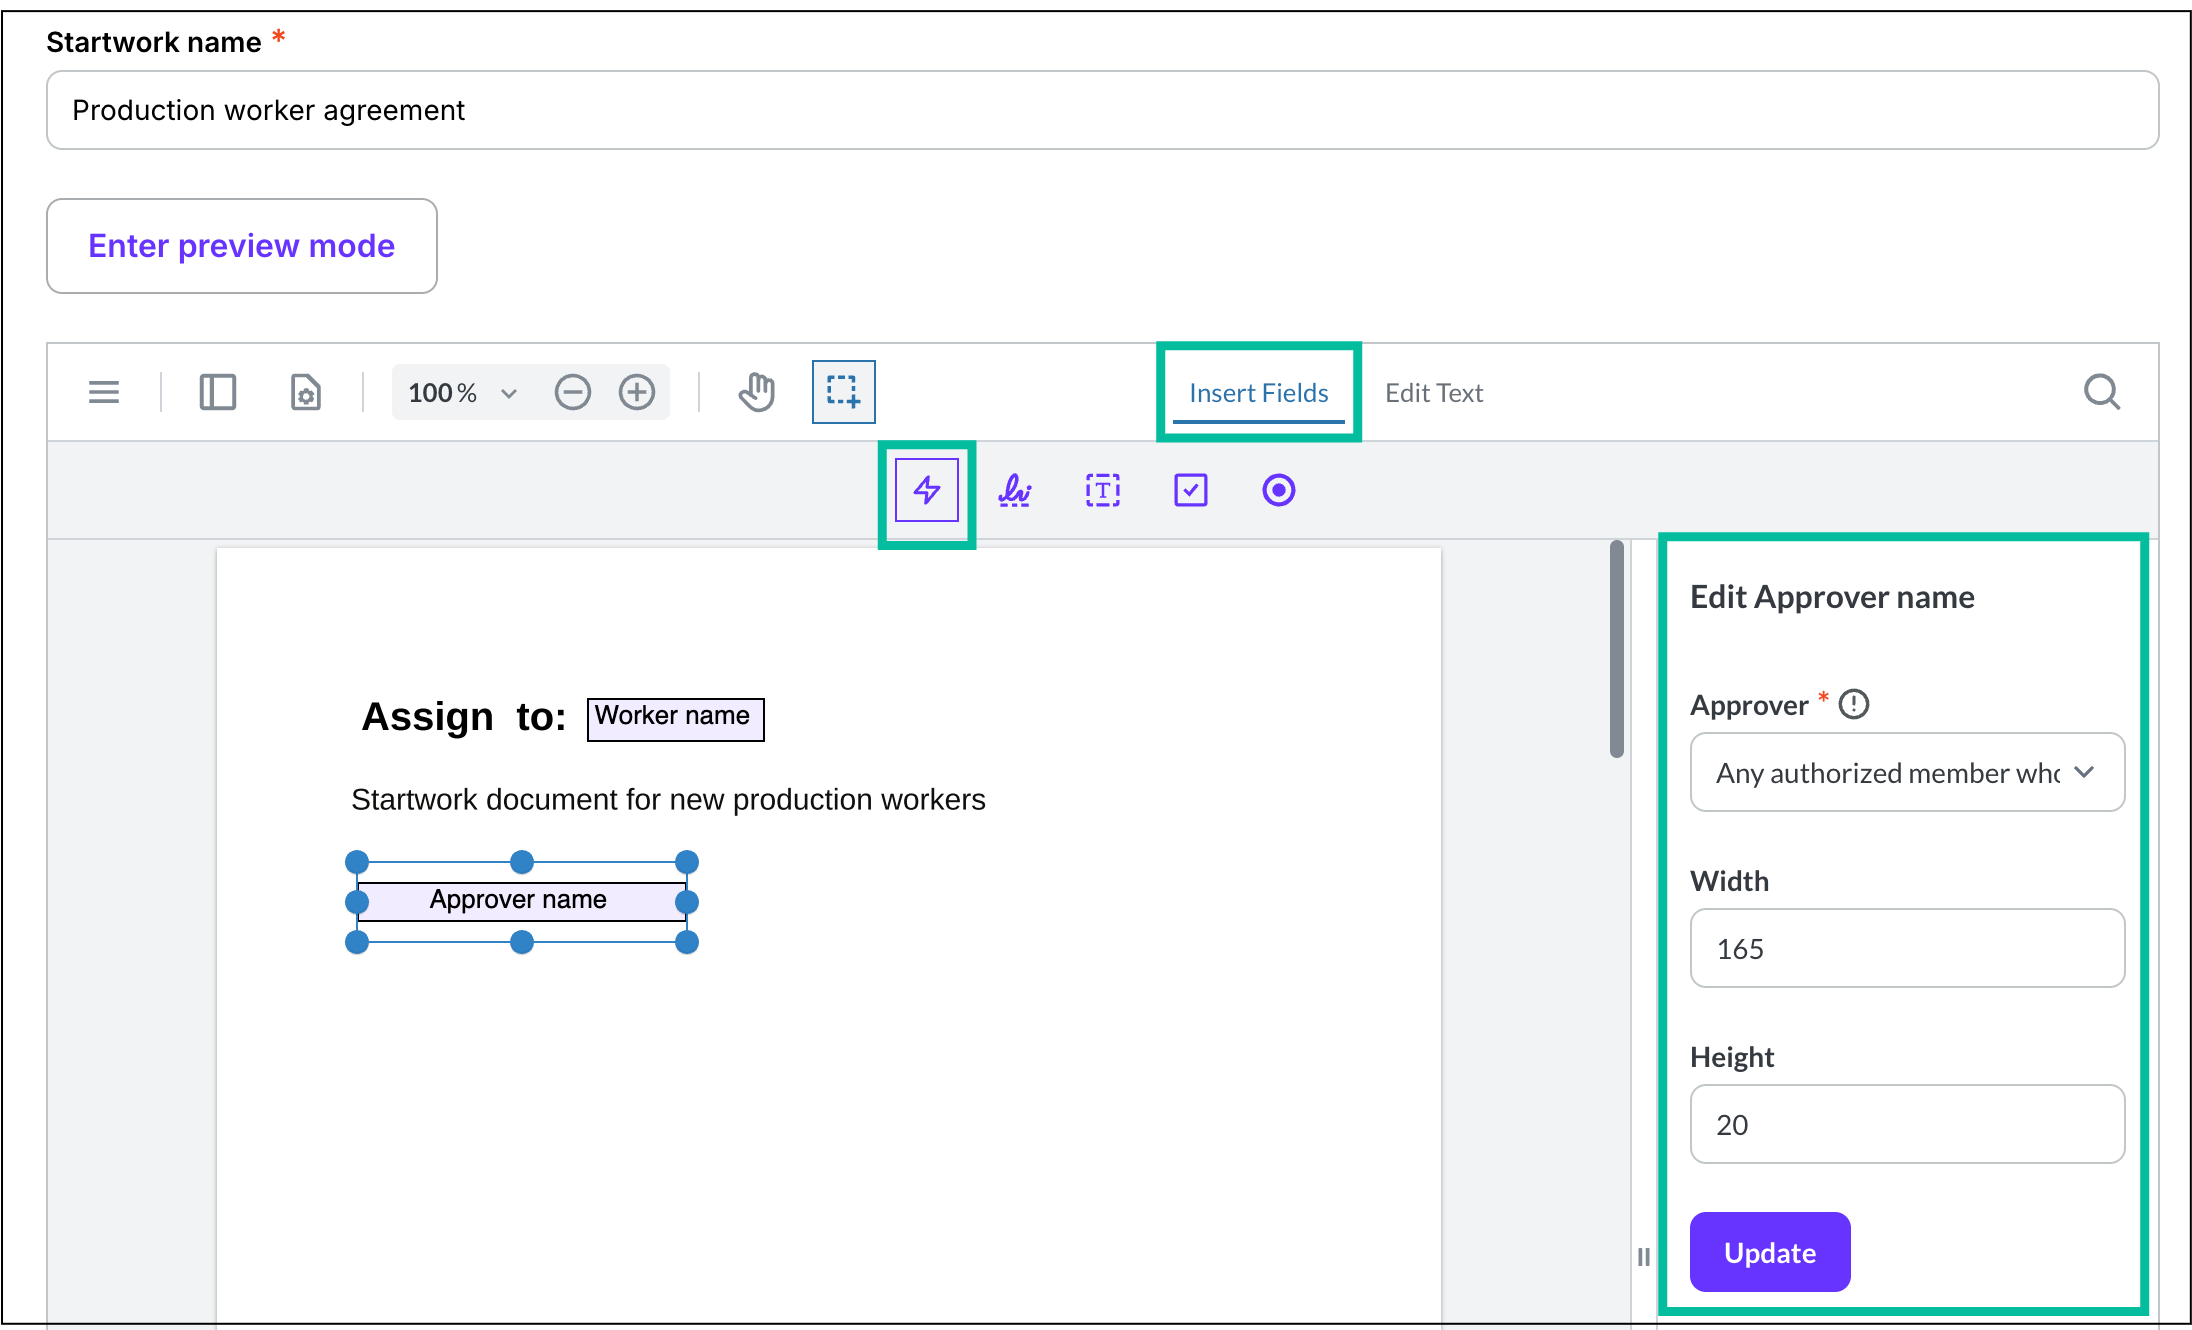
Click the lightning icon to open the smart fields panel
Click on a highlighted smart field in the document to see your edit options in the smart fields panel
Click the Update button once you’re finished
Click Insert Fields, then click the lightning icon, and then click on the smart field to edit it. Use the edit options in the side panel to make changes, then click the Update button.
Move and resize smart fields
To move and resize smart fields:
In the editor toolbar, click Insert Fields
Beneath Insert Fields, click the lightning icon
Click on the smart field that you want to move or resize
When the smart field is highlighted in blue, you can:
Use your cursor to move the smart field to another place in the document
Use your cursor to drag the edges of the bounding box to resize it, or update its dimensions in the smart field panel. The font size of the dynamic content generated within the smart field will scale to fit the bounding box.
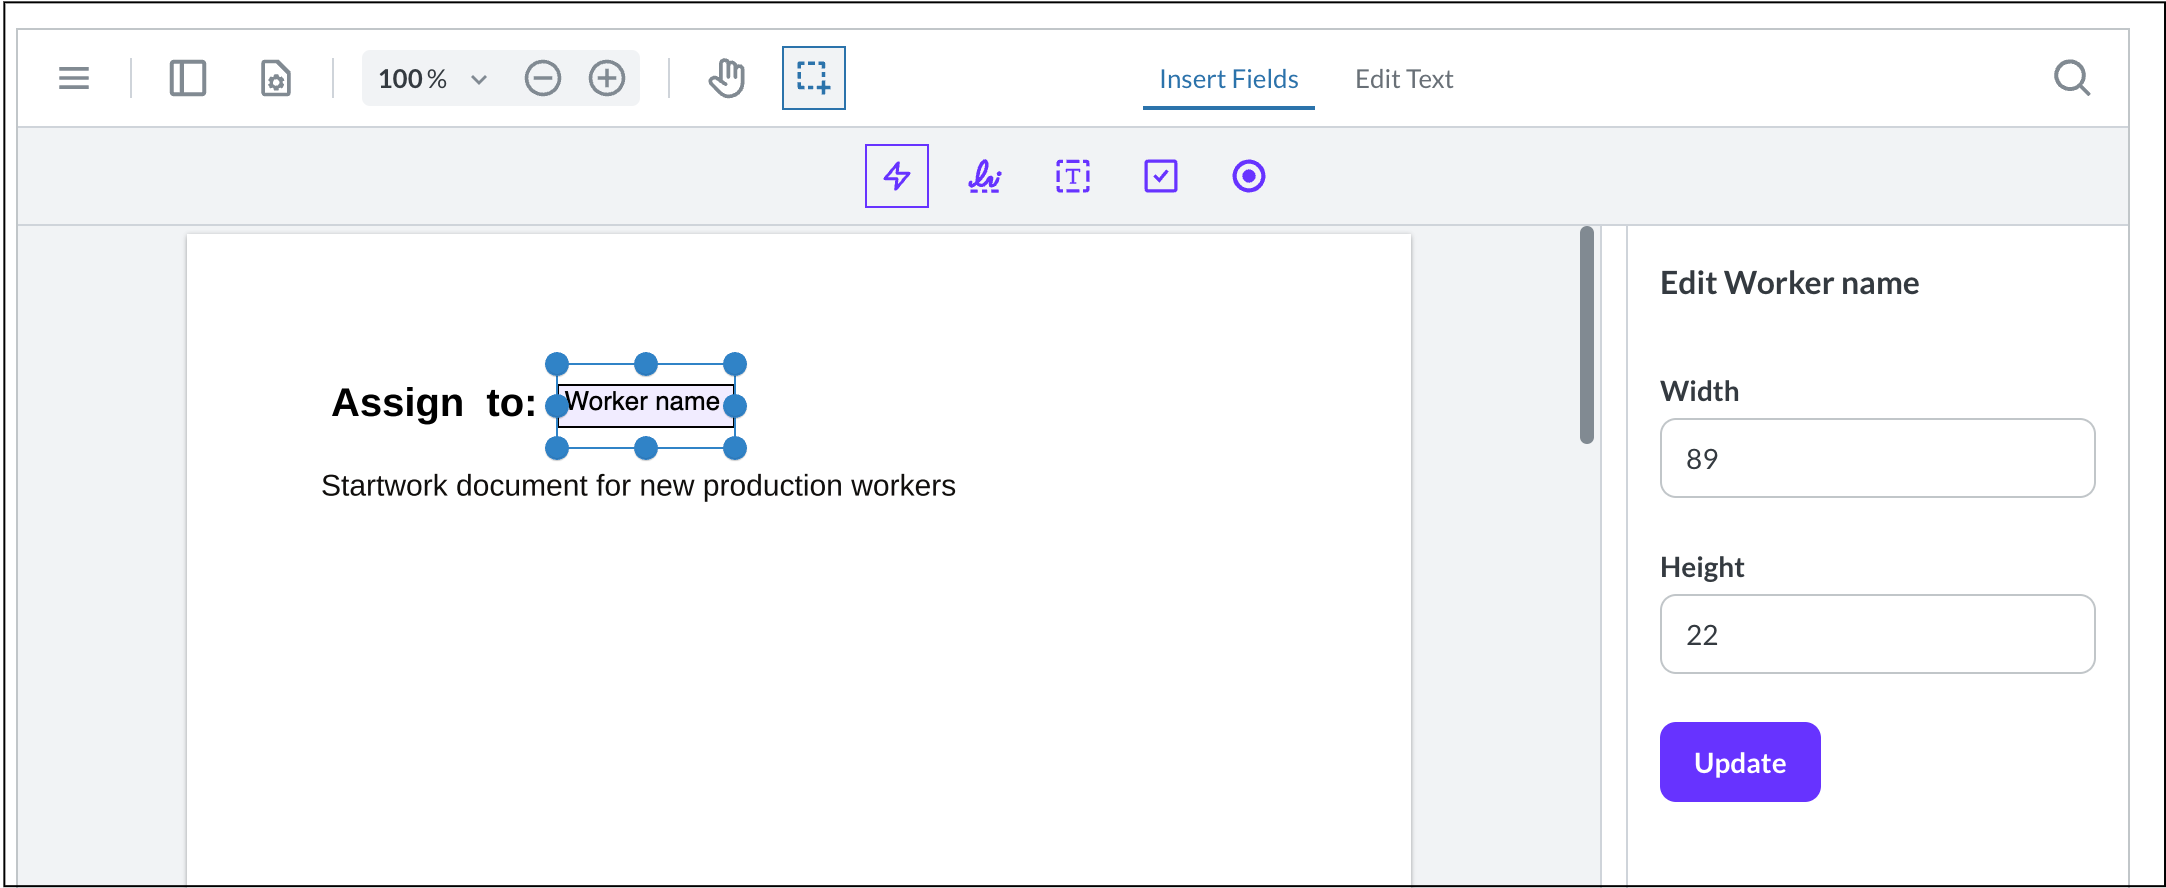
Click Insert Fields, click the lightning icon, then click on the smart field to move or resize it
Preview smart fields
To preview how the smart fields will appear in the document, click the Enter preview mode button
When you’ve finished previewing the document, click Exit preview mode
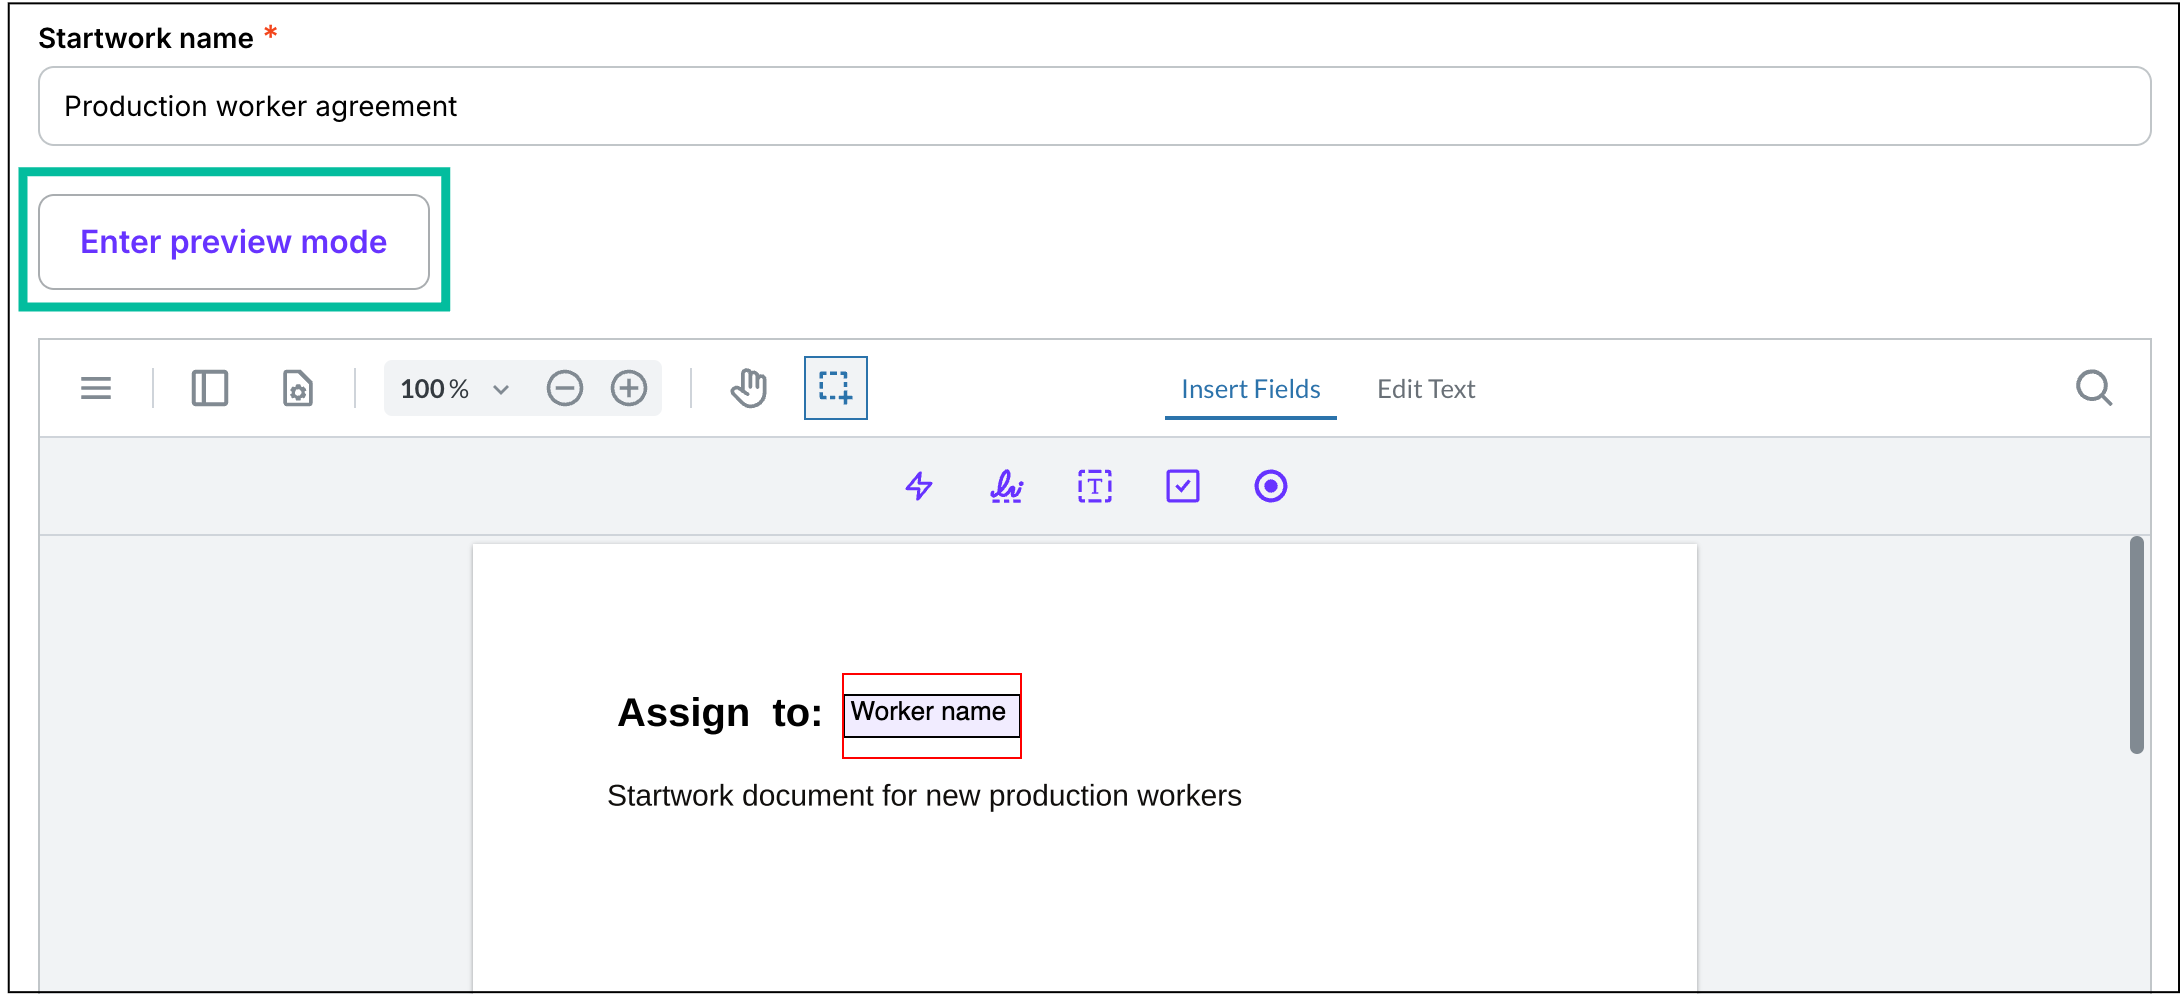
Click the Enter preview mode button
Save smart fields
To save smart fields:
Once you’ve finished adding smart fields to the startwork document click Save changes
When you publish and assign the document to a worker, the smart fields will dynamically update to match the information associated with the workers that you’ve assigned
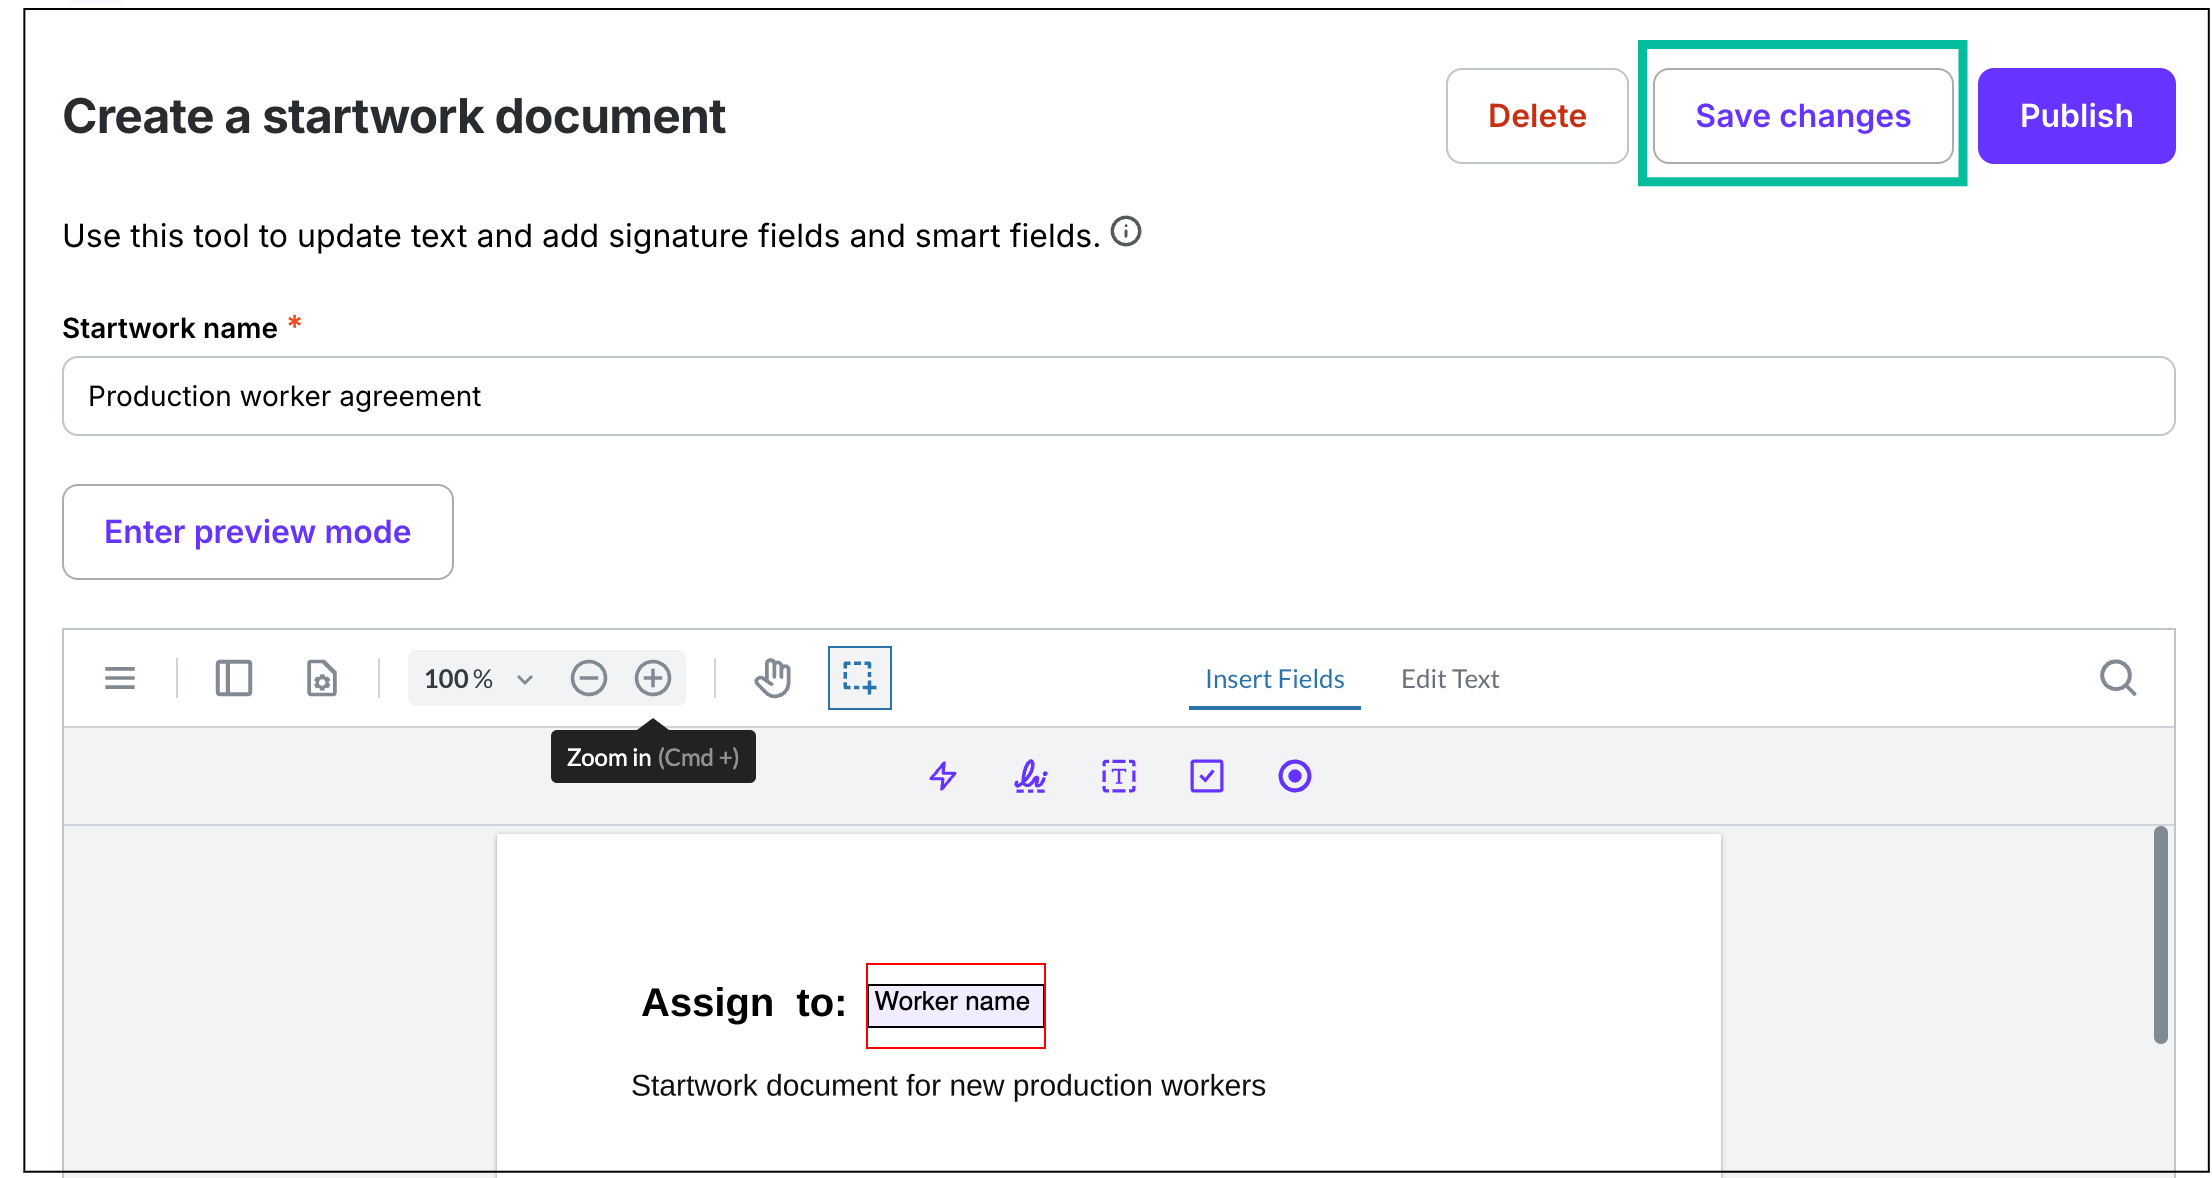
Click the Save changes button