Correcting or adding vendor 1099s after filing is permission based
To access, your account must have the following role enabled:
Role: Company Admin
Overview
If you filed vendor 1099s through Wrapbook and need to make a change, you can submit corrections and additions directly in the platform. This includes correcting a vendor's information or form type, and filing a 1099 for a vendor you forgot to include in your original submission.
How to access vendor 1099s
Use these steps to access vendor 1099s:
In the left-side navigation, click the dropdown menu and select All projects
In the left-side navigation, click 1099 reporting
How to file a correction
Use the steps below if you need to correct an error — such as a wrong TIN, incorrect amounts, or the wrong form type.
Before you make a correction, note the following:
You can only file a correction for a 1099 that has been accepted by the IRS. If your submission is still processing, wait until it has been accepted before proceeding.
If you need to correct the type of form filed for a vendor (NEC to MISC or vice versa), the IRS requires two separate submissions: first use the steps below to make a correction that zeroes out the original filing, then add a new filing using the correct form.
Go to your company’s 1099 reporting dashboard
On the 1099 reporting dashboard, click the View submitted files button
In the 1099 reporting submissions drawer, click on the tax year
On the 1099 reporting submissions page, click the three dots next to the vendor and then select File a corrected form
On the File a corrected form page, you can click on any of the editable fields to update information as needed. If you need to update state information, click + Add state and then enter the information
Once you’ve finished making corrections, click the Continue button
In the File corrected 1099 popup, review the details. Once you’ve confirmed they are correct, click the checkbox to agree to the attestation, then click the File corrected 1099 button
What happens next
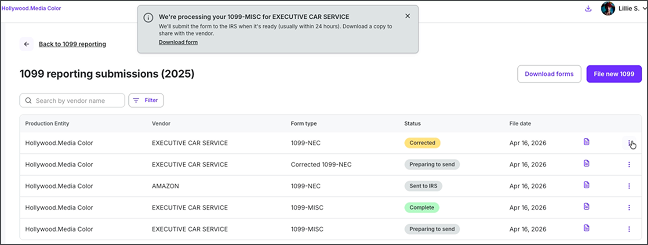
Once you click the File corrected 1099 button, your correction will be transmitted to the IRS and you’ll be brought back to the 1099 reporting submissions page where:
You’ll see a confirmation that the correction is being processed
In the confirmation, you can click the Download form link to save a copy of the corrected 1099 form
The status of the form will update to Corrected
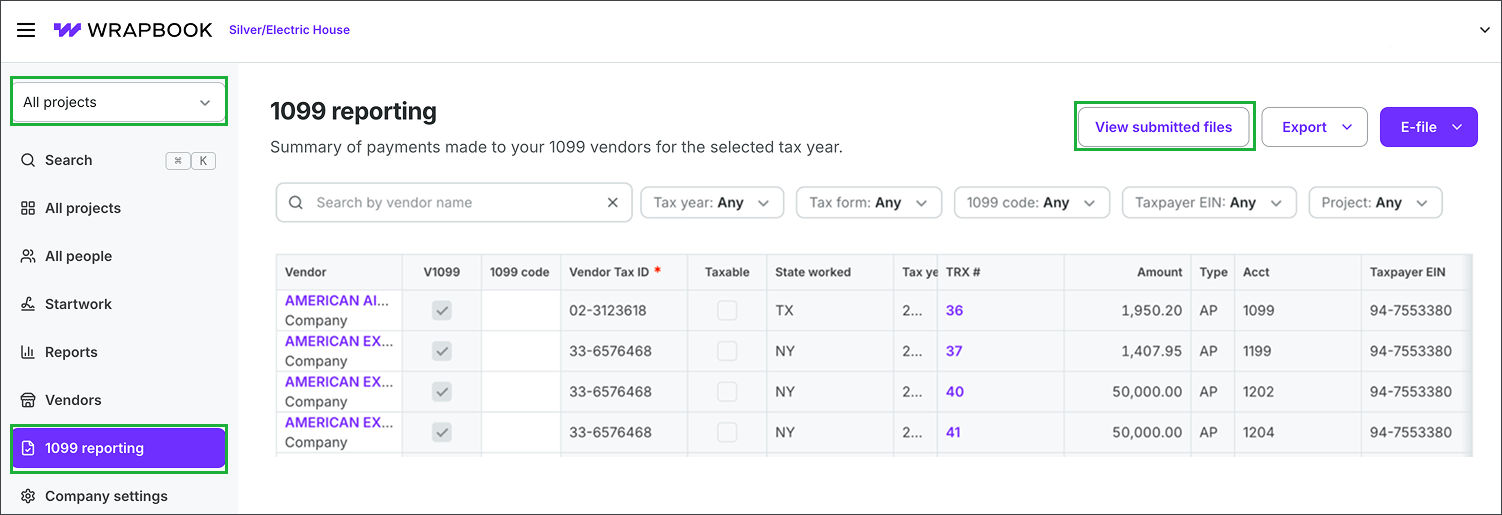
Select All projects, click 1099 reporting, and then click the View submitted files button
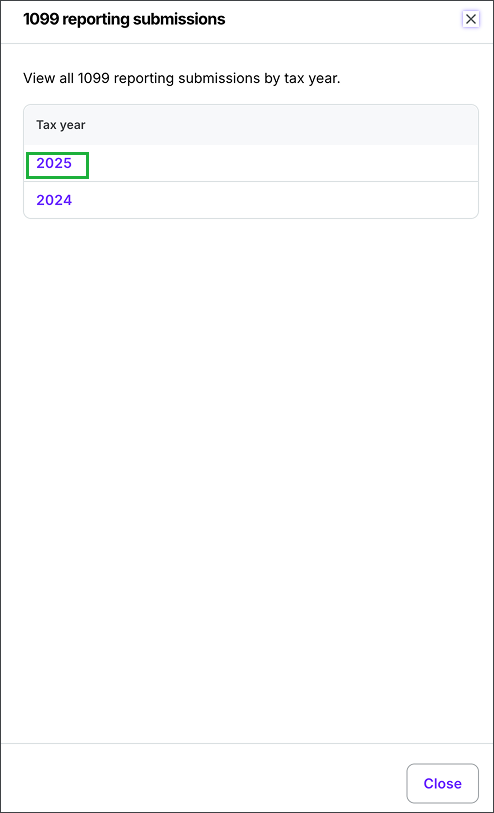
Click on the tax year
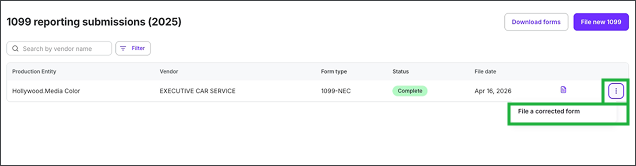
Click the three dots next to the vendor who’s 1099 you want to correct, and then select File a corrected form
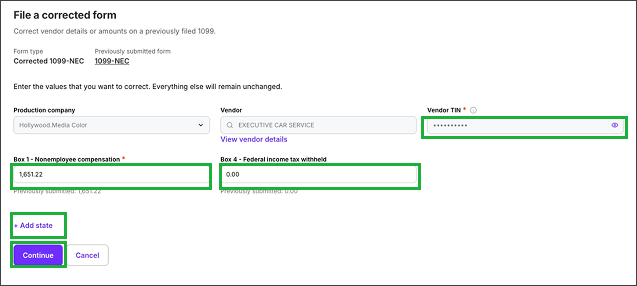
Click on any of the editable fields to update information as needed. If you need to update state information, click + Add state. Once you’ve finished making corrections, click the Continue button.
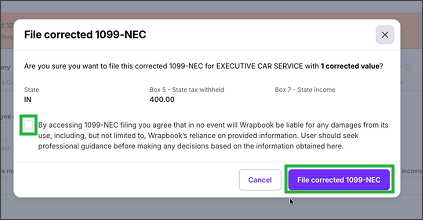
Click the checkbox next to the attestation, then click the File corrected 1099 button
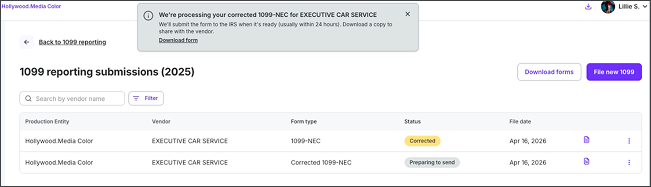
You’ll see a confirmation that the correction is being processed. You can click the download form link to save a copy of the corrected 1099 form.
Add a 1099 filing for a missed vendor or wrong form type
Use these steps if either:
You completed your original 1099 filing but forgot to include a vendor
You filed a 1099 for a vendor using the wrong form type (1099-NEC instead of 1099-MISC, or vice versa). Before filing the correct form, you'll need to first submit a correction to zero out the original filing.
Note: You can only file additional 1099s after your original filing has been completed and accepted.
Go to your company’s 1099 reporting dashboard
On the 1099 reporting dashboard, click the View submitted files button
In the 1099 reporting submissions drawer, click on the tax year
On the 1099 reporting submissions page, click the File new 1099 button
Confirm the Form type, then click to select a Vendor, and update fields as needed. If you need to enter state information, click + Add state and then enter the information
Once you’ve finished entering the information, click the Continue button
In the File 1099 popup, review the details. Once you’ve confirmed they are correct, click the checkbox to agree to the attestation, then click the File 1099 button
What happens next
Once you click the File1099 button, your filing will be transmitted to the IRS and you’ll be brought back to the 1099 reporting submissions page where:
You’ll see a confirmation that the filing is being processed
In the confirmation, you can click the Download form link to save a copy of the 1099 form
The status of the form will update to Preparing to send, and then Sent to IRS once it’s been successfully transmitted
Note: Once a submission has been transmitted to the IRS, it cannot be cancelled. If you need to make a change at that point, file a new correction.
Select All projects, click 1099 reporting, and then click the View submitted files button
Click on the tax year
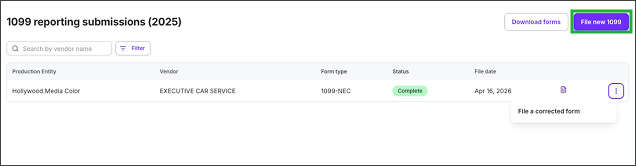
On the 1099 reporting submissions page, click the File new 1099 button
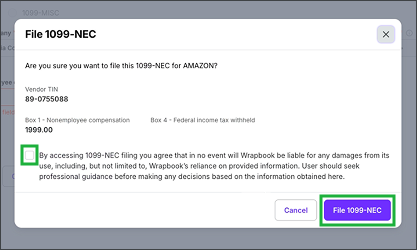
Click the checkbox next to the attestation, then click the File 1099 button
You’ll see a confirmation that the filing is being processed. You can click the download form link to save a copy of the 1099 form.